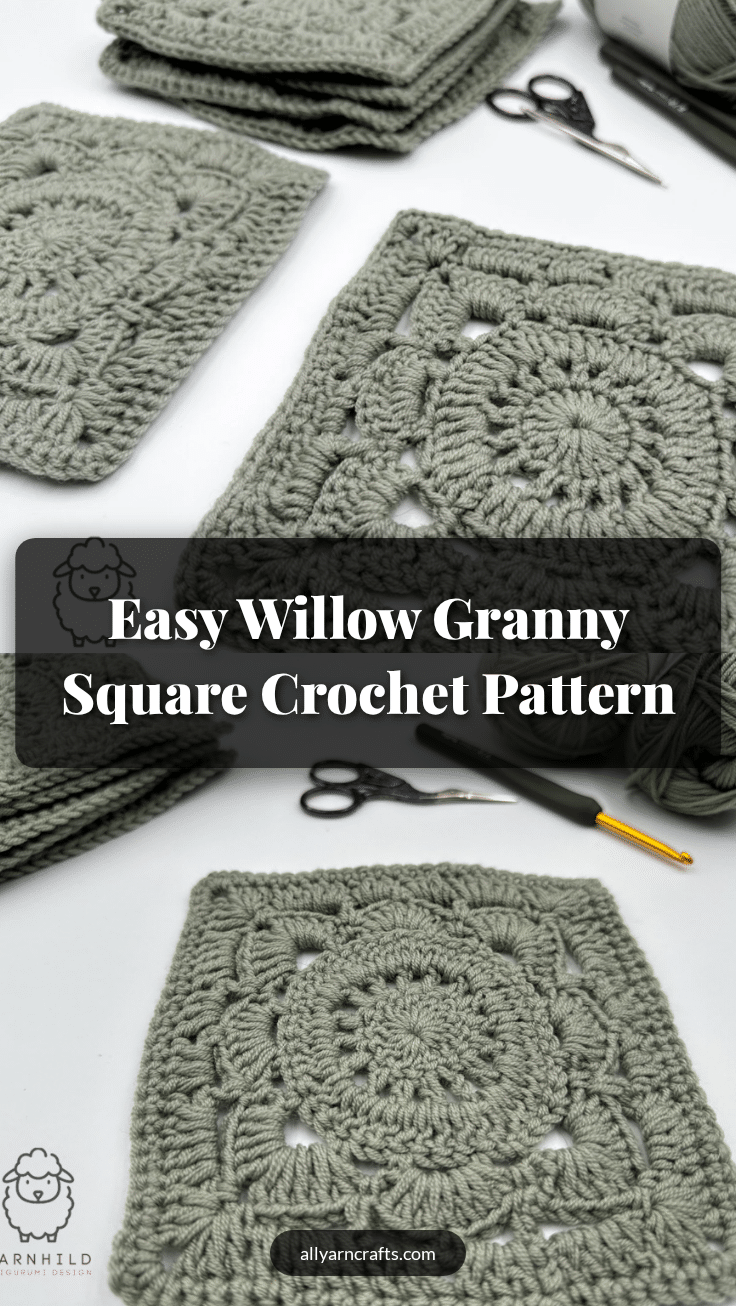
The Willow Granny Square is a delicate, lacy motif that transforms the classic granny square into something far more elegant and structured. It is a tidy, display-worthy piece that feels sophisticated enough for a boho cardigan yet simple enough for a quick gift. This pattern creates a defined, four-cornered square with beautiful framing on the sides, making it a versatile building block for blankets, bags, and lightweight garments.
Why the Finished Piece Stands Out
What makes the Willow Granny Square truly special is its unique drape and the way it balances openwork with structure. Unlike standard granny squares that can sometimes feel boxy, this design features a soft, flowing texture that gives it a vintage charm. The “willow” effect comes from the specific chain spaces and stitch placements in the middle rounds, which create a lacy, organic feel. It is a fantastic choice for makers who want to add a touch of refinement to their projects without sacrificing the ease of a traditional motif. Whether you use a single color for a unified, modern look or mix yarns for a patchwork aesthetic, the finished square has a professional finish that looks great on its own or joined with others.
Project Overview
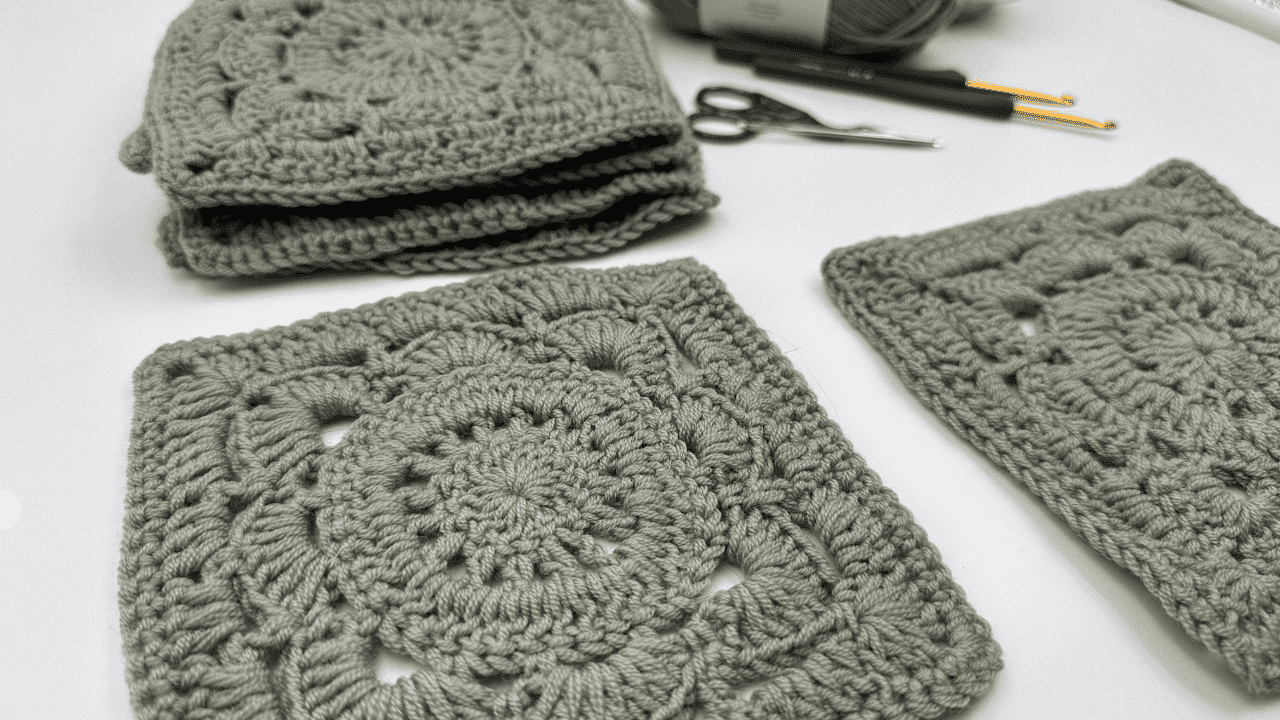
This pattern provides a step-by-step guide to creating the Willow Granny Square. It is designed to be accessible for crocheters of various skill levels, offering clear instructions for each round. The resulting square is highly versatile and can be used to craft a wide variety of items, including:
- Boho cardigans and lightweight sweaters
- Throw pillows and home decor accents
- Lightweight scarves and statement bags
- Placemats, tablecloths, or coasters (using a single square)
- Wall hangings or patchwork totes
For those looking to expand their crochet skills, this square pairs beautifully with solid blocks or textured panels. You can also explore other motifs, such as the Easy Crochet Top Pattern, to create wearable items that complement this delicate style.
Materials
- Yarn: DK (8ply) #3 or Worsted (10ply) #4 yarn. Each square requires approximately 25 meters (27 yards).
- Crochet Hook: 3.5mm hook for DK yarn or 4.5mm hook for worsted yarn.
- Other Tools: Scissors and a yarn needle for weaving in ends.
Note: Tighter stitches work best for this pattern to maintain the shape and structure of the square.
Gauge and Finished Size
Specific gauge and finished size measurements are not provided in the source pattern. The size of the finished square will vary slightly depending on your yarn weight and tension. Experimenting with different yarn weights can help you achieve the desired drape for your specific project.
Abbreviations
- ch = chain
- sc = single crochet
- dc = double crochet
- sp = space
- rep = repeat
- sl st = slip stitch
- sk = skip
Pattern Notes
- Tension: Tighter stitches are recommended for this pattern to ensure the square holds its shape.
- Color: Feel free to use one color for a unified look or mix different colors for each square if you are creating a larger project.
- Assembly: Squares can be joined using standard crochet joining methods to create blankets, bags, or garments.
Pattern Instructions
Willow Granny Square Pattern
Round 1
Start with a magic ring, or ch 4 and join with a sl st to form a ring. Ch 3 (counts as 1st dc), then work 15 dc into the ring. (16 dc total) Join with a sl st into the top of the starting ch 3.
Round 2
Ch 4 (counts as 1 dc + ch 1), turn your work. * Dc into the next dc, ch 1. * Rep from * to * around. Join with a sl st into the 3rd ch of the starting ch 4. (16 dc and 16 ch-1 spaces)
Round 3
Ch 3 (counts as 1st dc), turn your work. * 2 dc into the next ch-1 space, 1 dc into the next dc. *Rep from * to * around. In the last ch-1 space, work 2 dc. (48 dc total) Join with a sl st into the top of the starting ch 3.
Round 4
Ch 1, turn work. * Ch 5, sk 2 sts, sc in next st. Ch 3, sk 2 sts, sc in next st. Ch 4, sk 2 sts, sc in next st. Ch 3, sk 2 sts, sc in next st. * Rep from * to * 3 more times. (You’ll have 16 chain spaces total.) Finish with ch 3 and join with a sl st into the starting ch.
Your circle will now begin forming into a square.
Round 5
Sl st twice to reach the center of the nearest ch-5 space. Ch 3 (counts as 1 dc), then work 4 dc into the same space. Ch 2, then work 5 dc into the same space again. (This forms the first corner.)
* Sc into the next ch-3 space, 7 dc into the next ch-4 space, sc into the next ch-3 space. In the next ch-5 space: 5 dc, ch 2, 5 dc (corner). *
Repeat from * to * around. Join with a sl st into the top of the starting ch 3.
Round 6
Turn your work. Sl st into the next st. Ch 6 (counts as 1 dc + ch 3), sk 3 dc, sc in next st. Ch 3, sk 3 dc, dc in next st.
* Ch 4, sc into the corner space, ch 2, sc into the same corner. Ch 4, sk 5 dc, dc into next sc. Ch 3, sk 3 dc, sc into next dc. Ch 3, sk 3 dc, dc into next sc. *
Repeat from * to * 2 more times, working corners and sides. After the final side, work your last ch 4, then join with a sl st into the 3rd ch of the starting ch 6.
You should now have four defined corners and beautifully framed sides, ready for the final shaping round.
Round 7
Ch 3 (counts as 1 dc), turn your work. Work 4 dc into the first ch-4 space.
Next, in the corner space: work 3 dc, ch 2, 3 dc. Then, in the following ch-4 space, crochet 5 dc. In each of the next two ch-3 spaces, add 3 dc into each. Finally, work 5 dc into the next ch-4 space.
Repeat from * to * around the square. Join with a sl st to the top of the starting ch 3.
Round 8
Ch 1, turn work. * Sc in each st across. In each corner: 2 sc, ch 2, 2 sc. *Rep from * to * around. Sl st into the first st and fasten off. Weave in ends.
Assembly
Weave in all ends securely. To create larger projects, join the squares using your preferred method. For a more dynamic look, consider pairing these squares with solid blocks or textured panels. You can also explore other patterns, such as the Cozy Crochet Blanket Pattern, to see how different textures complement this lacy motif.
Tips
- Stitch Tension: Keep your stitches tight to ensure the square maintains its shape and doesn’t become too loose or floppy.
- Color Choices: Use a single color for a clean, unified aesthetic, or mix colors to create a vibrant, patchwork-style project.
- Yarn Weight: Experiment with different yarn weights to see how they affect the drape and size of the square.
FAQs
What type of yarn is best for the Willow Granny Square?
DK (8ply) #3 or Worsted (10ply) #4 yarn works best. The pattern is designed to use tighter stitches, so a yarn that holds its shape well is recommended.
Can I use this pattern for a blanket?
Yes, this square is highly versatile and can be used to craft blankets, bags, sweaters, and more. The delicate detail makes it perfect for lightweight blankets or throw pillows.
How do I join the squares together?
You can join the squares using standard crochet joining methods. The pattern suggests that these squares pair beautifully with other motifs or can be used as accent panels in larger designs.
Is this pattern suitable for beginners?
Yes, the pattern includes clear, step-by-step instructions and is designed to be accessible for crocheters of various skill levels, from beginners to experienced makers.
What can I make with just one Willow Square?
A single square can be used as a placemat, wall hanging, or coaster. It is also a great accent piece for bags or garments.
If you enjoyed this pattern, consider exploring more techniques in our crochet stitch library or checking out ideas for Easy Father’s Day Crochet Gifts to use your new skills.
Pin This Crochet Pattern!