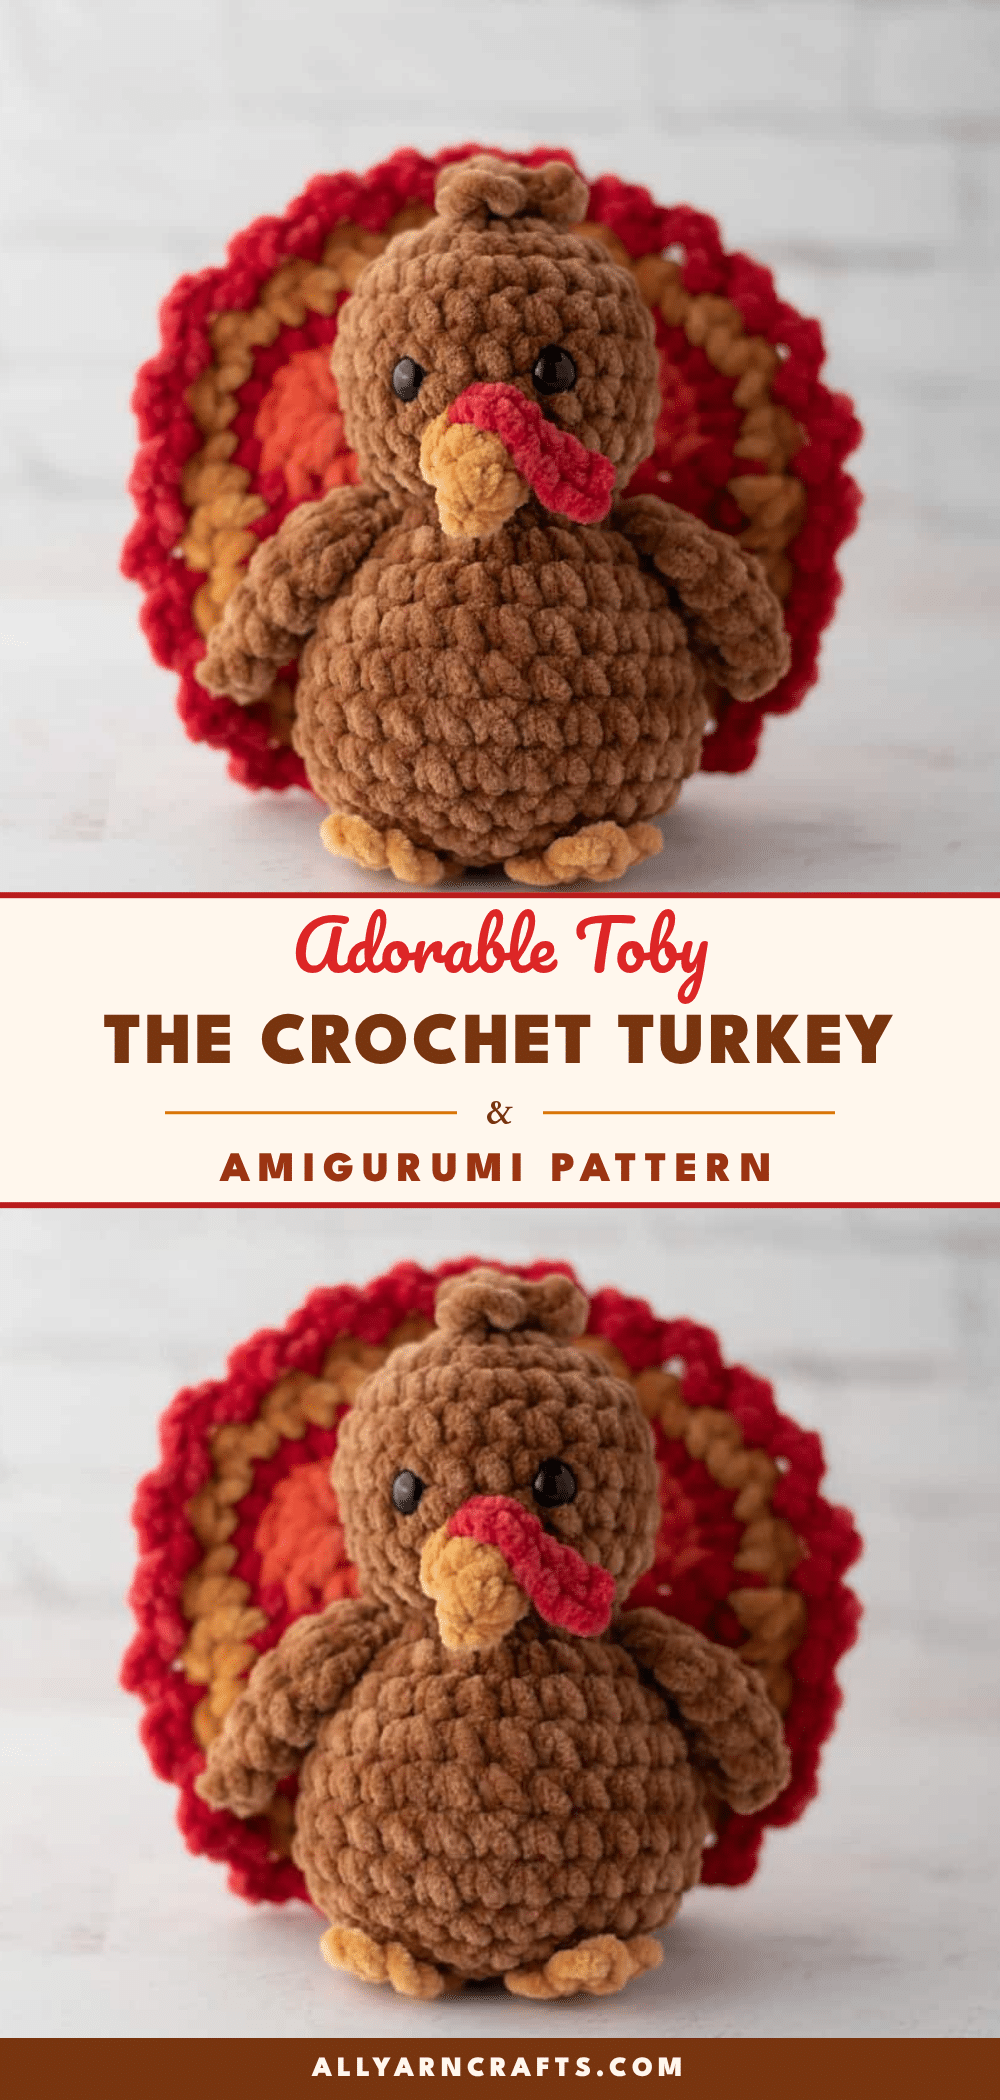
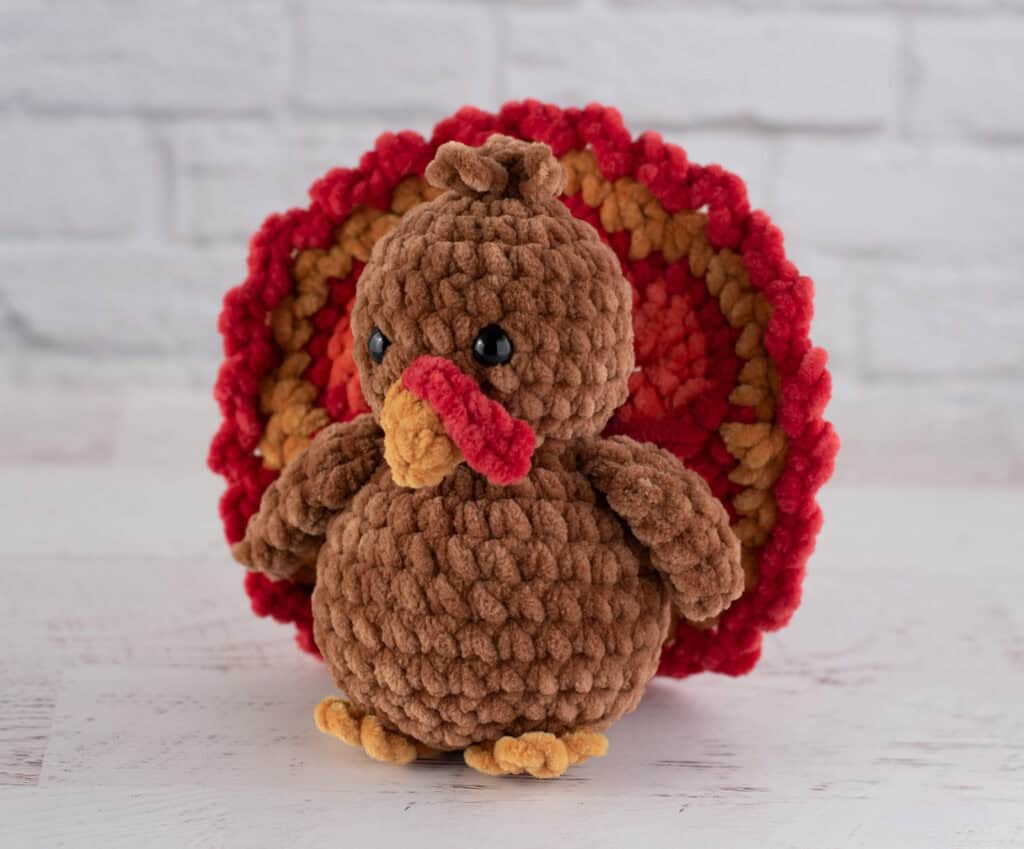
There is something deeply satisfying about watching a crochet project take shape through the rhythm of stitches. The tactile feedback of the yarn, the gradual formation of rounds, and the precision required for small details are what keep crocheters hooked. Toby the Crochet Turkey is a project that celebrates these elements perfectly. From the intricate, multi-colored tail feathers to the smooth, curving body, every row serves a purpose. This pattern uses a modified African Flower motif to create a stunning, dimensional tail, while the body is worked in one continuous piece to ensure a seamless, pudgy silhouette. It is a design that rewards patience with a plush, adorable result that stands up beautifully on its own.
Texture and Stitch Notes
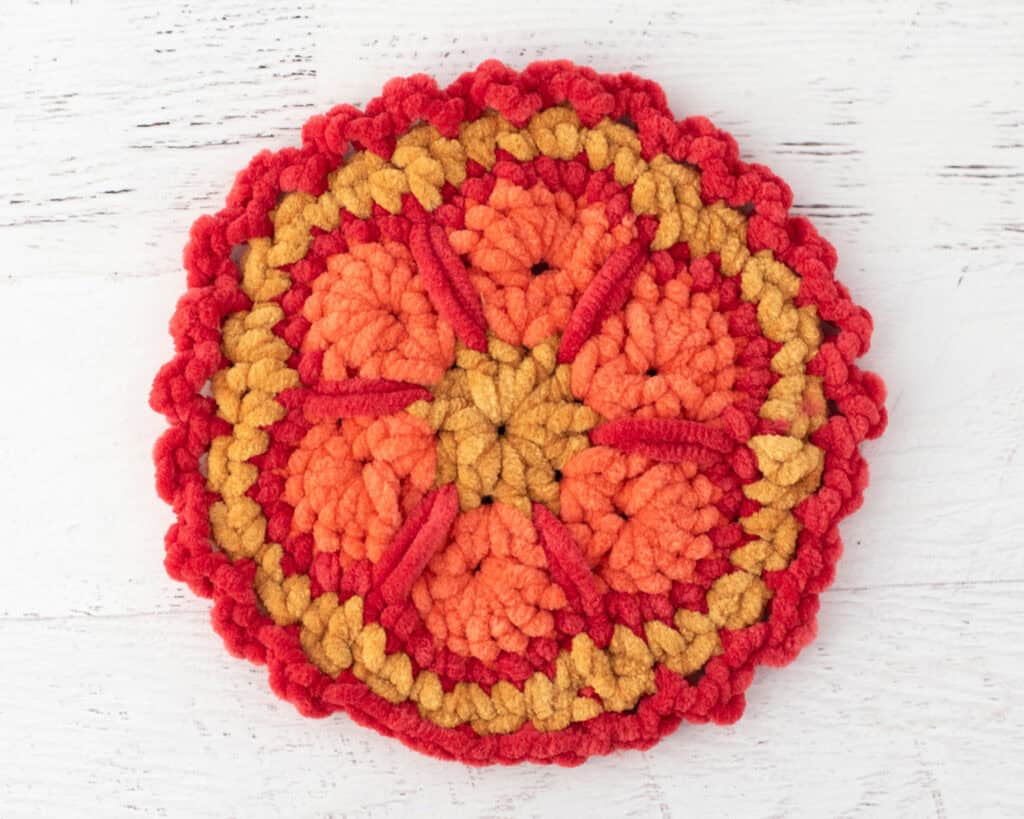
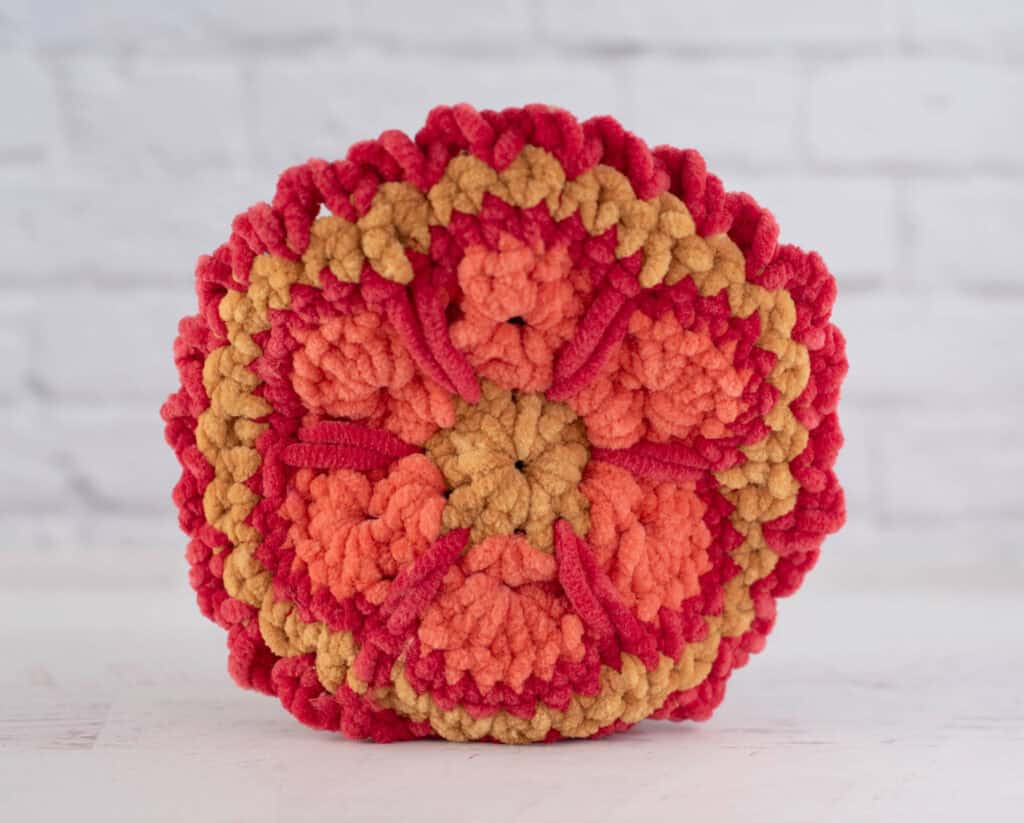
What makes Toby unique is the interplay between the bulky yarn and the detailed stitch work. The pattern utilizes Super Bulky Weight #6 yarn, but with a specific technique: using a smaller-than-normal hook (US H8/5.00 mm). This combination creates a dense, stiff fabric that allows the delicate tail feathers to hold their shape without flopping over. The chenille-style yarn adds a soft, fuzzy texture that enhances the “squishy” appeal of the turkey. Pay close attention to the “Long Single Crochet” stitch in the tail section; this special stitch drops down into previous rows to create a raised, decorative border that mimics the layered look of real feathers. These textural details are what transform a simple amigurumi into a piece of decor.
Project Overview
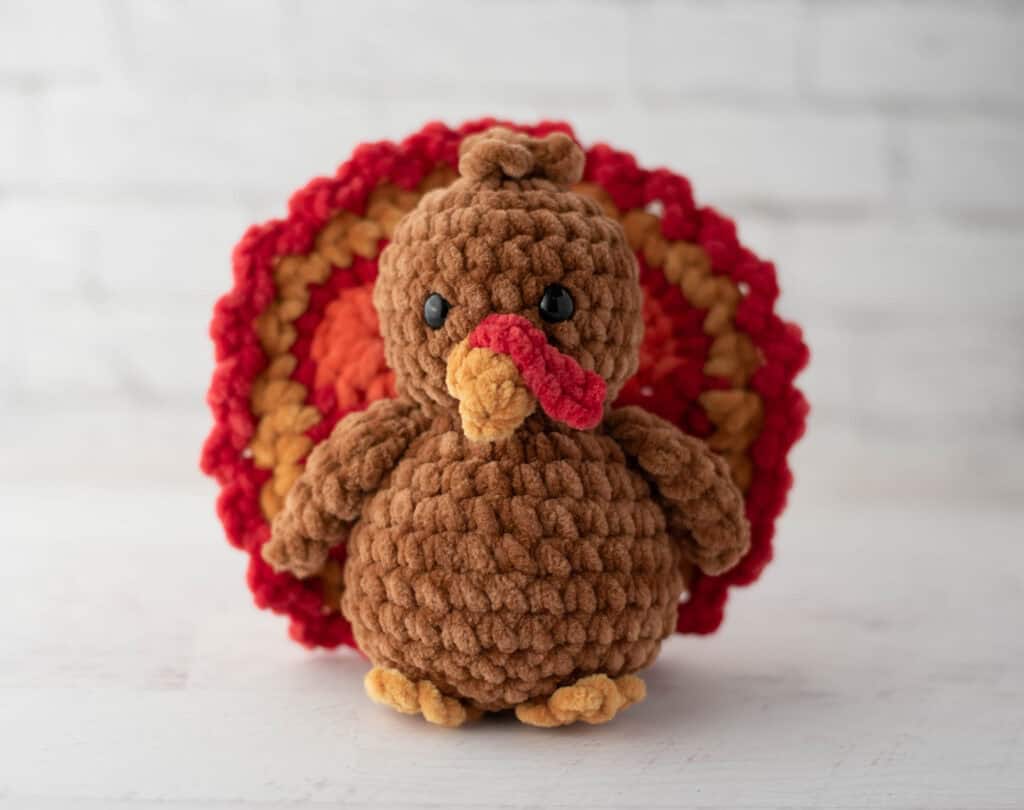
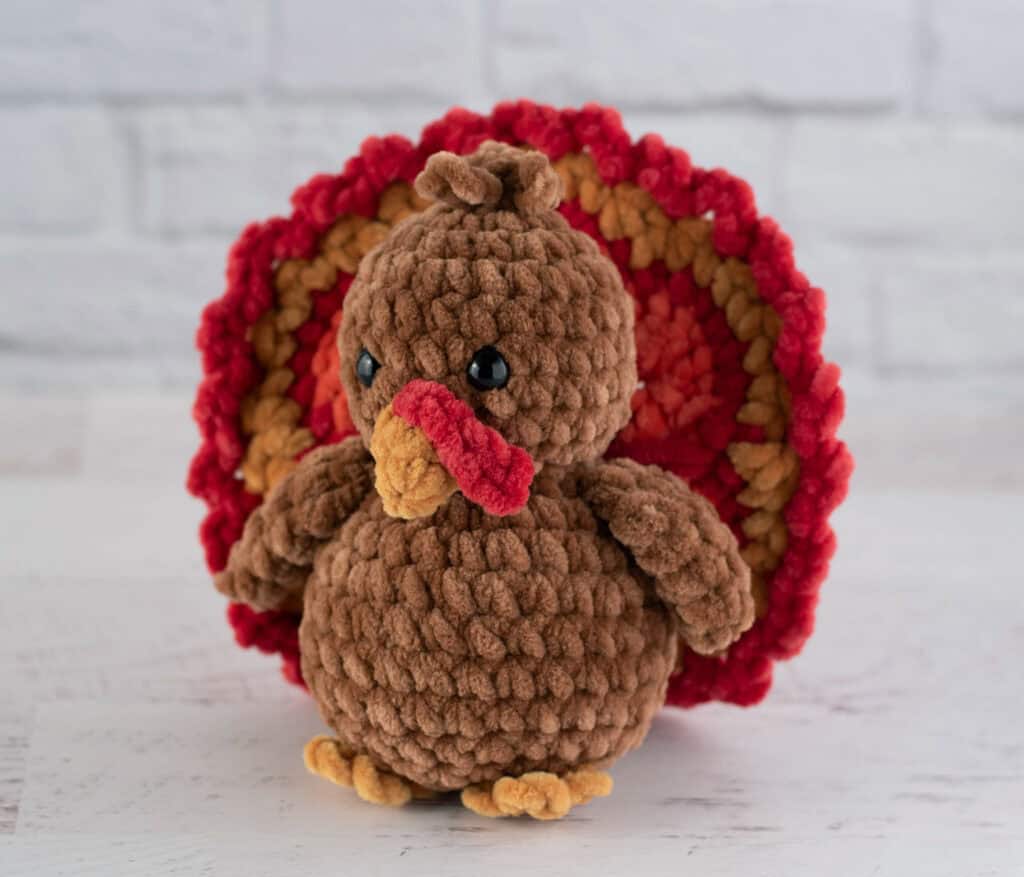
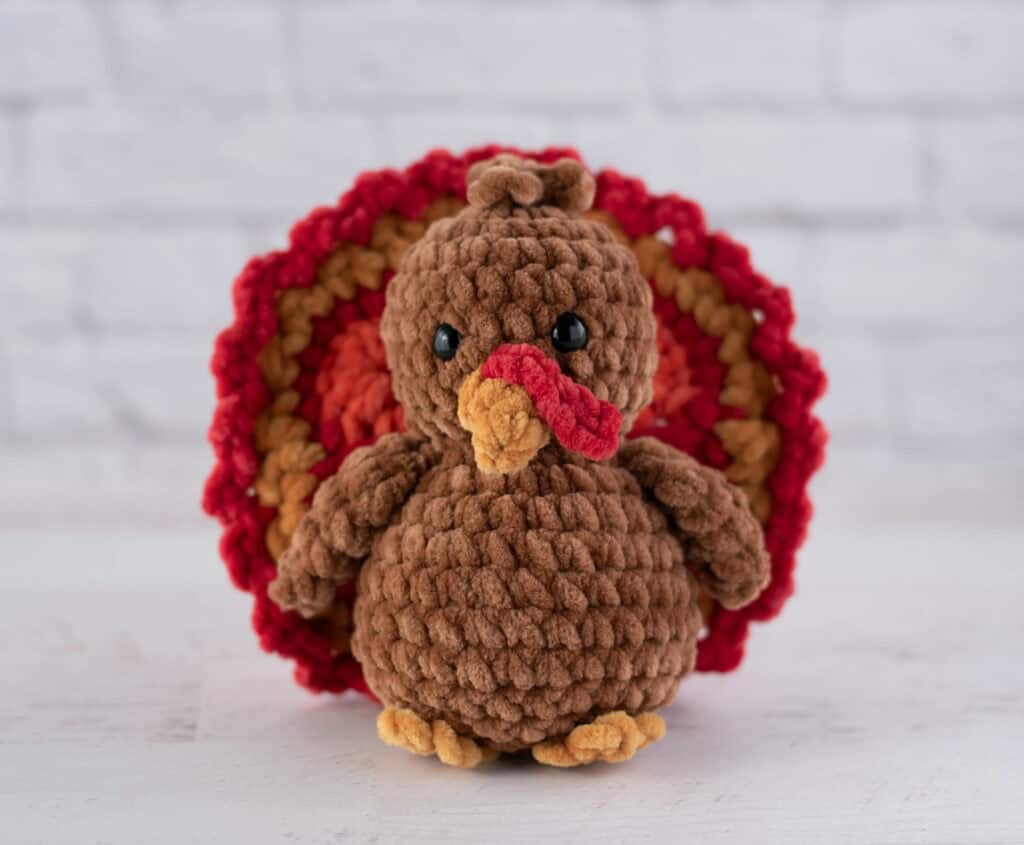
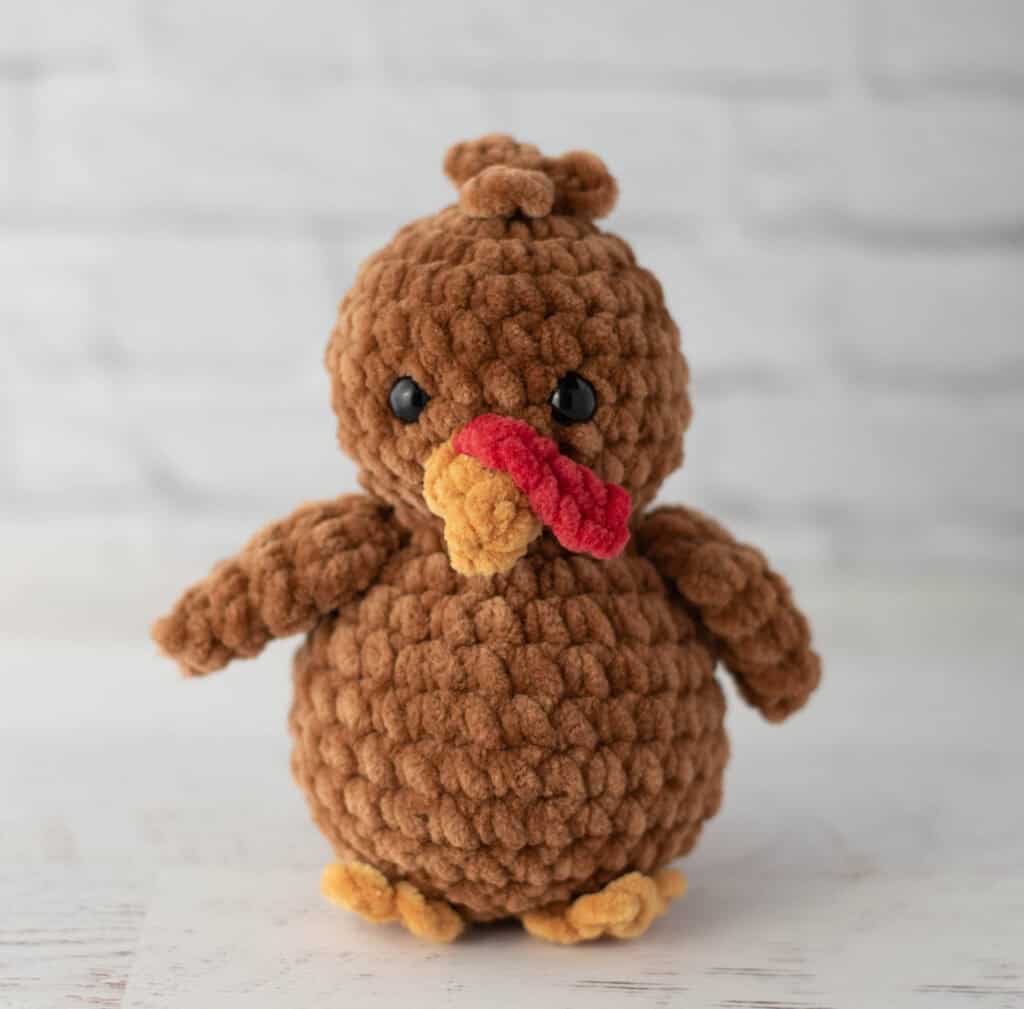
Toby is a charming Thanksgiving-themed amigurumi turkey. The project is designed to be relatively quick to make, despite its detailed appearance. It features a colorful, scalloped tail made from a modified African Flower motif, a single-piece head and body, and small, intentional details like the beak, wattle, and top feathers. The body is worked in one piece from the top of the head down to the feet, which helps achieve a natural, curved posture. This pattern is suitable for makers looking to add a festive touch to their holiday decor or create a unique gift.
Materials
- Yarn: Super Bulky Weight #6 yarn (Chenille style recommended, e.g., Premier Parfait Chunky)
- Brown: 39 yards (Sample used: Teddy Bear Gold)
- Gold: 16 yards (Sample used: Mustard)
- Orange: 12 yards (Sample used: Cardinal Red Orange)
- Red: 11 yards (Sample used: Mango)
- Crochet Hook: US H8/5.00 mm
- Eyes: 10 mm safety eyes (Note: Embroider eyes for babies or young children)
- Notions: Stitch markers, fiberfill, tapestry needle, scissors
Gauge and Finished Size
Gauge: The sample gauge is 6 sc to 2 inches. However, gauge is not critical for this pattern. You may use other weights of yarn if desired, but adjust your hook size to maintain the necessary fabric density.
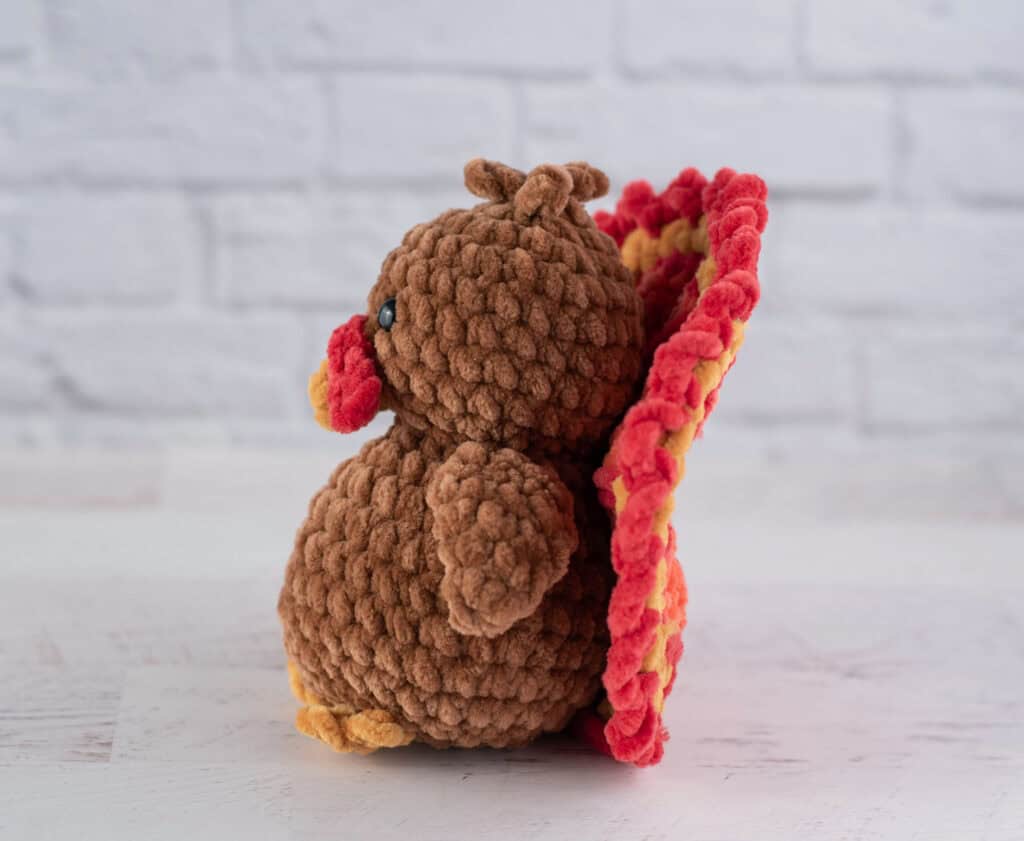
Finished Size: The turkey body (minus the back feathers) is approximately 6” tall x 4.5” wide. The back feather piece has a wing span of about 6.75” and curves against the body.
Abbreviations
- ch = chain
- dc = double crochet
- hdc = half double crochet
- sc = single crochet
- sl st = slip stitch
- st = stitch(es)
Pattern Notes
- Safety Eyes: If making this for a baby or young child, embroider the eyes instead of using safety eyes.
- Yarn Choice: The pattern recommends chenille-style yarn (like Premier Parfait Chunky) worked with a smaller hook to create a stiff, structured fabric that holds the feather shape.
- Body Construction: The head and body are worked in one continuous piece, starting at the top of the head and decreasing to the neck before increasing for the body.
Pattern Instructions
Tail Feather Motif (African Flower)
Using gold color, ch 4 and join with a slip stitch to form a ring.
R1: Work all stitches in this round in the ring. Ch 3 (counts as 1st dc), dc, ch 1 *2dc ch1, repeat from * 4 more times. Sl st to top of starting ch 3. (At end of the round there are 6 groups of 2 dc each). Fasten off gold yarn.
R2: Join orange yarn in ch-1 space from previous round. Working in same space as joining, ch3 (counts as 1st dc), dc, ch 2, 2dc, ch 1. *In next space work (2dc, ch 2, 2dc, ch 1). Repeat from * 4 more times. Join with sl stitch to top of starting ch 3.
R3: Sl stitch to 1st space. Ch3 (counts as first dc), work 6dc in same space, ch 1. *in next space work (7 dc, ch 1). Repeat from * 4 more times. Join with sl stitch to top of starting ch 3. Fasten off orange yarn.
R4: With red yarn and starting on the side of any petal, work sc around. Work a long sc in between each petal, by inserting hook into the middle of the 2dc from round 1 and pulling up a loose loop. Continue working sc in every petal stitch and a long sc in between each petal. sc to top of starting sc. Fasten off red yarn.
Note: Round 5 turns the African flower into a circle. Larger stitches are worked in the area between the African Flower petals (the long sc in the previous row and the stitches on either side) and a single crochet increase is worked at the top of the “petal”.
R5: Attach gold yarn 2 stitches to the left of a long sc stitch from the prior round. Ch 1 and work sc in the same stitch, sc in the next st, 2sc in the next st, sc in next 2 st, hdc in next st, dc in next st (this is the long sc in previous round), hdc in next st, *sc in next 2 st, 2sc in the next st, sc in next 2 st, hdc in next st, dc in next st (this is the long sc in previous round), hdc in next st. Repeat from * around. At end of round, join to top of first sc in round. Fasten off yellow yarn.
R6: With red yarn, sl st to any stitch, ch 3, skip 1 st, sl st in next st (1 st loop made), *ch 3, skip 1 st, sl st in next st (loop made). Repeat from * for a total of 23 loops. Then **ch 1, skip 1 st, sl st to next stitch. Repeat from ** until end of round. Join to starting sl st. Fasten off yarn and weave in all ends.
Turkey Head and Body
The head and body are worked in one piece starting the top of the head, decreasing to the neck and then increasing to work the body.
Make a magic ring.
R1: 6 sc into ring (6 sts). Work in rounds.
R2: 2 sc in ea st (12 st).
R3: *sc in next st, 2 sc in next. Repeat from * around. (18 st).
R4: *sc in next 2 st, 2 sc in next. Repeat from * around. (24 st).
R5-8: sc around. (24 st).
R9: *sc in next 2 st, sc next 2 st together. Repeat from * around (18 st).
R10: *sc in next st, sc next 2 st together. Repeat from * around (12 st).
Insert safety eyes between rows 6 & 7, leaving 4 stitches in between them. Stuff head and continue to stuff body as you work.
R11: *sc in next st, 2 sc in next. Repeat from * around. (18 st).
R12: *sc in next 2 st, 2 sc in next. Repeat from * around. (24 st).
R13: sc around (24 st).
R14: *sc in next 5 st, 2 sc in next. Repeat from * around. (28 st).
R15-18: sc around. (28 st).
R19: *sc in next 5 st, sc next 2 st together. Repeat from * around (24 st).
R20: *sc in next st, sc next 2 st together. Repeat from * around (16 st) Firmly stuff body the rest of the way.
R21: *sc next 2 st together. Repeat from * around (8 st) Fasten off, weave end through last stitches and pull tight.
Beak
With Gold yarn, make a magic ring.
R1: 4 sc into ring (4 sts). Work in rounds.
R2: (sc in next st, 2sc in next st) twice (6 st). Fasten off, using an invisible join if you prefer.
Sew beak between and below eyes. Beak covers all of row 8 and parts of rows 7 & 9 (or as desired).
Wattle
With red yarn, ch 6.
R1: sl st in 2 nd ch from hook, sl st in next 2 chains. Fasten off by cutting yarn and continuing to pull loop through. Use yarn end to carefully weave in on the wrong side. Then sew over the top of the beak as shown in photo.
Top Feathers (Hair)
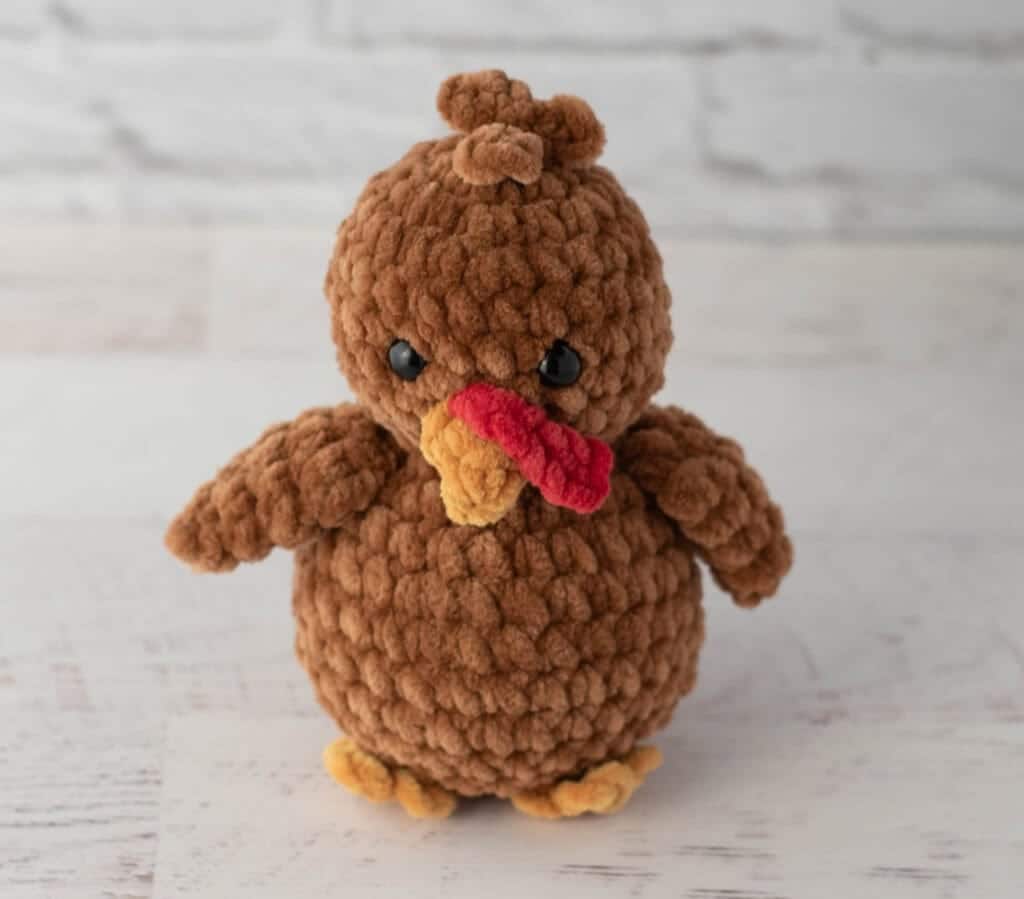
With brown yarn, *ch 3, sl st in next 2 st, repeat from * 2 more times. Fasten off and sew to top of head.
Wings (Make 2)
With brown yarn, make a magic ring.
R1: 4 sc into ring (4 sts). Work in rounds.
R2: (sc in next st, 2sc in next st) twice (6 st).
R3: (sc in next 2 st, 2sc in next st) twice (8 st).
R4: sc around (8 st).
R5: Fold piece in half, then carefully sc across the double thickness (4 st).
R6: ch 1, (sc next 2 st together) twice. (2 st) Fasten off leaving a long strand for joining.
Sew a wing on either side of the body near neck.
Feet (Make 2)
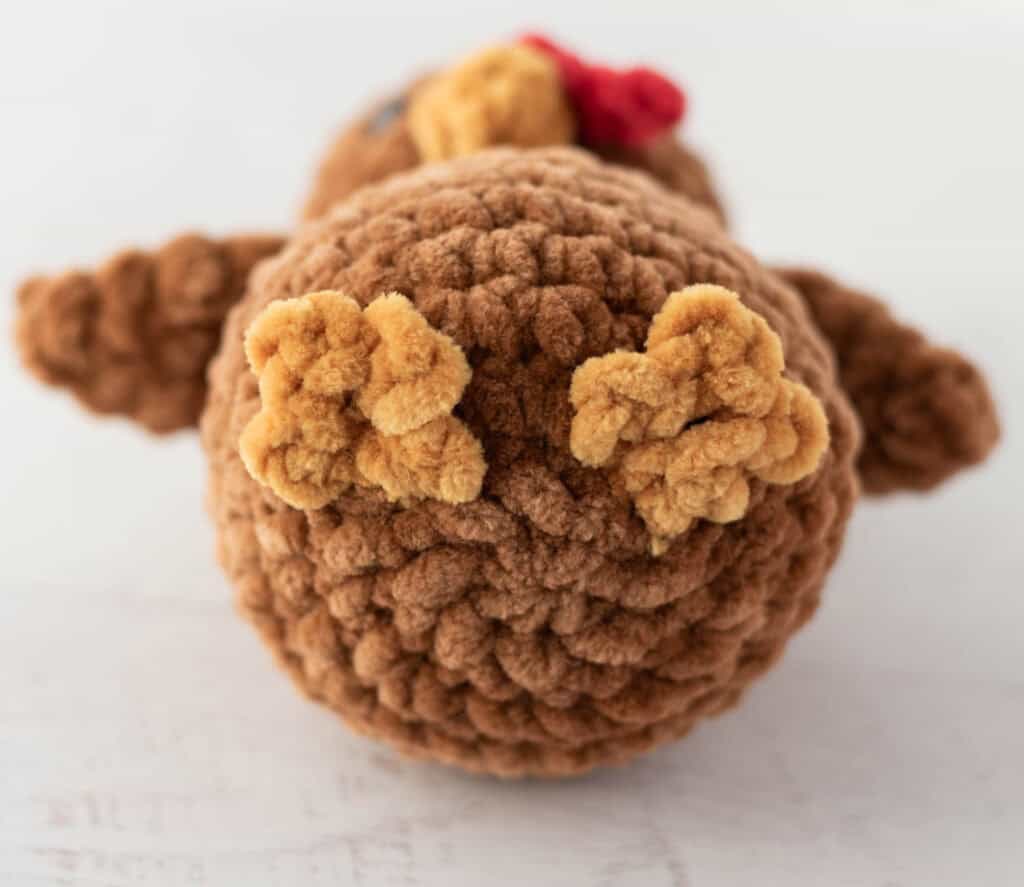
With gold yarn, ch 3.
R1: sl st in 2 nd ch from hook (1 st toe made), *ch 2, sl st in 2 nd ch from hook. Repeat from * once (3 toes made). Then, sl st to very 1 st chain in round to connect the toes back to the start. Fasten off leaving a long strand for joining.
Sew feet between rows 19 and 20 of body, or as desired.
Assembly
- Stand turkey on a flat surface. Then position the back feather piece on the back of the turkey so that the non-scalloped portion is on the bottom (behind where the feet are placed).
- Form fit the feather piece to contour to the head and body of the turkey.
- Using orange yarn, tack the feather piece in a few spots along the center of the turkey, making sure the stitches aren’t noticeable in either piece. I made one stitch on the middle of the back of the head and a few more stitches on the center of the body.
- When it is securely attached, knot off the yarn and hide the end in the body.
- Weave in any loose ends.
Tips
- Stiffness: Use a Super Bulky Weight yarn with a smaller than normal hook to give the piece the right amount of stiffness. This is crucial for the tail feathers to stand up correctly.
- Pudgy Look: The tummy has extra stitches (increases in R14) to create an adorable, rounded belly shape.
- Small Details: Designing with bulky yarn can make small details challenging. The beak, feet, wattle, and top feathers use very few stitches, so place them intentionally for the best look.
FAQs
Can I use a different yarn weight?
Yes, you can use other weights of yarn, but you will need to adjust your hook size. The pattern relies on a dense fabric created by bulky yarn and a smaller hook, so keep that in mind if substituting.
Is this pattern safe for babies?
The pattern includes safety eyes, which are not recommended for babies or young children. For these recipients, please embroider the eyes instead.
How do I make the tail feathers stand up?
The key is using chenille-style bulky yarn and a smaller hook (US H8/5.00 mm) to create a stiff, structured fabric. This prevents the feathers from flopping over.
Why is the head and body worked in one piece?
Working the head and body in one piece ensures a seamless transition and helps achieve the natural, curved posture of the turkey without visible seams at the neck.
What is a Long Single Crochet?
A long single crochet is worked like a regular sc, but you insert the hook into a lower row beneath the current one. Pull up a loop so the top of the stitch aligns with the current row, then complete the sc. This creates a raised, decorative stitch.
Where can I find more Thanksgiving crochet ideas?
If you enjoy this project, you might also like exploring other seasonal decor ideas, such as a cozy crochet blanket for autumn evenings or other easy crochet patterns for home decor.
Pin This Crochet Pattern!