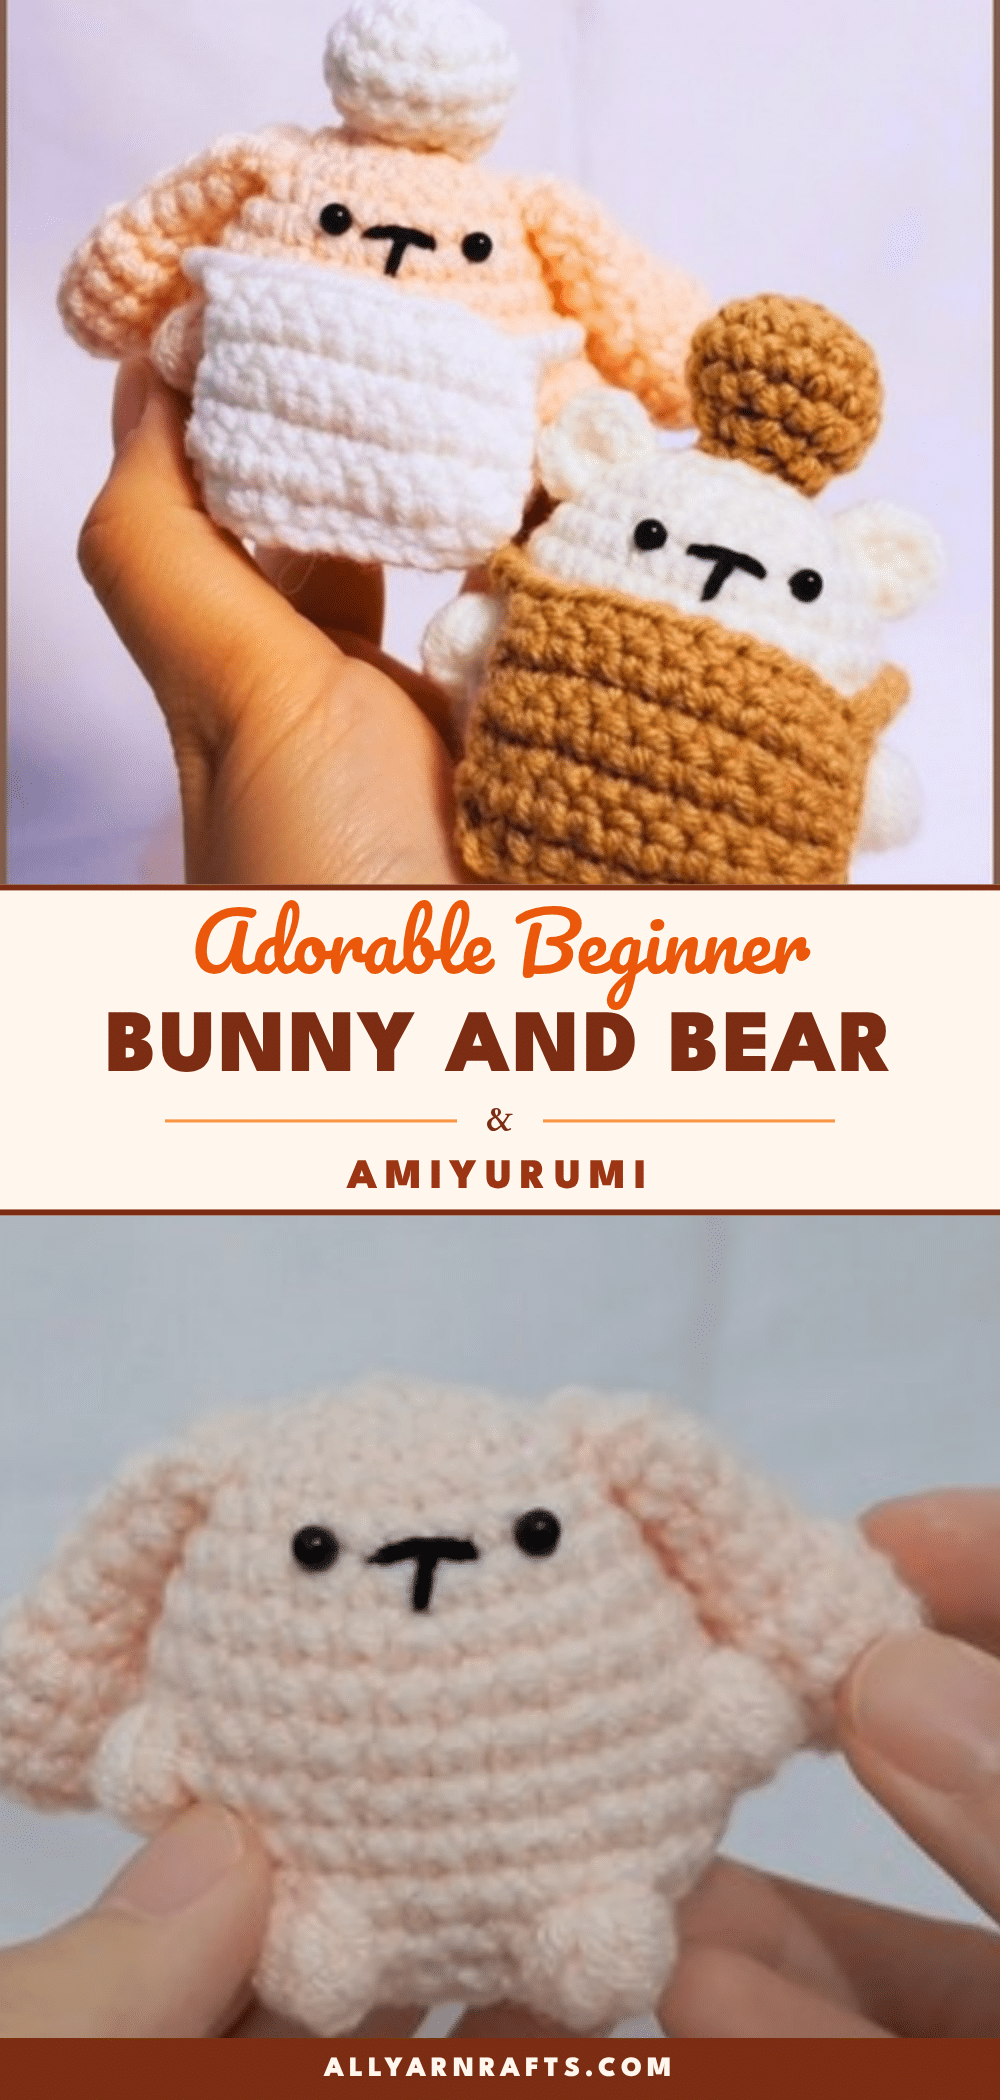
Did you start your magic ring and immediately panic because you saw a tiny hole in the center? You are not alone. It is the most common worry for beginners, but this project is designed to be forgiving. The Bunny and Bear Amigurumi pattern uses a continuous spiral technique that hides those small imperfections, and the instructions include checkpoints to help you fix tension issues before they become problems. Whether you are worried about losing your place in a round or struggling with the first decrease, this guide walks you through every step with clear visual cues and practical fixes.
Maker Notes
One of the best things about this pattern is the shared construction logic. Because the bunny and bear bodies are identical, you only need to learn the core technique once. The visual difference comes entirely from the ears: long and upright for the bunny, short and rounded for the bear. This makes it a highly efficient project for building muscle memory. I recommend making the bodies first to get the rhythm of the bubble stitches and decreases down, then moving on to the distinct ears. The accessories—the apron and chef hat—are entirely optional, so you can keep the set simple or add the finishing touches for a complete character look.
Project Overview
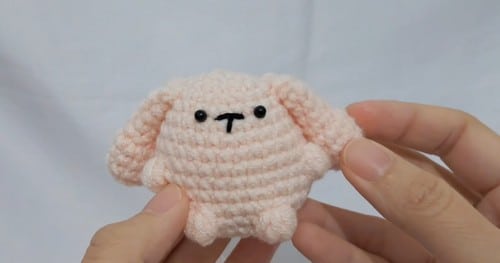
This pattern creates two small, pocket-sized amigurumi figures: a bunny and a bear. They share the same base torso construction, featuring a spherical body with integrated bubble-stitch limbs. The figures are distinguished by their ears and can be dressed in a matching chef’s apron and hat. The project is designed for beginners, utilizing continuous rounds and a magic ring to create a tight, professional finish.
Materials
- Yarn: DK or sport weight yarn in your chosen body colour (one colour for the bunny, a different one for the bear, or both the same). White or cream yarn for the chef hat and apron. Small amounts of contrast colour for embroidered faces.
- Crochet Hook: 3.0mm or 3.5mm hook.
- Accessories: Two safety eyes per animal (6mm or 8mm), polyester fiberfill stuffing, yarn needle, scissors, and a stitch marker.
Gauge and Finished Size
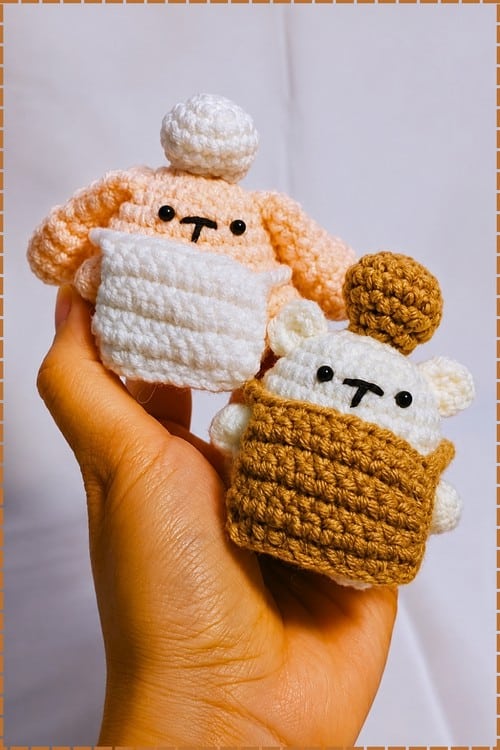
The finished height is approximately 10 to 12cm with DK yarn on a 3.0mm hook. This is an estimate based on stitch counts rather than a strict pattern measurement. Allow roughly 2.5 to 3.5 hours per animal including accessories.
Abbreviations
- sc: single crochet
- inc: increase, 2 sc worked into one stitch
- dec: invisible decrease recommended
- ch: chain
- sl st: slip stitch
- st / sts: stitch / stitches
Pattern Notes
The Magic Ring
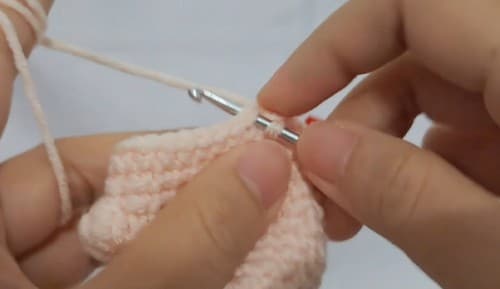
Every piece in this pattern starts with a magic ring. It sounds complicated but is just an adjustable loop that closes cleanly, unlike starting with a chain which always leaves a small hole at the centre. Make a loop with the yarn, insert your hook through the loop, catch the working yarn and pull up a loop, then chain 1 to lock it. Work your first-round stitches into the loop itself, not through the chain. Once you finish the first round, pull the tail end to close the ring tight.
Continuous Rounds
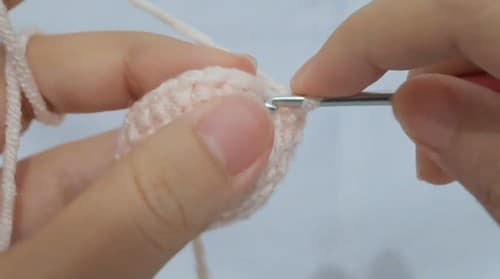
The body, ears, and hat are all worked in continuous rounds—a spiral, not a joined circle. That means you do not slip stitch to close each round and you do not chain up at the start of a new one. You just keep going. The problem is that the spiral makes it impossible to see where one round ends and the next begins, which means you will lose count without a stitch marker. Put one in the first stitch of every round. A split ring marker, a locking marker, or even a small piece of contrast yarn works. Move it up every time you complete a round.
The Invisible Decrease
The body has several decrease rounds near the bottom. Use the invisible decrease rather than a standard sc2tog. Insert your hook through the front loop only of the first stitch, then through the front loop only of the next stitch, yarn over and pull through both loops, yarn over and finish as a normal sc. This keeps the surface smooth instead of leaving a small ridge at each decrease point, which matters most on the face area.
The Bubble Stitch
Round 10 and round 13 use a bubble stitch to create the arms and legs. This is worked into one stitch—yarn over, insert hook, pull up a loop, repeat several times in the same stitch, then yarn over and pull through all loops at once. The result is a small raised bobble that sits on the surface of the body and reads as a limb. It is easier than it sounds and you only need to make four of them across the whole body.
Marking the Round Start
The specific stitch at which you place your marker is the first stitch of each round. Mark it immediately after working it, before you move to stitch two. If you wait until the end of the round to place the marker you will sometimes miscounted by one. That one-stitch drift will compound across twelve rounds and leave your body shape skewed.
Pattern Instructions
Body (Same for Both Animals)
Ears are what separate these two at a glance, one pair long and upright, the other short and rounded, sitting on bodies that share the same basic sphere-and-limb construction. Each figure has a head, a body, two arms, and two legs worked separately and assembled, with small ear pieces added on top. The builds are nearly identical underneath those ears, which means learning one carries directly into the other. Stuffing goes in firm throughout so the limbs hold their position rather than flopping.
- Round 1: Start a magic ring and work 6 sc into the ring. [6]
- Round 2: Inc in every stitch around. [12] — checkpoint: a small flat disc, about the size of a large button. If the centre has a visible hole, pull the magic ring tail again before continuing.
- Round 3: [Sc 1, inc] — repeat around. [18]
- Round 4: Sc in each stitch around. [18] — checkpoint: the disc is now slightly domed at the edges and beginning to form a shallow cup. Hold it up — if it is already a steep bowl at this point your tension is very tight and the base will be narrow. Relax slightly on the hook.
- Round 5: [Sc 2, inc] — repeat around. [24]
- Round 6: Sc in each stitch around. [24]
- Round 7: [Sc 3, inc] — repeat around. [30] — checkpoint: the piece should be sitting as a clear open bowl at this point, roughly 6cm across. The shaping has been consistent and even, which you can verify by checking that the rim is level all the way around.
- Rounds 8 to 9: Sc in each stitch around for 2 rounds. [30]
- Round 10: Sc 9, work 1 bubble stitch for the first arm, sc 11, work 1 bubble stitch for the second arm, sc 8. [30 plus 2 bubble stitches]
- Rounds 11 to 12: Sc in each stitch around for 2 rounds. [30]
- Round 13: Sc 13, work 1 bubble stitch for the first leg, sc 4, work 1 bubble stitch for the second leg, sc 11. [30 plus 2 bubble stitches]
- Safety Eyes: Safety eyes go in now, before the next round narrows the opening. Position them between rounds 8 and 9, spaced 4 to 5 stitches apart on what will be the front face. Push the posts through from the right side and press the washers firmly onto the backs while you can still reach inside comfortably. Once round 14 begins closing the body, access becomes very difficult. Do not skip this step and plan to add eyes later — it is not possible after closing. For toys going to children under three, skip plastic safety eyes and embroider two small circles in black yarn or thread instead, with tails buried well inside the body before stuffing.
- Round 14: [Sc 3, dec] — repeat around. [24]
- Round 15: [Sc 2, dec] — repeat around. [18] — checkpoint: the opening is clearly narrowing here and the body is starting to look complete. Stuff the body through the opening now if you have not already — it becomes harder to reach through as the next round closes further.
- Final round: [Sc 1, dec] — repeat around. Fasten off, leaving a long tail. Thread the tail through the front loops of the remaining stitches, pull closed, and weave in the end. [12 before closing]
Bunny Ears (Make 2)
- Round 1: Start a magic ring and work 6 sc into the ring. [6]
- Round 2: Inc in every stitch around. [12] — checkpoint: a small flat disc, same as the body opening. Both ears need to match here before you go further.
- Rounds 3 to 5: Sc in each stitch around for 3 rounds. [12]
- Round 6: [Sc 1, dec] — repeat around. [8]
- Rounds 7 to 10: Sc in each stitch around for 4 rounds. [8] — checkpoint: by round 10 the ear should be a clear elongated tube with a slightly wider base and a narrower tip. If it is a perfect cylinder with no taper, check that round 6 landed correctly. Fasten off. Leave a long tail of roughly 30cm for sewing.
Bear Ears (Make 2)
- Round 1: Start a magic ring and work 6 sc into the ring. Fasten off immediately. [6] — checkpoint: a tiny flat circle with no tube at all. That is correct and intentional. The bear ear is just one round. Leave a long tail for sewing.
Apron
- Foundation: Make a slip knot and ch 11.
- Row 1: Starting in the 2nd ch from the hook, work 10 sc along the chain. [10]
- Rows 2 to 7: Turn your work. Sc in each stitch across. Repeat for 6 rows. [10]
- Ties: At the end of row 7, ch approximately 25, or enough to wrap around the body. Sl st to the opposite side of the apron to form the tie loop. Fasten off and weave in ends.
Chef Hat
- Round 1: Start a magic ring and work 6 sc into the ring. [6]
- Round 2: Inc in every stitch around. [12]
- Round 3: [Sc 3, inc] — repeat around. [15] — checkpoint: a flat disc that will become the crown of the hat. It should lie flat and be about 4cm across. If it is smaller, the hat will sit like a bottle cap rather than a hat brim.
- Rounds 4 to 5: Sc in each stitch around for 2 rounds. [15]
- Round 6: [Sc 1, dec] — repeat around. [10] — checkpoint: the hat narrows here into a short cylinder, which is the classic tall chef hat profile. The decrease should pull the top inward evenly. Fasten off. Leave a long tail for sewing.
Assembly
Work in this order. First, embroider the face—a short straight mouth in black thread, one or two small blush spots if you want, French knots for nostrils on the bear. Do this while the body is closed but before anything is attached, so you can hold it at arm’s length and check the expression looks centred. Then position the ears. Bunny ears sit on the top of the head, slightly more toward the front than the back, standing upright. Bear ears go to the sides, roughly level with the safety eyes or just above. Pin both before sewing either one—holding the toy up and checking the symmetry before committing is the single most useful step in the whole assembly. Attach the apron next by wrapping the tie chain around the body at round 11 to 12 and securing it at the back. The sl st end of the tie should anchor at the back seam. Finally, position the chef hat centred on the crown of the head, tilted very slightly to one side if you want it to look less rigid, and sew through the outer round of the hat into the head stitches all the way around. A single tack stitch in the centre will not hold through handling.
Tips
- If the centre has a visible hole, pull the magic ring tail again before continuing.
- Hold it up—if it is already a steep bowl at this point your tension is very tight and the base will be narrow. Relax slightly on the hook.
- The shaping has been consistent and even, which you can verify by checking that the rim is level all the way around.
- Safety eyes go in now, before the next round narrows the opening. Position them between rounds 8 and 9, spaced 4 to 5 stitches apart on what will be the front face. Push the posts through from the right side and press the washers firmly onto the backs while you can still reach inside comfortably. Once round 14 begins closing the body, access becomes very difficult. Do not skip this step and plan to add eyes later—it is not possible after closing. For toys going to children under three, skip plastic safety eyes and embroider two small circles in black yarn or thread instead, with tails buried well inside the body before stuffing.
- Stuff the body through the opening now if you have not already—it becomes harder to reach through as the next round closes further.
- Both ears need to match here before you go further.
- If it is a perfect cylinder with no taper, check that round 6 landed correctly.
- If it is smaller, the hat will sit like a bottle cap rather than a hat brim.
- The decrease should pull the top inward evenly.
- Pin both before sewing either one—holding the toy up and checking the symmetry before committing is the single most useful step in the whole assembly.
- For toys going to children under three, skip plastic safety eyes and embroider two small circles in black yarn or thread instead, with tails buried well inside the body before stuffing.
- Check that all bubble stitch tails are woven at least two centimetres into the body—the arm and leg bubbles take stress from being grabbed, and a short tail will pull through over time.
- The apron tie is a long chain and should be shortened for young children, since 25 chains of yarn is long enough to be a hazard.
- Worsted on a 3.5mm hook goes the other direction at around 14cm, and at that size the single-round bear ears look very small in proportion—consider adding a round 2 of increases to each bear ear if you scale up.
- Colour is entirely open. A brown bear in warm caramel reads more naturally against a white apron than a grey bear does, but the construction does not change.
- Chain 2 and work your first-round stitches into the second chain from the hook. It leaves a slightly larger hole at the centre than a magic ring does, but you can close it with the starting tail afterwards. It is a reliable alternative while you are learning.
- A bubble stitch is worked into a single stitch—you yarn over and insert the hook repeatedly into the same stitch, pulling up a loop each time, then pull through all loops at once. The bump pops to the outside of the work. If the bump is on the inside instead of the outside, you are working on the wrong side of the piece. Turn it right-side-out before continuing.
- Almost always a tension difference between the two, which is very common when you make the second piece immediately after the first while your hands are already warmed up. Block both ears flat with a damp cloth and pin them to the same dimensions. If the difference is significant, check your starting magic ring on the smaller one—a ring pulled tighter than the other gives you fewer effective stitches in round 1.
- No, the body and ears are complete on their own as a plain bunny or bear. The apron and hat are entirely optional and are not referenced in the body construction at all. Many people make the bodies first, then decide on accessories afterwards.
- After the final round, cut the yarn leaving a tail of about 20cm. Thread it onto a yarn needle. Working from the outside, insert the needle through the front loop of each remaining stitch all the way around, then pull the tail gently to gather the stitches closed. Pass the needle through the centre of the closing point twice to anchor it, then bury the tail inside the body and trim.
FAQs
Can I make these toys for a baby under three?
Yes, but you should skip the plastic safety eyes. Instead, embroider two small circles in black yarn or thread for the eyes, ensuring the tails are buried well inside the body before stuffing to prevent choking hazards.
What if my magic ring leaves a hole?
If you see a hole in the center after Round 1, pull the starting tail tighter. If you are still struggling, you can start with a chain 2 and work into the second chain from the hook, then close the gap with the tail at the end of the round.
Do I need to make the apron and hat?
No, the apron and chef hat are entirely optional. The bunny and bear bodies are complete on their own. You can make the bodies first and decide on accessories later.
How do I fix uneven ears?
It is common to have a tension difference between the first and second ear. Block both ears flat with a damp cloth and pin them to the same dimensions. If one is significantly smaller, check your magic ring on that piece to ensure it was pulled tight enough.
Can I use a different yarn weight?
You can use worsted weight on a 3.5mm hook, which will result in a larger toy (around 14cm). However, be aware that the single-round bear ears may look small in proportion on a larger body, so you might want to add an extra round of increases to them.
Pin This Crochet Pattern!