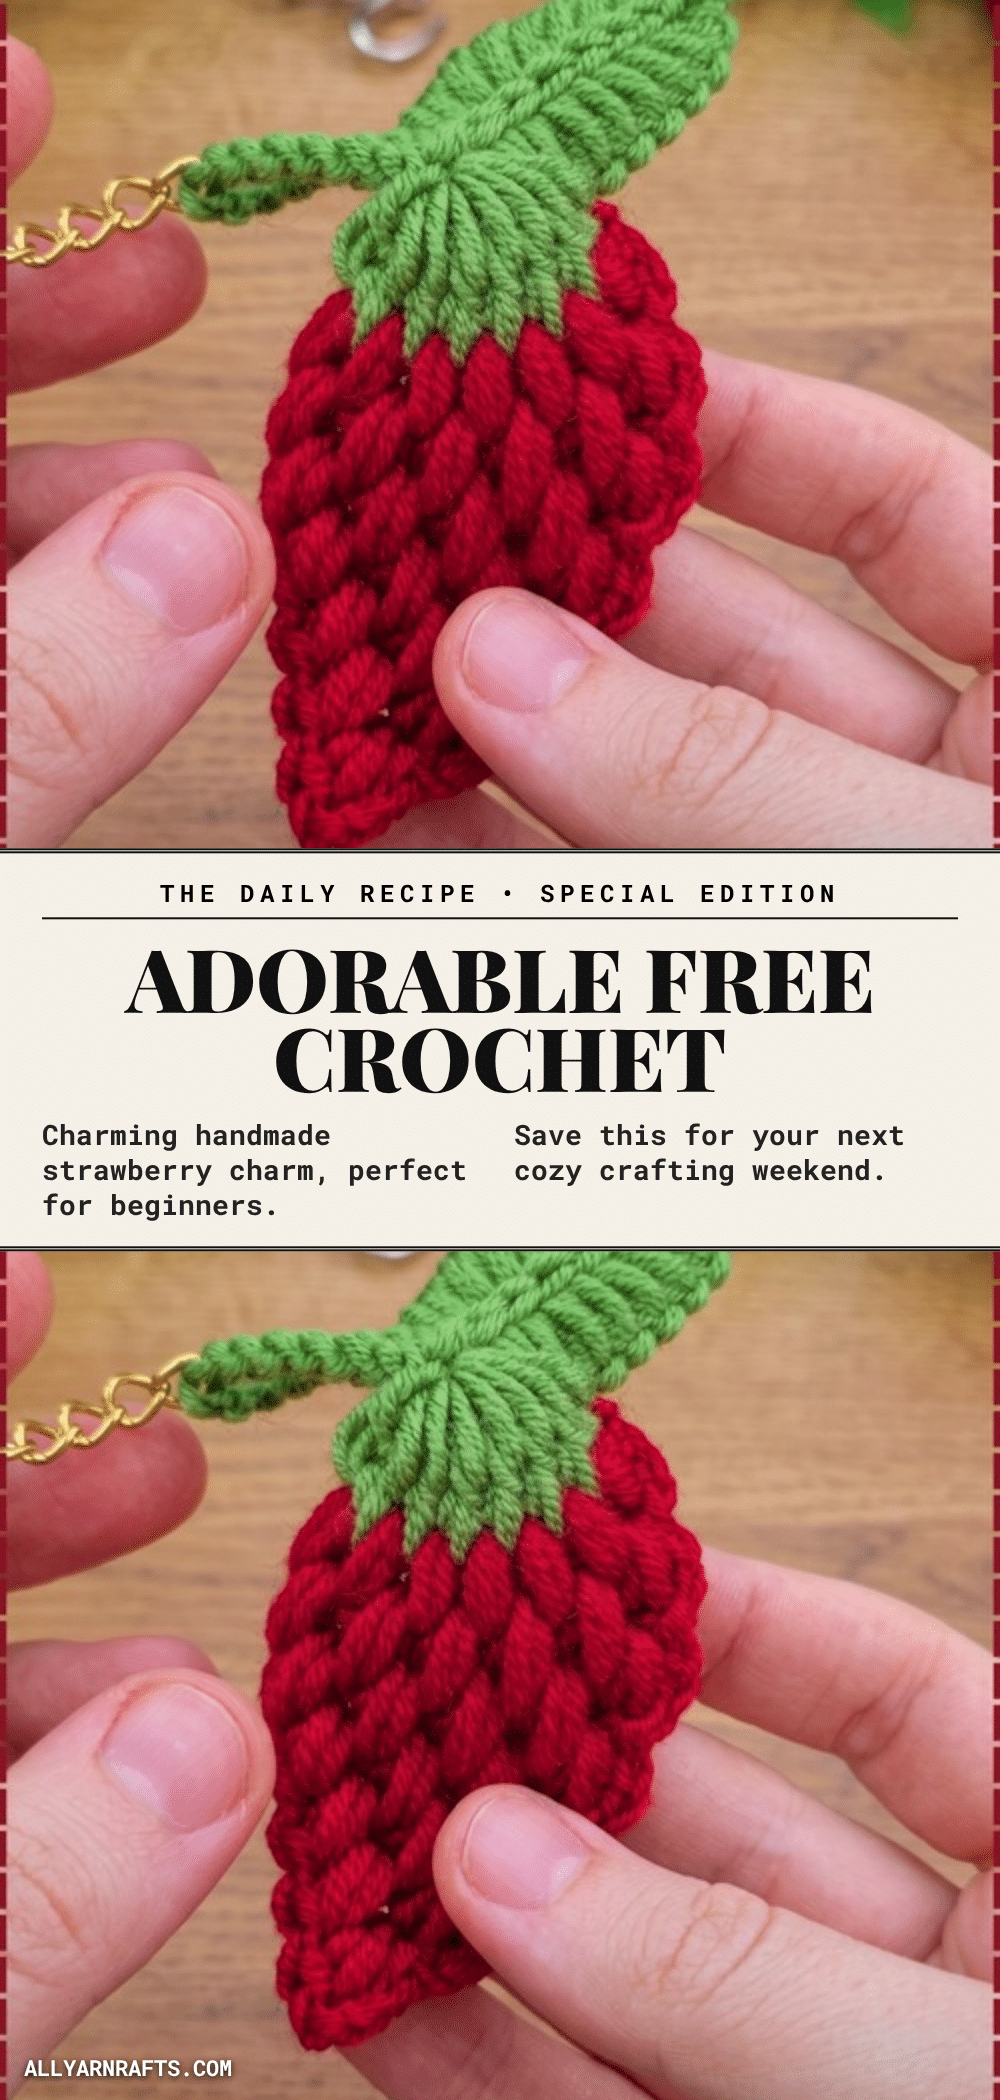
Gold chain links hang from the leafy stem of this crochet strawberry keychain, so it swings from a market tote like a fresh picked berry. Cottagecore fans clip a small strawberry keychain onto picnic baskets and summer purses, and spare ones slip easily into party bags. Puff stitch after puff stitch is what the crochet strawberry keychain asks of you, and the rhythm gets into your hands quickly. You stop counting and just work. Watching the ridges build up row on row is the good part, and the leaf goes on fast once the berry is done and closed.
I reached for a bright, saturated red from my stash, the kind that feels like summer in a skein. It was a cotton blend with a slight twist, perfect for catching the light. I paired it with a deep, leafy green to ground the color. The texture of the yarn mattered here; I wanted the ridges to pop, so I avoided anything too fuzzy. This little strawberry feels intentional, like a tiny harvest you can carry in your pocket.
Yarn and Color Notes
Yarn choice defines the character of this project. Cotton gives sharper ridge definition and stands up to being carried in a pocket. It is the best choice for a keychain that sees daily use. Acrylic is softer and the ridges blur slightly, but it wears well. Skip anything fuzzy. The front loop texture is the whole point, and halo yarn hides it. To scale up, use worsted with a 4.5mm hook and wrap the safety pin the same 10 times. To scale down for a zipper pull, use 4ply with a 2.5mm hook. More wraps at the start means a wider berry, not a taller one. Length comes from how many rows you work before decreasing.
Project Overview
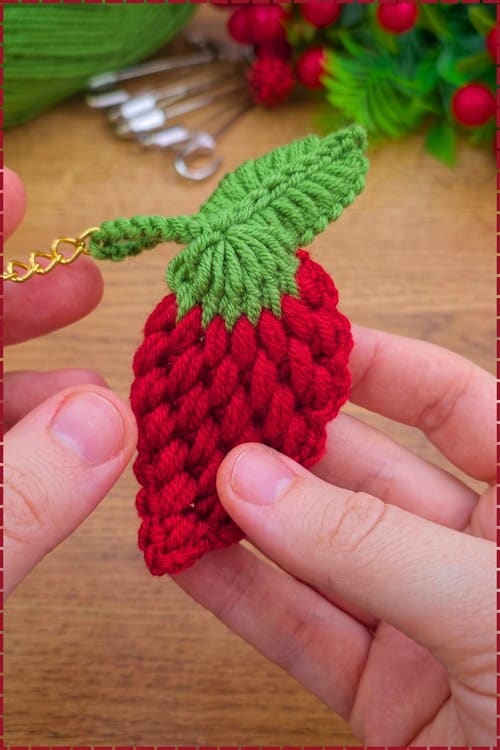
This pattern creates a raised, textured strawberry using a unique safety pin start. The berry is worked flat in rows, creating a natural curl that forms the fruit’s shape. The pattern is designed for speed and simplicity, making it a great project for beginners or a quick gift. It requires no complex shaping or seaming unless you prefer a stuffed, rounded berry.
Materials
- Red yarn, roughly 8 to 12 yards
- Green yarn, roughly 4 to 6 yards
- A crochet hook to suit the yarn. DK weight with a 3.5mm hook works well
- A large safety pin, used as the starting base
- Yarn needle for weaving in ends
- Optional: a keychain ring or split ring
- Optional: a small pinch of fiberfill
Gauge and Finished Size
Approximate finished size in DK weight: about 1.5 to 2 inches tall. Time: 20 to 30 minutes once you’ve done one.
Abbreviations
SC: Single Crochet
CH: Chain
SL ST: Slip Stitch
Pattern Notes
Three things in this pattern are left open, and I’d rather point them out than quietly fill them in.
No stitch counts after the first row. The berry is worked to whatever length you like, and the decrease section says to decrease each row without specifying how many rows or how many stitches per row. That means no two people will make the same size berry. Write down your row count on the first one so you can repeat it.
No instruction to join the side edges. The piece is worked flat in rows, and the assembly section says no sewing is needed. But the stuffing section talks about adding fiberfill before the tip closes, which only makes sense on a piece with an inside. As written, you end up with a flat curled wedge rather than a closed berry. If you want a rounded, stuffable strawberry, you will need to seam the two side edges together yourself with a whip stitch up the back before the leaves go on. That is my addition, not the original pattern.
Stuffing timing conflicts with the row order. The pattern says to insert fiberfill before the final decreases close the tip, but the decreases are worked in rows on a flat piece with nothing to close over. If you seam the sides as above, add the stuffing just before you finish the seam, not during the decreases.
Pattern Instructions
Green Stem Base
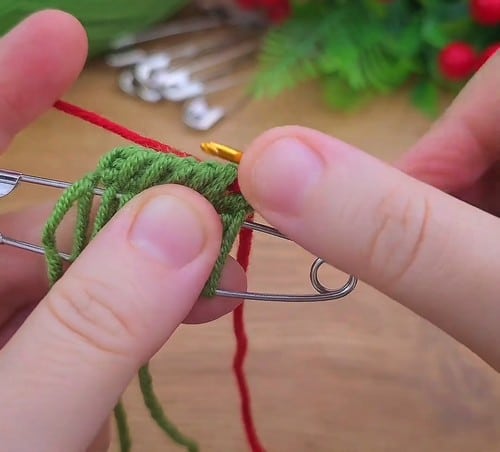
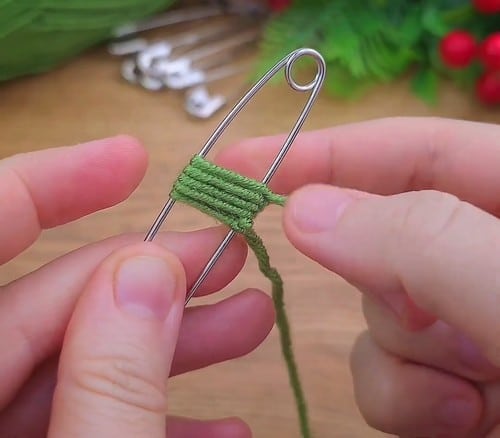
Wrap the green yarn around the safety pin 10 times to form loops. [10 loops] Secure the loops with a slip knot. Use the hook to pull yarn through the loops, working a row of crochet stitches across them. If the wraps slide together and you can’t tell one from the next, spread them along the pin bar with your thumbnail before you start hooking. Ten wraps crowded into half an inch is where most people lose count. Keep this first row loose. Working tightly into the wraps makes the pin almost impossible to remove afterwards, and forcing it out distorts the row. Checkpoint: you should have a narrow green strip roughly the width of your thumbnail, with a visible row of loops along the bottom edge. It should sit flat, not fan out. If one end is noticeably wider than the other, your tension shifted partway across, which will make the berry lean later.
Red Strawberry Base
Cut the green yarn and attach the red yarn to the last green stitch. Work SC across the row, going into the front loop of each stitch only. [10 sc] Continue working rows this way until the strawberry reaches the length you want. Working into the front loop only means the back loop stays free and stands up as a small ridge. Those ridges are the strawberry texture, so resist the urge to work into both loops when the front loop feels flimsy. If your rows start curling into a tube, that’s normal for front loop only fabric. Don’t try to correct it with tighter tension. Let it curl. The most common problem here is losing the front loop at the end of a row. The last stitch of any row is the easiest one to miss. Count 10 at the end of every row until the decreases start. Checkpoint: after four or five rows the piece should read as a small red rectangle with clear horizontal ridges running across it, and it should already want to roll toward you. If the ridges are barely visible, check that you are working the front loop and not both loops.
Beginner crocheter? The video tutorial below guides you through every round of this plushie, and the written pattern is below for later!
Decrease
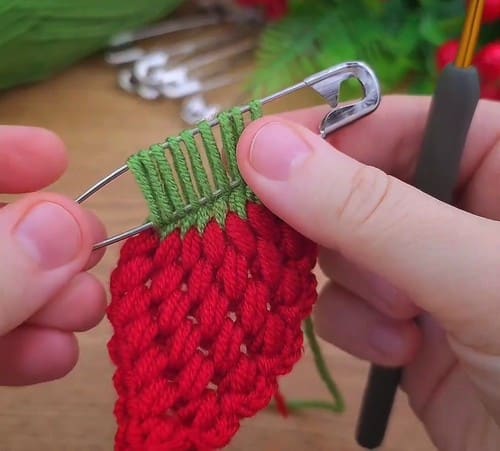
Begin decreasing the stitch count in each row to shape the pointed tip. Decrease either by skipping a stitch or by crocheting two stitches together at the end of each row. Continue working rows and decreasing until you reach the tip of the strawberry. Crocheting two together gives a smoother edge than skipping. Skipping leaves a small hole at each decrease, which reads as untidy on a piece this small. Use the two together method unless you specifically want that open look. If your tip goes lopsided, it’s because all the decreases stacked on the same end of every row. Alternate ends if you want a symmetrical point. Stop decreasing when you have two or three stitches left. Fasten off there rather than working the count all the way to one, which pulls a hard knot at the tip. Checkpoint: the piece should now taper visibly, narrow at the working edge and wide at the green end, so it reads as a wedge rather than a rectangle. Roll it in your palm. The wedge should curl into a rough cone shape on its own.
Leaves and Stem
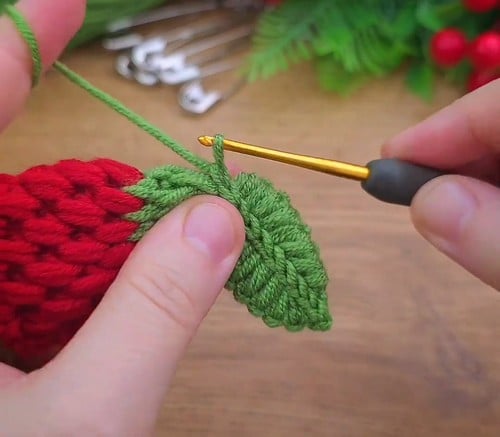
Reattach the green yarn at the top of the strawberry. CH 3, then SL ST back into the first stitch to form a loop. [1 leaf] Repeat this twice more to make three leaves. [3 leaves] Repeat the whole process on the other side of the top to make a second set of three leaves. [6 leaves total] Space the six loops evenly around the top so the cap looks balanced from any angle. Bunched loops on one side make the berry look like it is wearing a hat sideways. If a leaf loop collapses instead of standing out, your slip stitch went into the wrong stitch. It needs to go back into the same stitch the chain started from, or the loop has nowhere to arch. Checkpoint: the finished cap should sit as six small green arches fanning out over the red, all roughly the same size. Hold the keychain up by the leaves. They should stay open rather than flattening against the berry.
Finalize
If using a keychain ring, attach it at the top of the strawberry with the remaining green yarn. Weave in all loose ends, working the tails back through several stitches in different directions. Roll the finished berry between your fingers to round out the shape.
Assembly
There are no separate pieces to join, so this comes down to the ring. Attach the ring at the top of the berry using the green yarn near the leaf cap. Thread the yarn through the ring and back into the fabric several times, not once. This is the point that carries the full weight of a set of keys. Anchor it into the green stem row rather than into a single leaf loop. A leaf loop is one chain thick and will pull apart. Knot off on the back side, then run the tail through four or five stitches before trimming. If you plan to hang real keys off it, a split ring holds better than an open jump ring.
Tips
One practical thing nobody mentions. The wraps are only held by the pin, so if you put the work down mid row and it rolls off the table, the whole start unspools. Hook the pin through a scrap of fabric or park it under something heavy while you’re not stitching.
Stuffing is optional here and depends on whether you seamed the sides. Left flat, the berry curls naturally and needs nothing inside. If seamed, use a pinch of fiberfill only. Enough to round the shape, no more. Push the filling toward the wide top and leave the tip soft. An over-firm tip splays the decrease stitches open and the shape goes blunt. Overstuffing shows first as gaps between the front loop ridges, where the white filling peeks through red fabric. If you can see filling, take some out. Rolling the piece between your palms after stuffing does more for the shape than adding extra filling.
FAQs
Can I use this pattern for a zipper pull?
Yes. To scale down for a zipper pull, use 4ply yarn with a 2.5mm hook. Keep the same wrap count of 10 times around the safety pin.
Why is my strawberry curling into a tube?
This is normal when working front loop only. The back loop stays free and creates a ridge, causing the fabric to curl. Do not try to correct it with tighter tension; let it curl naturally.
How do I make the strawberry stuffed and round?
The original pattern leaves the berry flat. To stuff it, seam the two side edges together with a whip stitch up the back before adding the leaves. Add a small pinch of fiberfill just before finishing the seam.
What kind of yarn is best for this?
Cotton is the best choice because it gives sharper ridge definition and stands up to being carried in a pocket. Avoid fuzzy yarns as they hide the texture.
How do I attach the keychain ring securely?
Anchor the ring into the green stem row, not into a single leaf loop. Thread the yarn through the ring and back into the fabric several times to distribute the weight.
Pin This Crochet Pattern!