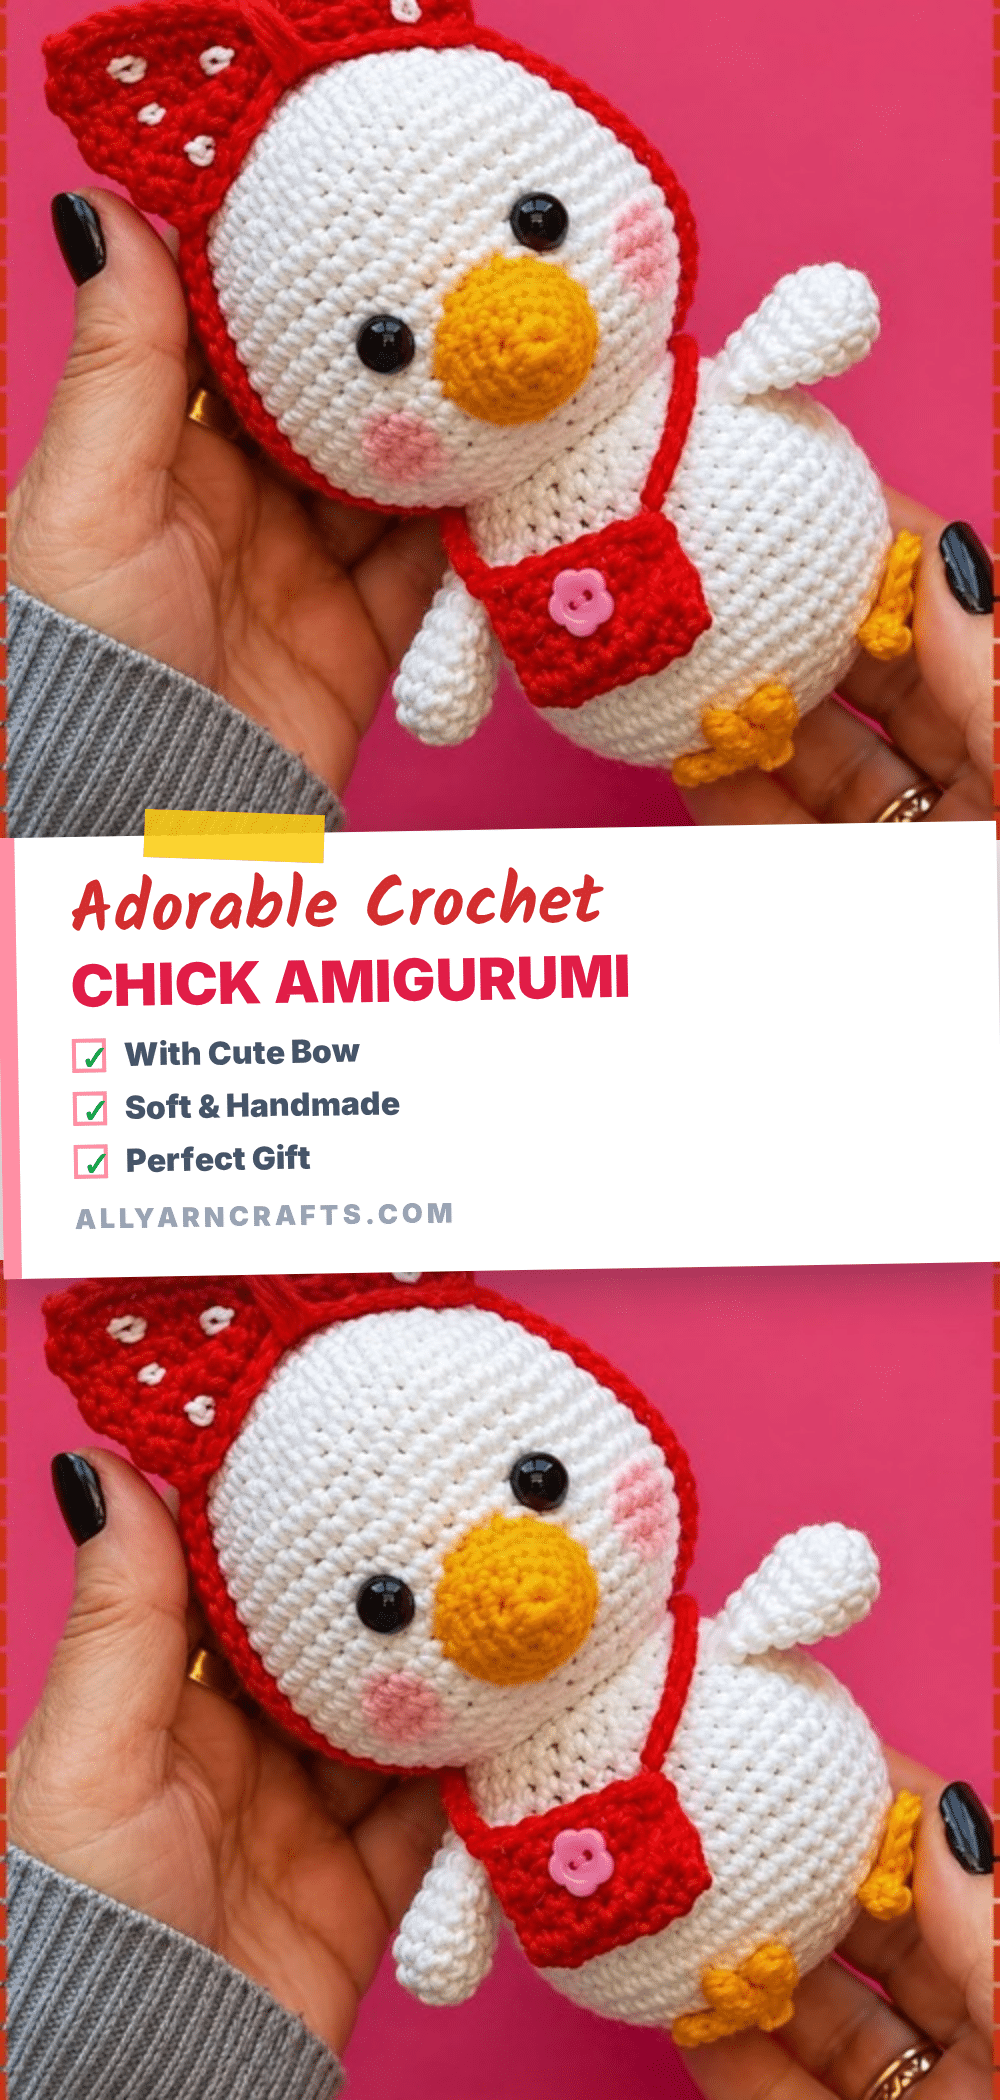
There is a specific kind of magic in the way amigurumi takes shape, round by round, as the spiral of stitches builds a three-dimensional form from a flat circle. This crochet chick pattern captures that progression perfectly, starting with a tight center and expanding into a rounded head and a sturdy, egg-shaped body. The satisfaction comes from watching the geometry unfold—checking the flat disc, ensuring the sides rise into a deep bowl, and finally pinching the decreases to close the piece. It is the little details that keep crocheters hooked: the precise placement of the safety eyes, the subtle curve of the beak, and the charming accessories that transform a simple plush into a character with personality.
Texture and Stitch Notes
The visual appeal of this chick lies in the contrast between the smooth, rounded forms of the body and the flat, geometric nature of its accessories. The head and body are worked in continuous rounds, creating a seamless spiral that hides the joins and gives the plush a professional finish. The wings, however, offer a textural shift; they are worked as short tubes that are flattened and closed, creating a delicate, wing-like flap rather than a stuffed limb. The bow is perhaps the most interesting textural element—it begins as a simple rectangular strip worked in back loops only, but transforms dramatically when pinched and wrapped. This technique creates a soft, gathered texture that contrasts beautifully with the tight stitches of the chick’s face. The headband, a simple chain strip, adds a linear element that frames the face without adding bulk.
Project Overview
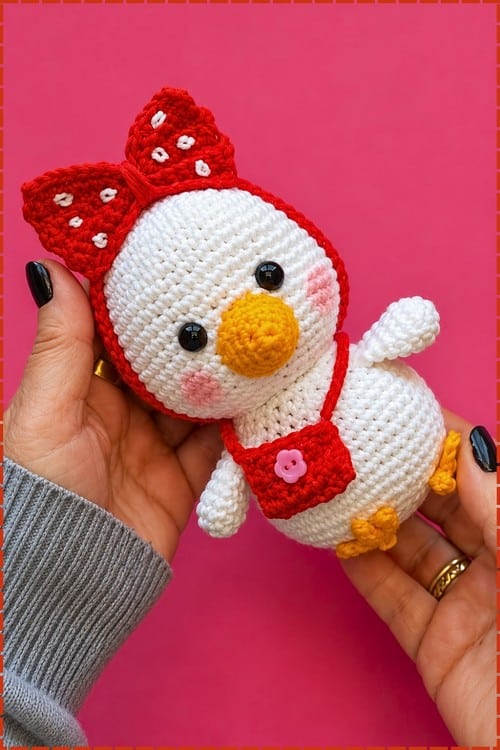
This project is a delightful amigurumi chick, perfect for Easter baskets or as a standalone plush toy. The pattern includes the main chick body, complete with a beak, wings, tail, and feet, along with a set of charming accessories: a dotted bonnet (headband), a large bow, and a tiny shoulder bag. The design is intermediate in difficulty due to the number of pieces and the assembly required, but the individual components are small and quick to work. The finished chick stands approximately 12 to 16 cm tall, making it an ideal size for little hands or as a decorative centerpiece.
Materials
- Yarn: Cotton yarn in white (for head, body, wings, tail), orange (for beak and feet), and red (for bow and small bag).
- Crochet Hook: 2.5 mm hook.
- Eyes: 8 mm or 9 mm safety eyes.
- Stuffing: Fiberfill stuffing.
- Tools: Tapestry needle, stitch markers, scissors.
- Optional: Pink blush for cheeks.
Abbreviations
- sc: single crochet
- inc: increase (2 sc in one stitch)
- dec: decrease
- ch: chain
- sl st: slip stitch
- MR: magic ring
Pattern Notes
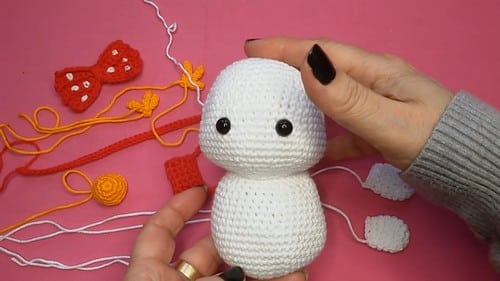
This pattern is worked in continuous rounds. Always use a stitch marker to keep track of the beginning of each round, moving it up as you complete each round. The head and body are worked as separate pieces before assembly. The beak is worked in orange and sits high between the eyes. The body and head are two rounded balls stacked together, with wings out to the sides and small feet at the base. The accessories, including the bonnet, bow, and bag, are added during the final assembly.
Pattern Instructions
Head (White)
Work in continuous rounds. Use a stitch marker.
R1: MR, 6 sc (6)
R2: 6 inc (12). Checkpoint: flat tight circle, ring pulled fully closed.
R3: (1 sc, 1 inc) repeat 6 times (18)
R4: (2 sc, 1 inc) repeat 6 times (24)
R5: (3 sc, 1 inc) repeat 6 times (30)
R6: (4 sc, 1 inc) repeat 6 times (36). Checkpoint: a flat disc about the size of a large coin, no cupping or ruffling at the edge.
R7: Sc in each stitch around (36)
R8: Sc in each stitch around (36)
R9: (5 sc, 1 inc) repeat 6 times (42)
R10: Sc in each stitch around (42)
R11: (6 sc, 1 inc) repeat 6 times (48)
R12: Sc in each stitch around (48)
R13: Sc in each stitch around (48). Checkpoint: the piece should now sit as a deep rounded bowl — sides clearly rising, base curving smoothly, no flat section visible at the bottom.
R14: (7 sc, 1 inc) repeat 6 times (54)
R15: Sc in each stitch around (54)
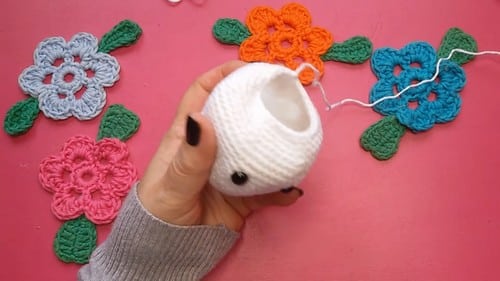
R16: Sc in each stitch around (54). Insert safety eyes between rounds 14 and 15, with 8 stitches between them. Snap the backs on now, while the opening is still wide. This must happen before the decreases begin.
R17: Sc in each stitch around (54)
R18: Sc in each stitch around (54). Checkpoint: the head should look like a full rounded sphere at the top with a wide open base — this is the widest and tallest it will get before closing.
R19: (7 sc, 1 dec) repeat 6 times (48)
R20: (6 sc, 1 dec) repeat 6 times (42)
R21: (5 sc, 1 dec) repeat 6 times (36)
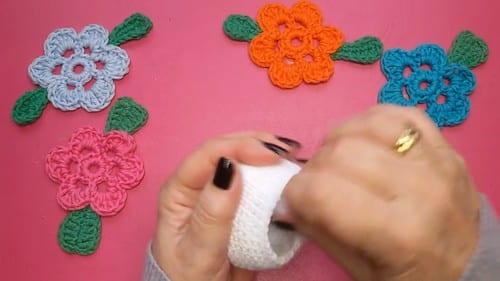
R22: (4 sc, 1 dec) repeat 6 times (30). Checkpoint: stuff firmly here — the opening is narrowing and will close fast over the next rounds if you forget. Stuff the head firmly. Fasten off, leaving a long tail for sewing.
For children under three: skip the safety eyes and embroider both eyes with black yarn in the same position between rounds 14 and 15, hiding tails inside before closing.
Body (White)
Work in continuous rounds. Use a stitch marker.
R1: MR, 6 sc (6)
R2: 6 inc (12)
R3: (1 sc, 1 inc) repeat 6 times (18)
R4: (2 sc, 1 inc) repeat 6 times (24)
R5: (3 sc, 1 inc) repeat 6 times (30)
R6: (4 sc, 1 inc) repeat 6 times (36)
R7: (5 sc, 1 inc) repeat 6 times (42)
R8: (6 sc, 1 inc) repeat 6 times (48). Checkpoint: a broad flat circle — the body widens more quickly than the head because all increases run consecutively without plain rounds between them.
R9: Sc in each stitch around (48)
R10: Sc in each stitch around (48)
R11: Sc in each stitch around (48)
R12: Sc in each stitch around (48). Checkpoint: a wide, even cylinder — deeper than a bowl but without the strong taper the head has. Sides should be straight at this point.
R13: (6 sc, 1 dec) repeat 6 times (42)
R14: Sc in each stitch around (42)
R15: Sc in each stitch around (42)
R16: (5 sc, 1 dec) repeat 6 times (36)
R17: Sc in each stitch around (36)
R18: Sc in each stitch around (36)
R19: (4 sc, 1 dec) repeat 6 times (30)
R20: Sc in each stitch around (30). Checkpoint: the body should now be clearly egg-shaped — wider in the middle, tapered at both ends. Stuff the body firmly, keeping it slightly softer than the head. Fasten off, leaving a tail for sewing.
Beak (Orange)
R1: MR, 6 sc (6)
R2: (1 sc, 1 inc) repeat 3 times (9)
R3: (2 sc, 1 inc) repeat 3 times (12)
R4: (3 sc, 1 inc) repeat 3 times (15). Checkpoint: a shallow cone shape — wider at the open end, pointed at the closed tip. Do not stuff or it will push the face out of shape. Fasten off, leaving a tail for sewing.
Wings — Make 2 (White)
R1: MR, 6 sc (6)
R2: 6 inc (12). Checkpoint: a small flat circle.
R3: Sc in each stitch around (12)
R4: Sc in each stitch around (12)
R5: Sc in each stitch around (12). Checkpoint: a short open tube, like a thimble.
R6: (2 sc, 1 dec) repeat 3 times (9). Flatten the wing. Crochet through both sides with sc to close the edge. Do not stuff. Fasten off, leaving a tail for sewing.
Tail (White)
MR. (Ch 5, sl st back down the chain) repeat 3 times to form 3 tail feathers. Fasten off, leaving a tail for attaching.
Feet — Make 2 (Orange)
MR. (Ch 5, sl st back down the chain) repeat to match the tail style. Fasten off, leaving a tail for attaching.
Headband (Red)
Ch 45. Sl st across the chain. Fasten off, leaving tails for attaching or tying in place.
Bow (Red)
Ch 15.
Row 1: Sc across (14)
Row 2: Sc in back loops only across (14)
Row 3: Sc in back loops only across (14)
Row 4: Sc in back loops only across (14)
Row 5: Sc in back loops only across (14)
Row 6: Sc in back loops only across (14)
Row 7: Sc in back loops only across (14). Fasten off. Pinch the centre of the rectangle and wrap yarn tightly around the middle to form the bow shape. Secure firmly.
Small Bag (Red)
Ch 7.
Row 1: Sc across (6)
Row 2: Sc across (6)
Row 3: Sc across (6)
Row 4: Sc across (6)
Row 5: Sc across (6)
Row 6: Sc across (6)
Row 7: Sc across (6)
Row 8: Sc across (6). Fold the piece into a small pouch. Sew the sides closed. Ch 40 for the strap. Attach the strap to the bag at both ends.
Assembly
- Sew the beak onto the head first, centred directly below the eyes, before attaching the head to the body — the face is easier to work on while the head is loose.
- Apply optional blush to the cheeks now, also while the head is loose and easy to rotate.
- Sew the head securely onto the body, checking from the front that it sits centred and upright. Pin before committing.
- Attach the wings to the sides of the body around round 2 below the neck, one on each side. Pin both before sewing either.
- Sew the feet to the bottom of the body around rounds 5 and 6.
- Sew the tail to the back of the body around rounds 10 and 11.
- Place the headband around the head and secure.
- Attach the bow to the headband or directly onto the head.
- Drape the bag strap across the shoulder and position the bag at the side before sewing the strap down.
Tips
- Stuffing: Stuff the head continuously through the decrease rounds rather than in one push at the end — waiting until the opening is small means uneven lumps with no way to smooth them out.
- Pin Before Sewing: Pin every piece before sewing it. The beak especially — one stitch off centre reads immediately on the finished face.
- Accessories: Position the bag and headband last, once the full character is assembled and you can see how everything sits together. The strap length is forgiving, but the bow placement relative to the eyes matters.
FAQs
Can I use acrylic yarn instead of cotton?
While cotton is recommended for its structure and ease of stitching, you can use acrylic yarn. Keep in mind that acrylic may be slightly fuzzier and might not hold the crisp shape of the bow and bag as well as cotton.
How do I make the chick suitable for toddlers?
For children under three, it is recommended to skip the safety eyes. Instead, embroider the eyes using black yarn in the same position between rounds 14 and 15 of the head, hiding the tails inside the stuffing before closing.
Can I change the color of the bow?
Absolutely. The red bow and bag are the most visible accessories, but you can easily swap the red yarn for any color to match your chick or the recipient’s preferences. This is a quick way to personalize the toy.
What if I don’t have a 2.5 mm hook?
You can use a different hook size, but this will affect the gauge and the final size of your chick. A larger hook will result in a looser stitch and a larger, potentially less dense plush, while a smaller hook will make the work tighter and harder to stitch through.
How do I attach the bag strap?
The bag strap is a chain of 40 stitches. Attach it to both ends of the bag pouch. During assembly, drape the strap across the shoulder to determine the desired length and position before sewing the ends securely to the bag.
Pin This Crochet Pattern!