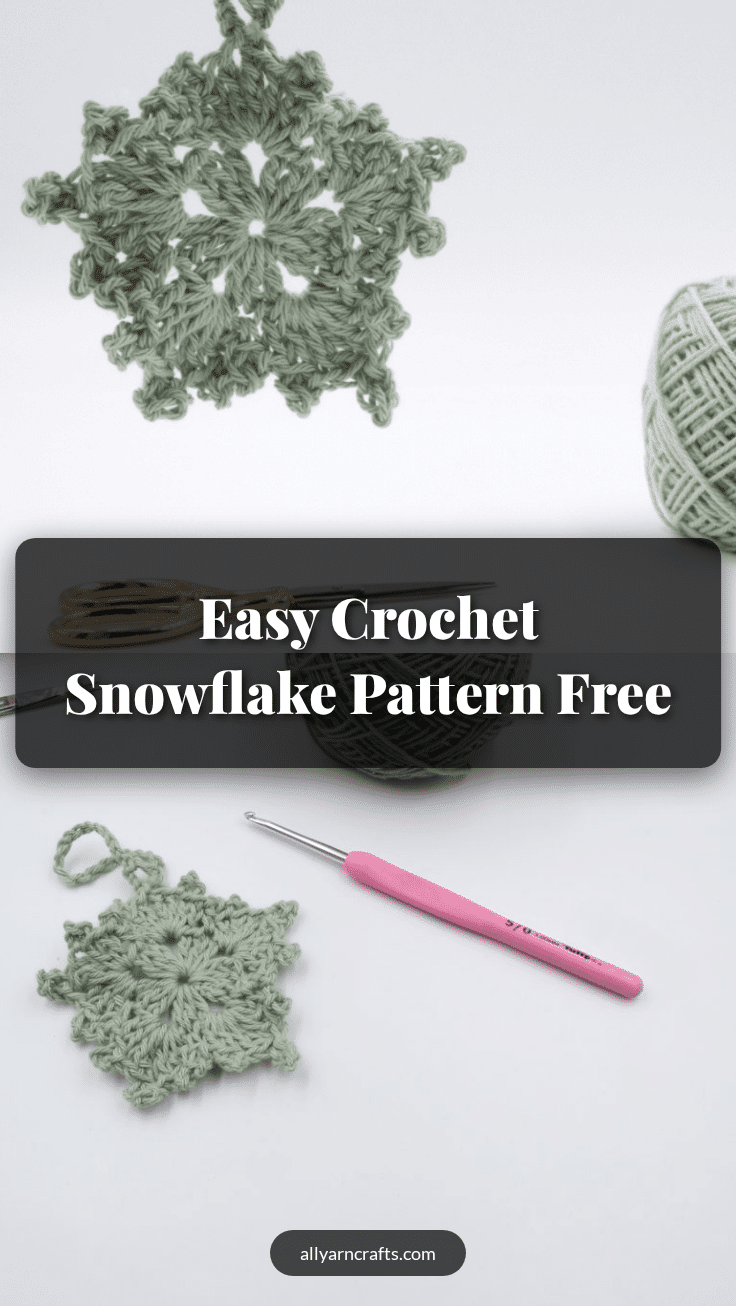
There is something quietly satisfying about the moment a small project begins to take shape. The yarn is on the table, the hook is in hand, and you are just starting to form those first loops. This easy crochet snowflake pattern captures that feeling perfectly. It is a quick, beginner-friendly project that transforms simple stitches into a delicate, festive accent. Whether you are looking to add a touch of winter magic to your tree or create charming gift tags, this design offers a rewarding experience that finishes in under 15 minutes.
Why This Project Works
This snowflake is more than just a quick make; it is a versatile piece that elevates any holiday decor. The combination of double crochets, treble crochets, and picot stitches creates a structure that is both airy and intricate. I love how the finished piece feels light and delicate, making it perfect for hanging on a Christmas tree, attaching to a gift tag, or stringing together to form a festive garland. The use of white cotton or sparkly acrylic yarn enhances its wintry appeal, while the optional stiffening step gives it that crisp, professional finish. It is a wonderful way to practice your picot stitches and enjoy the immediate gratification of a handmade ornament.
Project Overview
This pattern is Part 1 of the Winter Wonderland Series. It is designed to be beginner-friendly, utilizing simple stitches that are easy to master. The step-by-step instructions and video tutorial make it accessible for crocheters of all levels. You can use this snowflake as a standalone ornament, a decorative element for your home, or a thoughtful handmade gift.
Materials
- Yarn: Lightweight cotton or sparkly acrylic yarn (white or festive colors work beautifully)
- Crochet Hook: 3.0 mm
- Notions: Scissors and a yarn needle for weaving in ends
- Optional: Spray starch or fabric stiffener for shaping
Gauge and Finished Size
Gauge and specific finished measurements are not provided for this pattern. The snowflake is worked in the round to create a delicate, lacy structure. The final size will depend on your personal tension and the exact weight of the lightweight yarn used.
Abbreviations
All abbreviations follow US terminology:
- picot: ch 4, sl st into the top of the first ch
- ch: chain
- sl st: slip stitch
- sc: single crochet
- dc: double crochet
- tr: treble crochet
- sp: space
- st: stitch
Pattern Notes
- This pattern is designed to be quick and fun, typically taking less than 15 minutes to complete.
- The finished piece is light and versatile, suitable for ornaments, tags, or table decor.
- For a more structured look, you can stiffen the snowflake using spray starch or fabric glue.
- This design is part of a series that includes upcoming patterns like a crochet star, mini trees, and a mittens garland.
Pattern Instructions
Round 1
- Make a magic ring.
- Ch 2 (this does not count as a stitch).
- Into the ring: [3 dc, ch 2], repeat 4 more times.
- You should now have 5 groups of 3 dc separated by chain-2 spaces.
- Join the round with a slip stitch into the first double crochet.
Round 2
- Sl st two times (until you are in the center of the 3 dc).
- Ch 1 (counts as 1 sc) + 4 ch, sl st into the first chain to create a picot stitch.
- *Work 2 dc into the next chain-2 space. Then make a picot (chain 4, slip stitch into the top of the previous dc), 1 dc, 1 tr, chain 5, sl into the top of the previous treble (picot), 2 dc, 1 picot, 1 dc. Sk the next dc. In the following dc, work 1 sc and 1 picot.*
- Repeat from *-* until you have 5 beautiful snowflake points.
- At the end, sl st into the first ch and fasten off, and weave in the ends.
Assembly
Once you have fastened off and woven in your ends, your snowflake is structurally complete. To hang it, you can add a simple loop of thread or yarn at the top before or after blocking.
Tips
- Blocking and Shaping: To give your snowflake that crisp, elegant finish, gently pin it into shape on a foam board or blocking mat. Then spray it lightly with starch or fabric stiffener and let it dry completely.
- Yarn Choice: While you can use any lightweight yarn, white cotton or sparkly acrylic yarns highlight the delicate details of the picot stitches best.
- Visual Learning: If you prefer following along visually, a step-by-step video tutorial is available to guide you through the process.
FAQs
Is this pattern suitable for beginners?
Yes, this snowflake is designed to be beginner-friendly. It uses simple stitches like single crochet, double crochet, and treble crochet, along with a basic picot stitch. The entire project can be completed in under 15 minutes.
How do I make the snowflake stiff?
To achieve a structured, crisp look, pin the finished snowflake onto a blocking mat or foam board. Lightly spray it with fabric stiffener or starch and allow it to dry completely before removing the pins.
What size hook should I use?
A 3.0 mm crochet hook works beautifully with most lightweight yarns for this pattern. If you prefer a looser or tighter drape, you can adjust the hook size accordingly, though 3.0 mm is recommended for the intended delicate look.
Can I sell finished snowflakes made from this pattern?
You are welcome to make and sell finished items in small quantities. Please credit Yarnhild.com as the designer. The pattern and photos are for personal use only and may not be copied, redistributed, or republished without written permission.
What other projects can I make with this pattern?
This snowflake is versatile enough to be used as a tree ornament, a gift tag, or strung together to create a festive garland. It also pairs well with other winter-themed projects, such as the easy crochet top pattern for beginners or a cozy crochet blanket for a complete winter aesthetic.
Pin This Crochet Pattern!