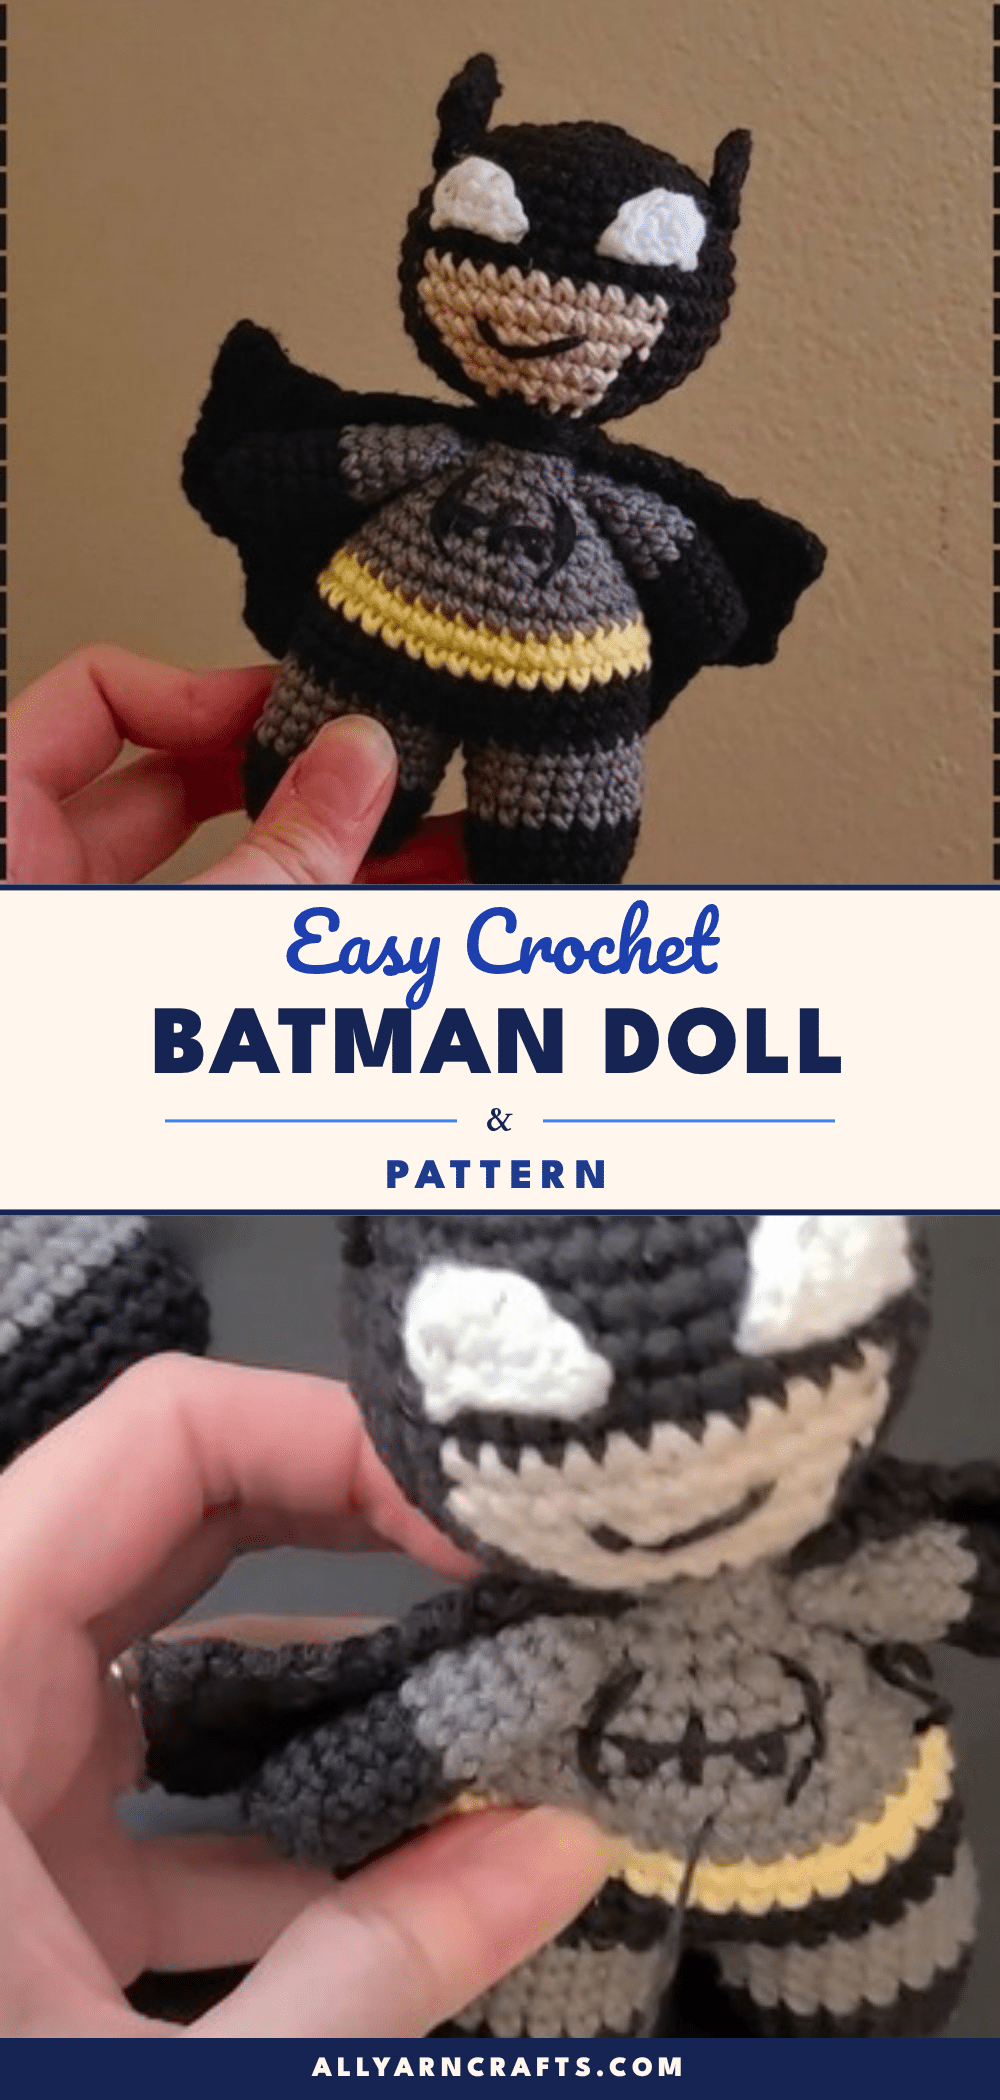
The satisfying snap of a hook catching yarn, the rhythmic rise of stitches, and the gradual formation of a three-dimensional shape—this is where the magic of amigurumi lives. This Batman doll pattern leans into that tactile joy, offering a project where the texture of the yarn and the precision of the shaping tell the story. From the clean horizontal lines of the color-blocked body to the dramatic flare of the cape’s pointed edging, every round builds toward a recognizable silhouette. It is a project for makers who enjoy the challenge of managing multiple yarn strands and the reward of a figure that stands tall and proud.
Texture and Stitch Notes
What makes this pattern particularly engaging is how the stitch choices define the character’s features. The body relies on a back-loop-only round to create a subtle ridge at the ankle, adding a touch of realism to the leg structure. The head introduces a unique color-work technique where the beige face panel and black cowl are worked simultaneously, requiring careful tension management to keep the fabric flat and the lines crisp. Meanwhile, the cape transforms simple single crochet increases into a sweeping, A-line fan shape, finished with a pointed edging row that adds a dramatic, almost accidental flair. These textural details elevate the doll from a simple toy to a crafted piece of art.
Project Overview
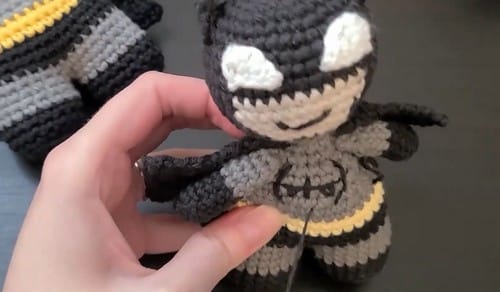
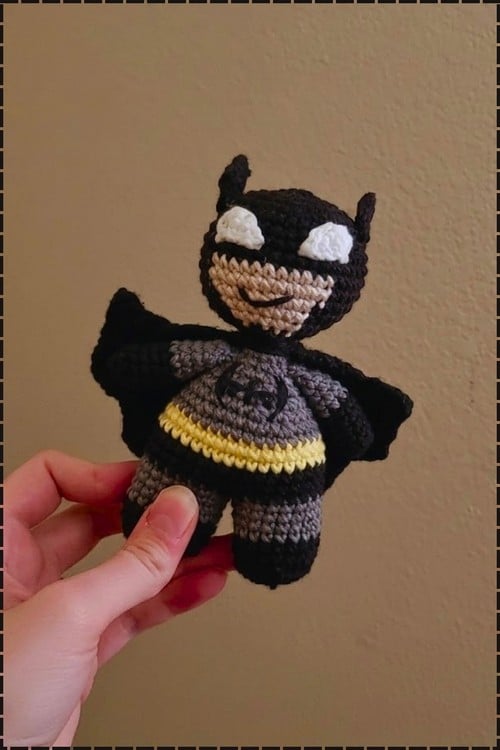
This is an intermediate-to-advanced amigurumi project that results in a detailed Batman doll. The pattern features a continuous body and leg construction, a two-color head with a face panel, and separate components for the arms, eyes, ears, and cape. The construction relies on joined rounds rather than spirals, providing a neat finish to each section. The color palette uses weight 4 yarn in black, gray, yellow, beige, and white to achieve the classic Dark Knight look.
Materials
- Black yarn, weight 4 (main color for legs, body sections, arms, head cowl, bat ears, and cape)
- Gray yarn, weight 4 (for the body middle section and arm upper section)
- Yellow yarn, weight 4 (for the belt band at rounds 14 and 15 of the body)
- Beige or khaki yarn, weight 4 (for the face panel of the head)
- White yarn (for the eye pieces)
- 3.25mm crochet hook
- Scissors
- Yarn needle
- Stitch marker
- Fiberfill stuffing
Gauge and Finished Size
Specific gauge and finished size measurements are not provided in the source pattern. The doll’s size will depend on your individual tension and the exact yardage of the weight 4 yarn used. The pattern relies on stitch counts and shape checkpoints rather than fixed dimensions.
Abbreviations
The pattern uses standard crochet abbreviations. Key terms include:
- sc: single crochet
- inc: increase (2 sc in the same stitch)
- dec: decrease (2 sc together)
- sl st: slip stitch
- ch: chain
- hdc: half double crochet
- dc: double crochet
- sc2tog: single crochet two together (decrease)
Pattern Notes
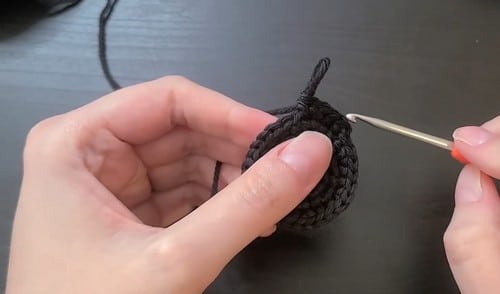
- Round Construction: This pattern uses joined rounds with a slip stitch and chain 1 between rounds, not continuous spiral rounds. Each round ends with a slip stitch into the first stitch and begins with a chain 1. Keep your stitch marker at the chain 1 of each round.
- Color Changes: Color changes happen on the last pull-through of the final stitch of the preceding round, so the new color appears cleanly at the start of the next round.
- Head Start: Round 2 of the head uses a specific increase sequence: 1 single crochet then increase, repeated two more times, for a total of 9 stitches. This is an unusual starting count for an amigurumi head — most heads start from 6 and increase to 12 in round 2. The sequence here produces 9, which is correct as written and is what the subsequent rounds build from. Count carefully at round 2 before continuing.
- Cape Edging: The cape edging row 14 is written descriptively in the source without a final stitch count. The pointed sections use a chain-1 to create the peak of each point, and the number of points depends on how the 40 stitches from row 13 divide across the repeat. Work the row as written and count the points when finished rather than tracking stitch by stitch.
Pattern Instructions
Legs
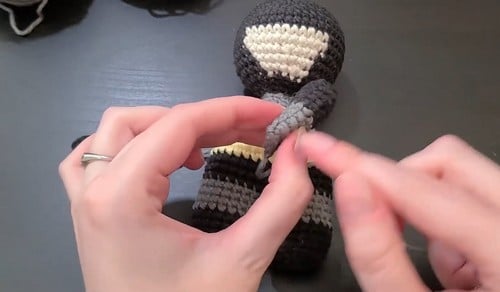
Make two pieces. Work rounds 1 through 9 for both legs.
- Round 1: Using black yarn, make a magic circle, chain 2, work 6 single crochet into the second chain from the hook, slip stitch into the first stitch, chain 1 for 6 stitches
- Round 2: Increase in each stitch around, slip stitch, chain 1 for 12 stitches
- Round 3: Work 1 single crochet then increase, repeat all the way around, slip stitch, chain 1 for 18 stitches
- Round 4: Work in back loops only, single crochet in each back loop around, slip stitch, chain 1 for 18 stitches
- Rounds 5 to 6: Work through both loops, single crochet in each stitch around, slip stitch, chain 1 for 18 stitches
- Rounds 7 to 9: Change to gray yarn before finishing the last stitch of round 6, single crochet in each stitch around, slip stitch, chain 1 for 18 stitches
Shape checkpoint: after round 9 each leg should be a solid tube about 1.5 to 2 inches tall, with a clean horizontal color division between the black foot section and the gray upper leg. The back-loop-only round 4 creates a visible ridge line at the ankle. For leg 1: fasten off, weave in ends, and stuff firmly. For leg 2: repeat all rounds but do not fasten off — this leg continues directly into the body.
Body
Continue from leg 2 without cutting the yarn.
- Round 10: With leg 2 still on the hook, single crochet around leg 1 for 18 stitches, then single crochet around leg 2 for 18 stitches, change to black yarn before finishing the last stitch, slip stitch, chain 1 for 36 stitches
- Rounds 11 to 13: Using black yarn, single crochet in each stitch around, slip stitch, chain 1 for 36 stitches
- Rounds 14 to 15: Change to yellow yarn before finishing the last stitch of round 13, single crochet in each stitch around, slip stitch, chain 1 for 36 stitches. Cut black yarn after round 15
- Round 16: Change to gray yarn before finishing the last stitch of round 15, cut yellow yarn. Work 7 single crochet then 1 decrease then 15 single crochet then 1 decrease then single crochet for the rest of the round, slip stitch, chain 1 for 32 stitches
- Round 17: Work 3 single crochet then 1 decrease, repeat 6 single crochet then 1 decrease three more times, then 3 single crochet, slip stitch, chain 1 for 28 stitches
- Round 18: Work 5 single crochet then 1 decrease, repeat 5 single crochet then 1 decrease three more times, slip stitch, chain 1 for 24 stitches
- Round 19: Work 2 single crochet then 1 decrease, repeat 4 single crochet then 1 decrease three more times, then 2 single crochet, slip stitch, chain 1 for 20 stitches
- Round 20: Single crochet in each stitch around, slip stitch, chain 1. Continue stuffing the body as you work for 20 stitches
- Round 21: Work 3 single crochet then 1 decrease, repeat 3 single crochet then 1 decrease three more times, slip stitch, chain 1 for 16 stitches
- Round 22: Work 1 single crochet then 1 decrease, repeat 2 single crochet then 1 decrease three more times, then 1 single crochet, slip stitch, chain 1 for 12 stitches
- Round 23: Single crochet in each stitch around, slip stitch into the first stitch, fasten off leaving a long tail for sewing. Finish stuffing the body for 12 stitches
Shape checkpoint: after round 10 the joined piece should sit as a wide squat cylinder with two tubes hanging from the bottom. The join should lie flat — if one leg is sitting higher than the other, the tension pulling across the join was uneven. After round 19 the torso should clearly taper toward a neck opening. The yellow belt band from rounds 14 and 15 should sit as a clean stripe across the lower body, contrasting against the black and gray sections above and below.
Head
The head uses two colors simultaneously across rounds 11 through 15. Have the beige yarn ready from round 11 onward. Cut and weave out the beige yarn after round 15 before continuing the decrease rounds in black only.
- Round 1: Make a magic circle, chain 2, work 6 single crochet into the second chain from the hook, slip stitch, chain 1 for 6 stitches
- Round 2: Work 1 single crochet then increase, repeat 1 single crochet then increase two more times, slip stitch, chain 1 for 9 stitches
- Round 3: Work 1 single crochet then increase, repeat 1 single crochet then increase three more times, then increase in the last stitch, slip stitch, chain 1 for 14 stitches
- Round 4: Work 1 single crochet then increase, repeat 1 single crochet then increase six more times, slip stitch, chain 1 for 21 stitches
- Round 5: Work 2 single crochet then increase, repeat 2 single crochet then increase six more times, slip stitch, chain 1 for 28 stitches
- Round 6: Work 3 single crochet then increase, repeat 3 single crochet then increase six more times, slip stitch, chain 1 for 35 stitches
- Round 7: Single crochet in each stitch around, slip stitch, chain 1 for 35 stitches
- Round 8: Work 2 single crochet then increase, repeat 4 single crochet then increase six times, then 2 single crochet, slip stitch, chain 1 for 42 stitches
- Rounds 9 to 10: Single crochet in each stitch around, slip stitch, chain 1 for 42 stitches
Shape checkpoint: after round 10 the head base should be a clear dome, wider than the body opening it will sit on. The fabric should be firm enough that it holds its shape when set down.
Color work rounds — black and beige:
- Round 11: Using black yarn work 15 single crochet, switch to beige yarn work 11 single crochet, switch back to black yarn and single crochet to finish the round, slip stitch, chain 1 for 42 stitches
- Round 12: Repeat round 11, slip stitch, chain 1 for 42 stitches
- Round 13: With black yarn work 2 single crochet then decrease, repeat 4 single crochet then decrease two times. Switch to beige yarn work 4 single crochet then decrease then 3 single crochet. Switch back to black yarn work 1 single crochet then decrease, repeat 4 single crochet then decrease two more times, then 2 single crochet, slip stitch, chain 1 for 35 stitches
- Round 14: With black yarn work 14 single crochet. Switch to beige yarn work 7 single crochet. Switch back to black yarn work 14 single crochet, slip stitch, chain 1 for 35 stitches
- Round 15: With black yarn work 3 single crochet then decrease, repeat 3 single crochet then decrease two more times. Switch to beige yarn work 3 single crochet then decrease then 1 single crochet. Switch back to black yarn work 2 single crochet then decrease, repeat 3 single crochet then decrease two more times, slip stitch, chain 1 for 28 stitches
Decrease rounds — black yarn only:
- Round 16: Cut beige yarn and weave the end out. Work 1 single crochet then decrease, repeat 2 single crochet then decrease six times, then 1 single crochet, slip stitch, chain 1. Stuff the head at this point for 21 stitches
- Round 17: Work 1 single crochet then decrease, repeat 1 single crochet then decrease six more times, slip stitch, chain 1 for 14 stitches
- Round 18: Work 5 single crochet then decrease, repeat 5 single crochet then decrease one more time, slip stitch into the first stitch, fasten off leaving a long tail for sewing for 12 stitches
Shape checkpoint: after round 18 the head should be a fully closed dome with the beige face panel visible across the lower front. The black cowl surrounds it on all sides and across the top.
Arms
Make two pieces.
- Round 1: Using black yarn, make a magic circle, chain 2, work 6 single crochet into the second chain from the hook, slip stitch, chain 1 for 6 stitches
- Round 2: Work 1 single crochet then increase, repeat two more times around, slip stitch, chain 1 for 9 stitches
- Rounds 3 to 6: Single crochet in each stitch around, slip stitch, chain 1 for 9 stitches
- Rounds 7 to 10: Change to gray yarn before finishing the last stitch of round 6, cut black yarn, single crochet in each stitch around, slip stitch, chain 1. Lightly stuff the arm as you work for 9 stitches
- Round 11: Fold the arm flat, skip the first stitch, work a decrease through the second and third stitch, then work 1 single crochet, chain 1, cut a 6 to 8 inch tail for sewing for 3 stitches
Shape checkpoint: the finished arm should be a two-tone tube — black at the hand end, gray at the shoulder — flattened and closed at the top into 3 stitches ready for sewing.
Eyes
Make two pieces, in white yarn.
- Row 1: Chain 4, work in the back bumps of the chain. Single crochet in the second chain from the hook, then 2 more single crochet, chain 1, turn for 3 stitches
- Row 2: Work 1 half double crochet in the first stitch, 1 single crochet, 1 slip stitch, and 1 more slip stitch, chain 1, cut a long tail for sewing for 4 stitches
These are flat oval-ish pieces that taper at one end. The taper sits toward the outer corner of the face when positioned.
Bat Ears
Make two pieces, in black yarn.
- Row 1: Chain 5, work in the back bumps of the chain. Single crochet in the second chain from the hook, then 3 more single crochet, turn for 4 stitches
- Row 2: Single crochet in each stitch across, chain 1, turn for 4 stitches
- Row 3: Slip stitch in the second stitch, work 1 single crochet then increase in the last stitch, chain 1, turn for 4 stitches
- Row 4: Increase in the first stitch, then 2 single crochet, work slip stitches all the way down the side for edging, chain 1, fasten off leaving a long tail for sewing
Cape
Worked flat in rows, black yarn.
- Row 1: Chain 10, work in the back bumps of the chain. Single crochet in the second bump from the hook, then 8 more single crochet across, chain 1, turn for 9 stitches
- Row 2: Single crochet in the second stitch then increase, repeat 2 single crochet then increase two more times across, chain 1, turn for 12 stitches
- Row 3: Work 2 single crochet then increase, repeat 3 single crochet then increase two more times across, chain 1, turn for 15 stitches
- Row 4: Work 3 single crochet then increase, repeat 4 single crochet then increase two more times across, chain 1, turn for 18 stitches
- Row 5: Single crochet in each stitch across, chain 1, turn for 18 stitches
- Row 6: Work 4 single crochet then increase, repeat 5 single crochet then increase two more times across, chain 1, turn for 21 stitches
- Row 7: Single crochet in each stitch across, chain 1, turn for 21 stitches
- Row 8: Work 5 single crochet then increase, repeat 6 single crochet then increase two more times across, chain 1, turn for 24 stitches
- Row 9: Work 6 single crochet then increase, repeat 7 single crochet then increase two more times across, chain 1, turn for 27 stitches
- Row 10: Work 7 single crochet then increase, repeat 8 single crochet then increase two more times across, chain 1, turn for 30 stitches
- Row 11: Work 8 single crochet then increase, repeat 9 single crochet then increase two more times across, chain 1, turn for 33 stitches
- Row 12: Work 9 single crochet then increase, repeat 10 single crochet then increase two more times across, chain 1, turn for 36 stitches
- Row 13: Work 7 single crochet then increase, repeat 8 single crochet then increase three more times across, chain 1, turn for 40 stitches
Shape checkpoint: after row 13 the cape should be a wide fan shape, noticeably flared compared to the narrow starting rows. Lay it flat — it should spread across the table with the increase rows creating a clear A-line splay from top to bottom.
Cape edging row:
- Row 14: Work 3 slip stitches, then 1 single crochet, then 1 half double crochet. In the next stitch work 1 half double crochet and 1 double crochet, chain 1. In the next stitch work 1 double crochet and 1 half double crochet. Then 1 half double crochet, then 1 single crochet. Repeat this pointed section two more times across. Work 1 half double crochet. In the next stitch work 1 half double crochet and 1 double crochet, chain 1. In the next stitch work 1 double crochet and 1 half double crochet. Then 1 half double crochet, then 1 single crochet. Slip stitch across the rest of the row, chain 1, fasten off leaving a long tail for sewing
Assembly
Pin everything before sewing a single stitch. Start with the head: align it centered over the body’s 12-stitch neck opening and sew down using the long tail from the head. Check the angle — the face panel should look straight forward, not tilted to one side — before committing. Sew the arms to the sides of the body just below the neck, one on each side. The flat closed end of the arm sews flat against the body fabric. The gray end is the shoulder end. Sew the white eye pieces onto the beige face panel, positioned symmetrically across the face. They taper toward the outer corners. Stitch a small dark line for the mouth below the eye line if desired — a single straight stitch or a short curved line, both read correctly. Attach the bat ears to the top of the head between rounds 7 and 8, about three stitches from the outer corner of each eye position. The ears should stand upright rather than lean inward or outward — if they fall, an extra anchor stitch at the base helps. Sew the cape to the back of the neck and across the shoulder line so it drapes behind the body. The narrow top edge of the cape is the attachment edge. The pointed bottom hangs free. Weave in all remaining ends.
Tips
- Toy Safety: For a toy going to a young child, the same approach works — sewn fabric eyes are already safer than hardware — but reinforce each eye with several passes of yarn through the back of the head fabric before trimming the tail.
- Managing Two Yarns: The color work in the head cowl can cause tangling. Keep the black and beige balls on opposite sides of your work and let the yarn you’re not using hang loose at the back. When switching, bring the new color up from underneath the color you just dropped — this locks the carry yarn against the back of the fabric and stops gaps showing on the front. It gets easier after the first color-work round.
- Skip the Cape? Can I skip the cape and still have a complete figure? The figure reads as finished without the cape — the color work on the head and the bat ears carry most of the visual identity. The cape adds considerable time for what is ultimately a draped back panel, so skipping it is a reasonable choice for a faster make.
- Stiff Ears: My bat ears are flopping over rather than standing. What helps? Sew the base of each ear through several stitches rather than just one or two, and add an extra anchor stitch through the middle of the ear base going backward through the head fabric. Stiffening the ear with a tiny piece of pipe cleaner bent inside before sewing is another option if you want a guaranteed upright result.
- Fixing Color Work: The head face panel looks uneven across the color change lines. Can I fix it after the fact? Small unevenness at the color join is normal in colorwork — the switch points almost always show slightly. A single duplicate stitch in the correct color worked over the problem stitch can clean it up after the head is finished. Do it before assembly so you can still access the back of the fabric.
FAQs
What hook size should I use for this pattern?
The pattern specifies a 3.25mm crochet hook. Using this size helps maintain the tight gauge necessary for amigurumi to prevent stuffing from showing through.
Do I need safety eyes for the Batman doll?
No, this pattern uses white yarn pieces for the eyes rather than safety eyes. The eyes are small flat ovals sewn onto the beige face panel during assembly, which is also a safer option for young children.
How do I manage the two colors in the head cowl?
Keep the black and beige yarn balls on opposite sides of your work. When switching colors, bring the new color up from underneath the old color to lock the carry yarn against the back of the fabric. This prevents gaps and keeps the tension even.
Can I make this doll smaller or larger?
While the pattern is written for weight 4 yarn and a 3.25mm hook, you can adjust the size by changing the yarn weight and hook size. However, you will need to adjust the stitch counts accordingly to maintain the proportions.
Why are the rounds joined instead of worked in a spiral?
Joined rounds create a neat, visible line at the end of each round, which can help with counting and maintaining a consistent shape. It also prevents the spiral staircase effect that can occur in continuous rounds, giving the doll a more structured look.
Is this pattern suitable for beginners?
This is considered an intermediate-to-advanced make due to the color work in the head and the multiple components. Beginners might find the joined rounds and color changes challenging, but it is a great project for those looking to expand their skills.
Pin This Crochet Pattern!