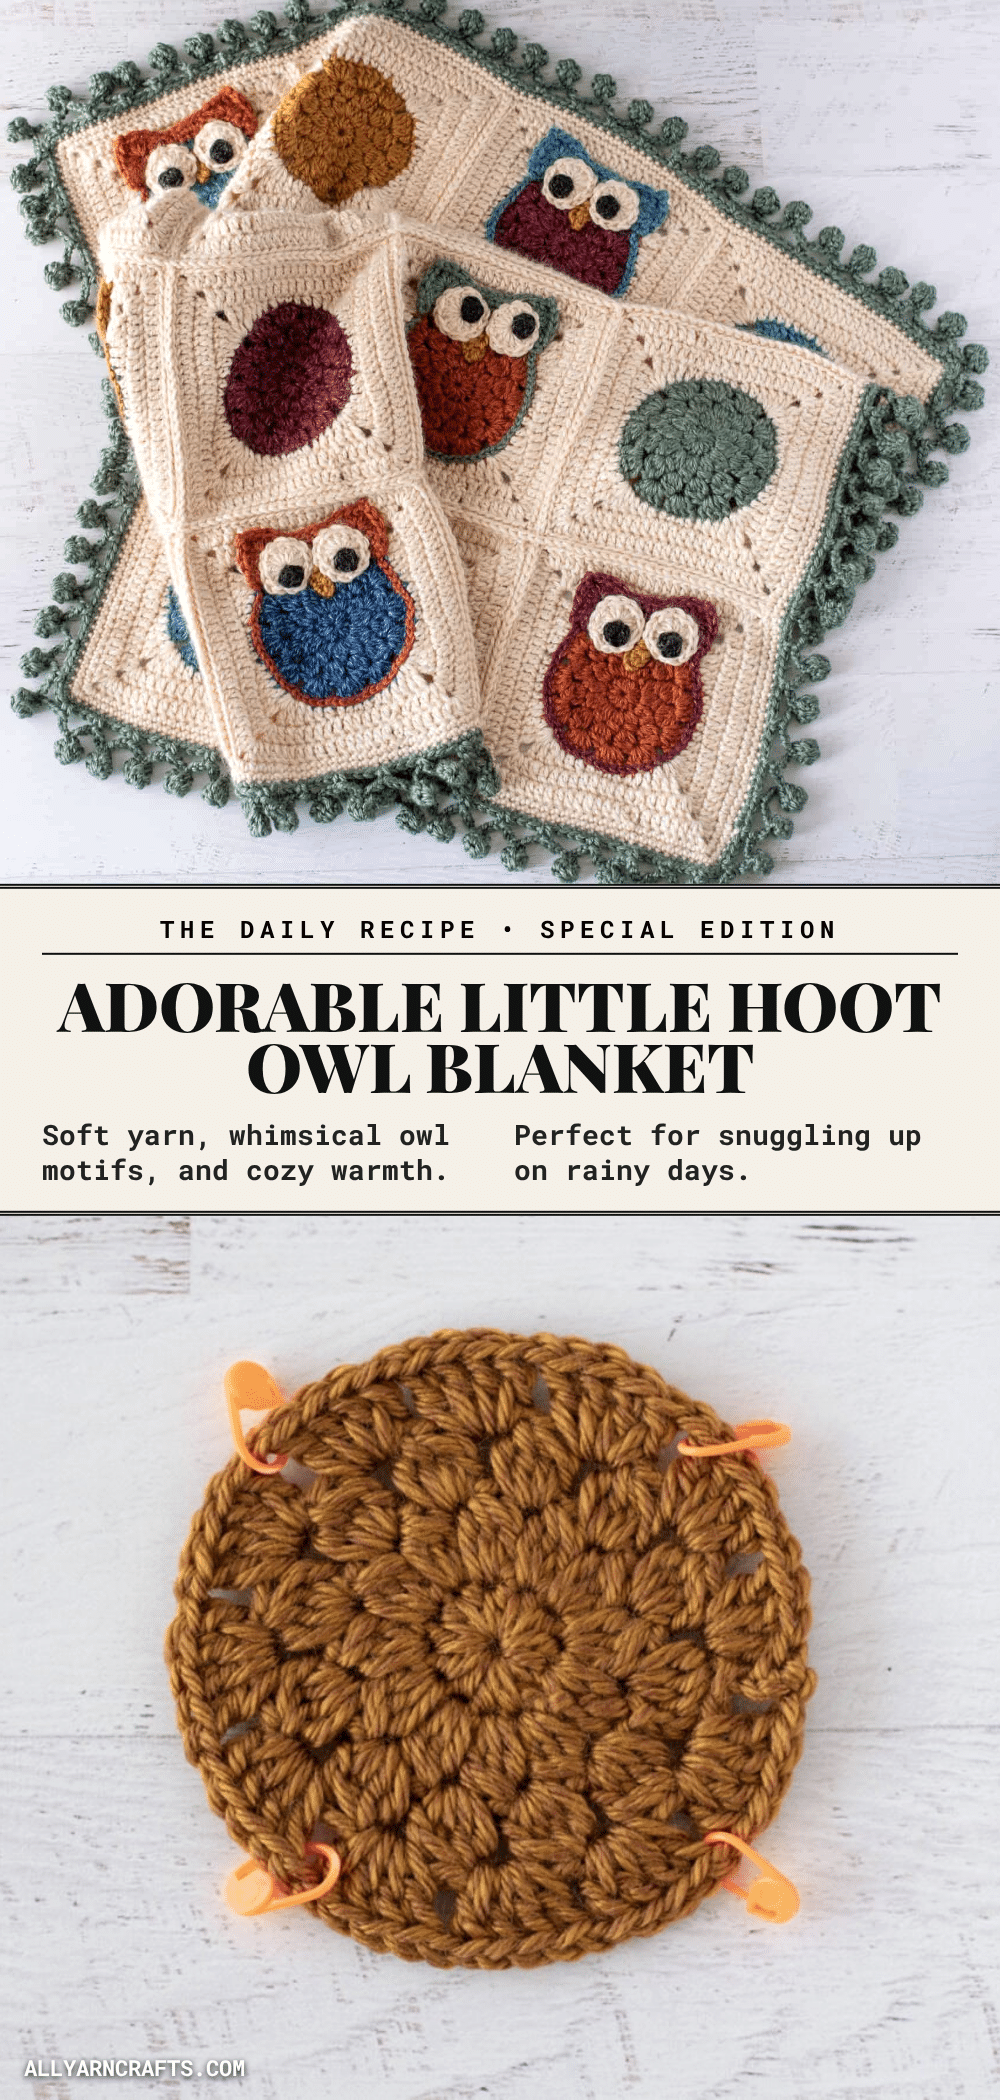
There is something undeniably magical about bringing a nursery to life with handmade touches, and few projects capture that whimsy quite like the Cozy Little Hoot Crochet Owl Blanket. Designed as a wearable afghan perfect for a new arrival, this pattern transforms a classic granny square into a charming woodland friend. The design cleverly integrates the owl’s ears directly into the square’s structure, ensuring they lay flat and stay secure, while a playful pom pom border adds a textural finish that is as delightful to touch as it is to look at.
Seasonal Styling Ideas
While this blanket is a year-round favorite, its color palette and motif make it particularly special for specific seasons. The earthy tones of the Lion Brand Heartland yarn—such as the Rocky Mountains green and Badlands red—make it a perfect companion for autumn nursery decor or a cozy winter gift. However, the ivory background keeps it fresh and airy for spring arrivals. Because the owls are designed to “look” at one another, you can style the finished blanket on a crib or chair to create a narrative scene where the owls seem to be having a quiet conversation, adding a layer of storytelling to the decor.
Project Overview
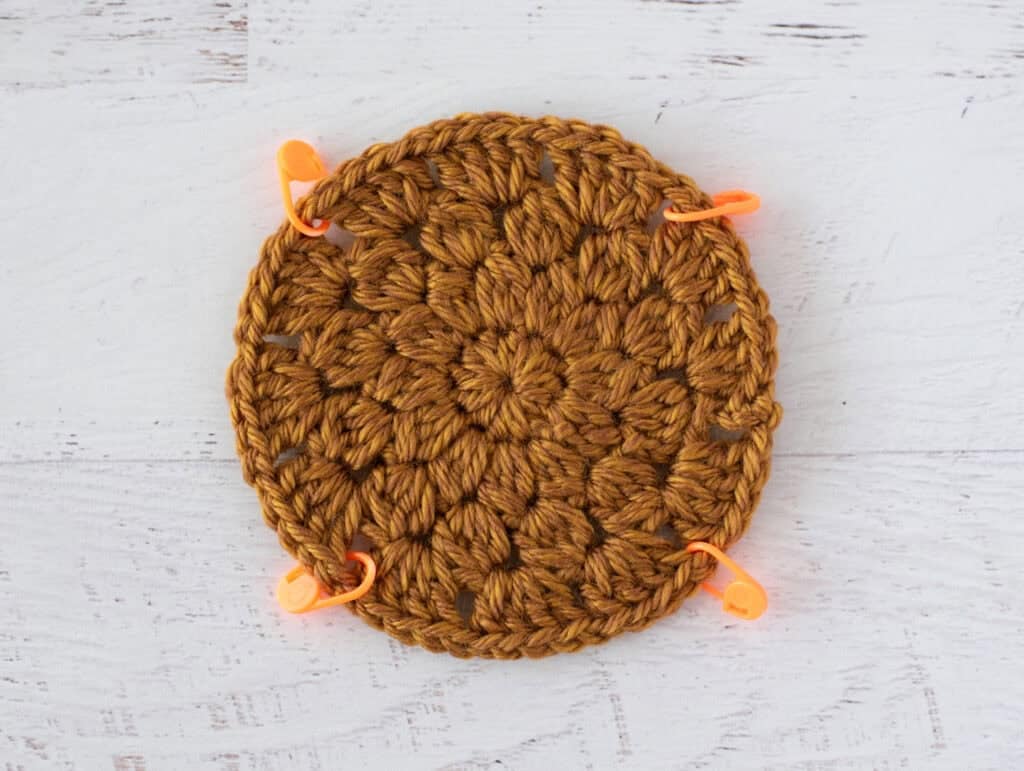
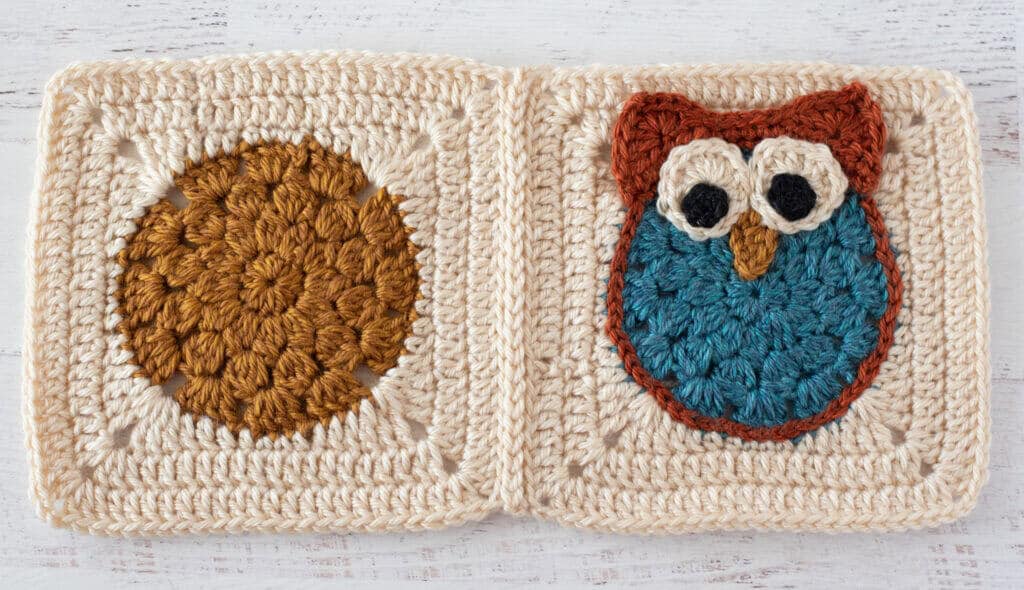
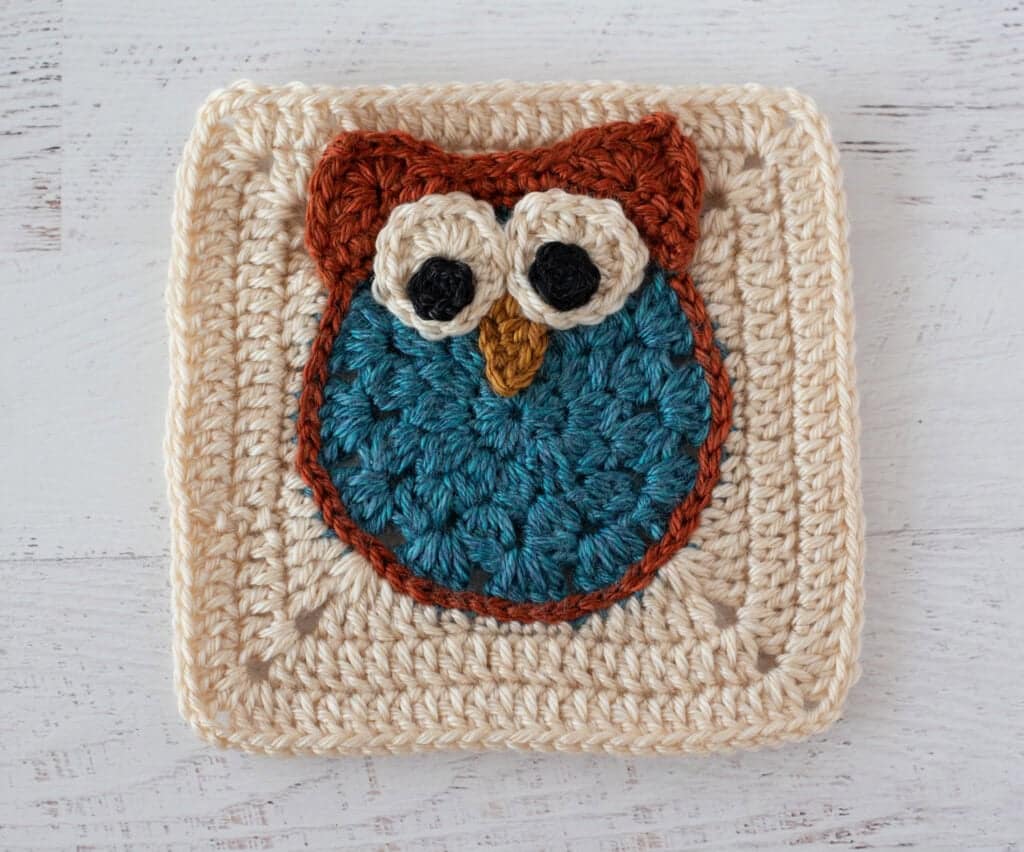
This project is a motif-based afghan comprised of 16 squares. The design features a mix of regular background squares and owl blocks. All squares begin with a 4-round center motif. Half of the motifs are completed as standard squares in ivory, while the other eight become owl blocks. These owl blocks feature ears worked in the front loops only of the top of the head, followed by rounds of ivory. To finish the owl face, surface crochet is used to outline the ears, and appliqued eyes, pupils, and a nose are sewn on. The squares are then joined, and a unique pom pom border is added.
Materials
For this project, you will need Lion Brand Heartland, a size 4 worsted weight, 100% acrylic yarn (251 yds/230m per 5oz/142g skein). You can find this yarn at Herrschners, Amazon, or Lion Brand.
- Ivory (Acadia): 4 Skeins
- Green (Rocky Mountains): 2 Skeins
- Red (Badlands): 1 Skein
- Orange (Yosemite): 1 Skein
- Gold (Bryce Canyon): 1 Skein
- Med Blue (Glacier Bay): 1 Skein
- Dark Blue (Olympic): 1 Skein
- Black (Black Canyon): Small amount for pupils
- Hook: US G+7/4.50 mm crochet hook
- Notions: Stitch markers, tapestry needle, and scissors
Note: It is important to get the same dye lot for colors requiring more than one skein, as there can be significant variation between dye lots in this yarn line.
Gauge and Finished Size
The gauge for this pattern is 8 dc to 2 inches. Alternatively, the inner circle (rounds 1-4) should measure 4.25” in diameter. The finished afghan measures 31” x 31” including the pom pom border, with each square measuring approximately 7” square.
Abbreviations
- dc = double crochet
- hdc = half double crochet
- sc = single crochet
- sl st = slip stitch
- st = stitch(es)
- tr = treble crochet
Pattern Notes
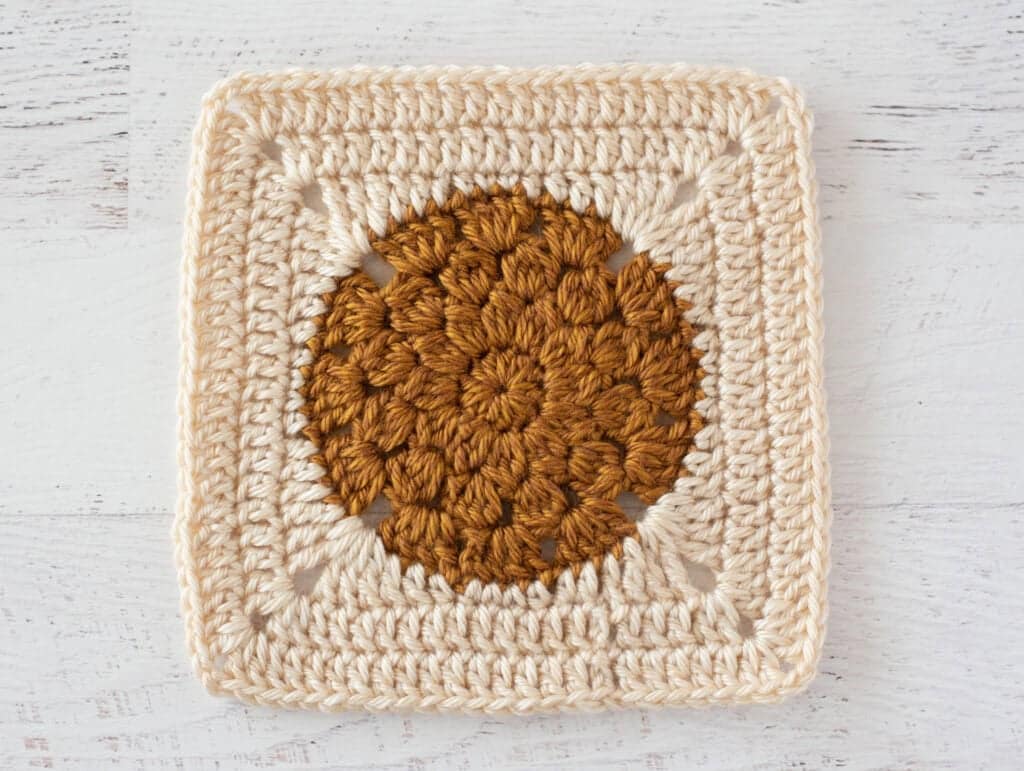
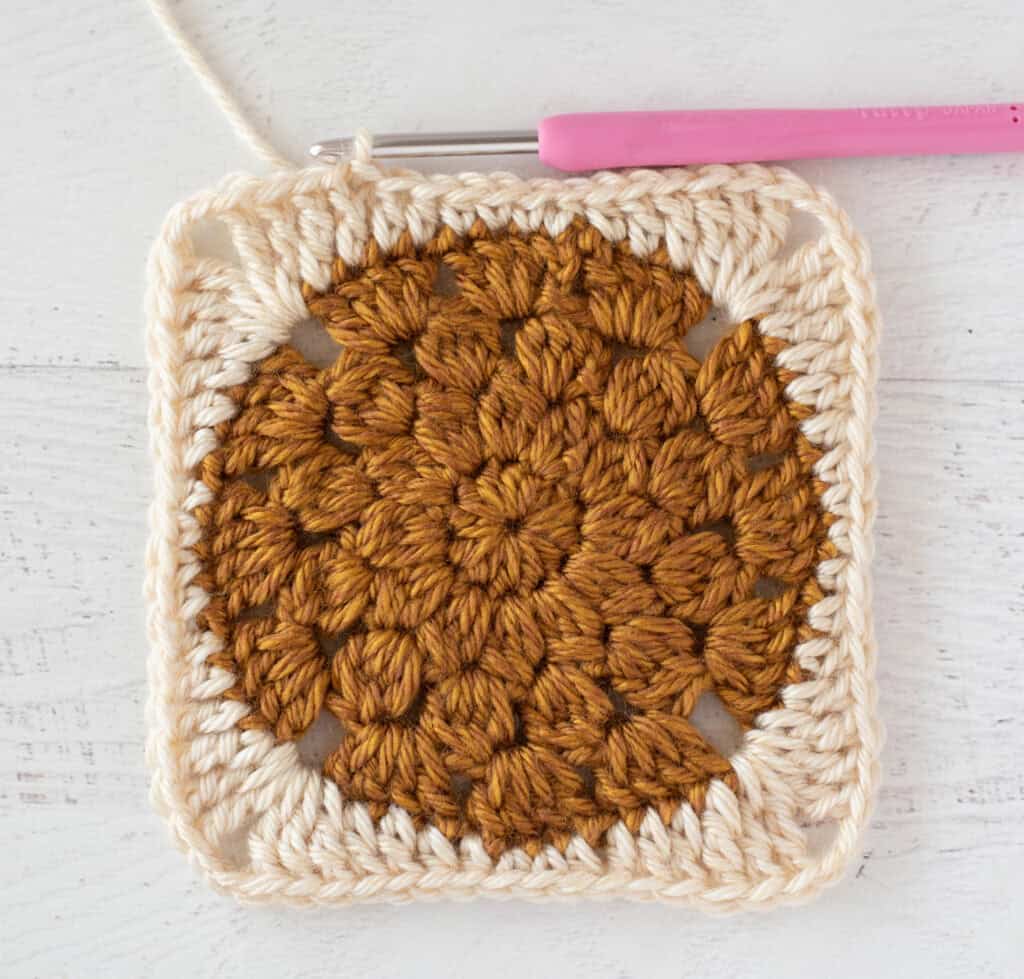
The afghan is comprised of 16 squares. All 16 squares start with a 4-round center motif. For half of the motifs, rounds 5-7 are worked in ivory and turned into squares. The remaining 8 motifs become the owl blocks, starting with the ears worked in the front loops only of the top of the head. Then rounds of ivory are worked similarly to the non-owl squares. An outline of surface crochet to match the ears is worked around the circle motif and finally appliqued eyes, pupils and nose are sewn on to the owls. Then the squares are joined and the border is worked.
The afghan can easily be enlarged by adding more blocks; simply buy more yarn to accommodate additional squares. Note that it’s important to get the same dye lot of yarn for colors requiring more than one skein. I found a lot of variation between dye lots with this particular yarn line. I’ve provided the color combinations I used in this baby afghan.
I found it easiest to lay out the 16 motifs and audition various options to determine best color placement before deciding on ear color. Note that the same gold color is used for the beak, so I opted to avoid using gold for an owl block for this reason. I enjoyed playing with the eye placement so that the owls could look at one another. This requires a bit of thought, especially if you wish to sew on the eye applique pieces prior to seaming the afghan.
Color Combinations
For the baby afghan shown, here are the motif colors used:
- Red: 2 Owl Blocks, 1 Regular Block (Total 3)
- Orange: 2 Owl Blocks, 1 Regular Block (Total 3)
- Gold: 0 Owl Blocks, 2 Regular Blocks (Total 2)
- Green: 2 Owl Blocks, 1 Regular Block (Total 3)
- Medium Blue: 1 Owl Block, 2 Regular Blocks (Total 3)
- Dark Blue: 1 Owl Block, 1 Regular Block (Total 2)
Special Stitches
This project uses cluster stitches that are worked similarly. A basic Cluster Stitch tutorial follows the stitch descriptions.
2dcc (2 double crochet cluster): *yarn over, insert hook in stitch, yarn over and pull through stitch, yarn over and pull through first 2 loops on hook*. Repeat from * to * once in same st. There are now 3 loops on hook. Yarn over and pull through all 3 loops on hook.
3dcc (3 double crochet cluster): *yarn over, insert hook in stitch, yarn over and pull through stitch, yarn over and pull through first 2 loops on hook*. Repeat from * to * two more times in same st. There are now 4 loops on hook. Yarn over and pull through all 4 loops on hook.
4dcc (4 double crochet cluster): *yarn over, insert hook in stitch, yarn over and pull through stitch, yarn over and pull through first 2 loops on hook*. Repeat from * to * three more times in same st. There are now 5 loops on hook. Yarn over and pull through all 4 loops on hook.
Standing Double Crochet: A standing double crochet starts with a slip stitch on the hook. Then carefully yarn over and hold against the hook. Insert hook into the stitch, then make a double crochet as usual.
Pattern Instructions
Center Motifs (Make 16)
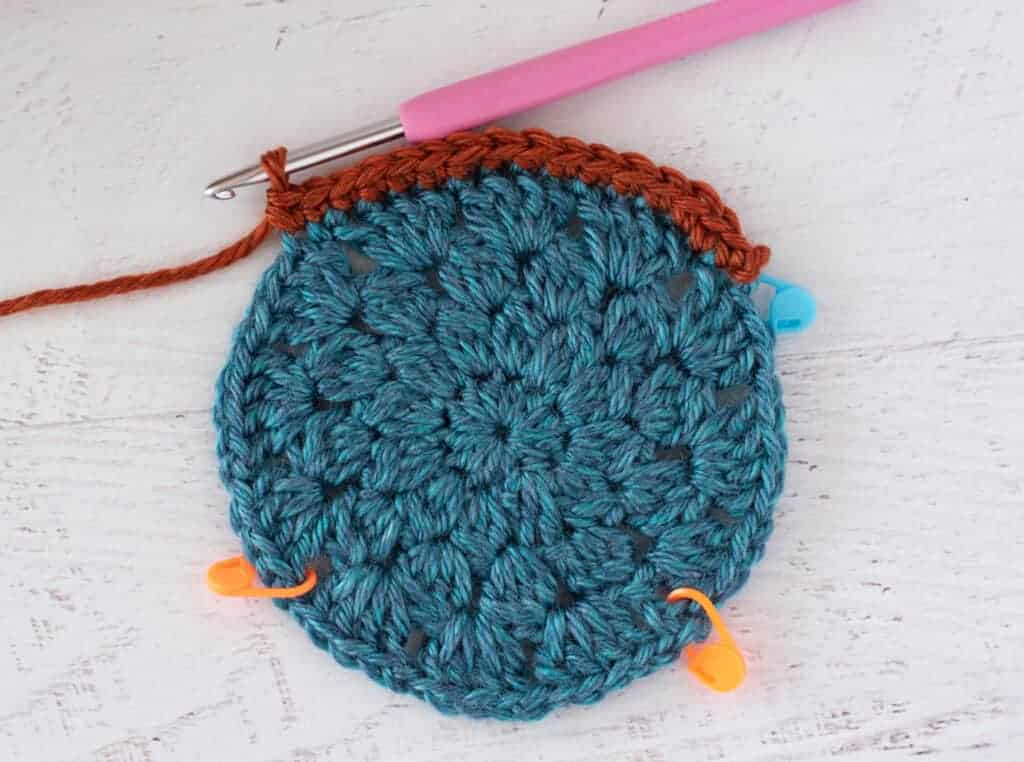
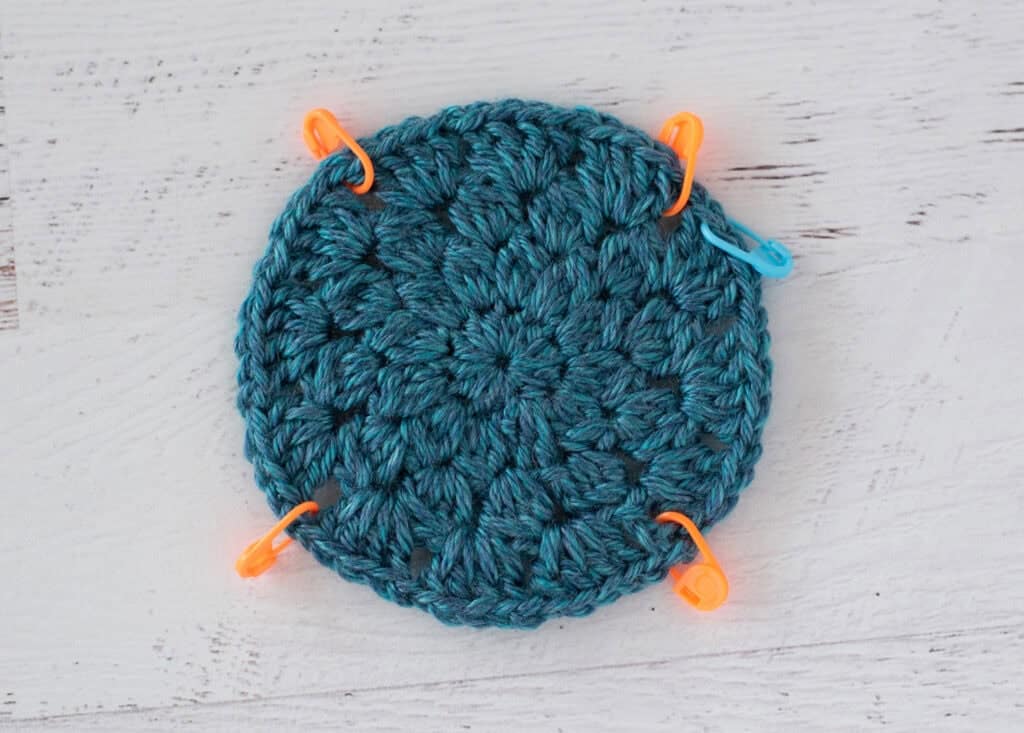
R1: Using Ivory yarn, make a Magic Ring. Ch 3 (counts as 1 st dc) then, work 13 dc into magic ring. Join with an invisible join, leaving a long strand for joining. (14 st)
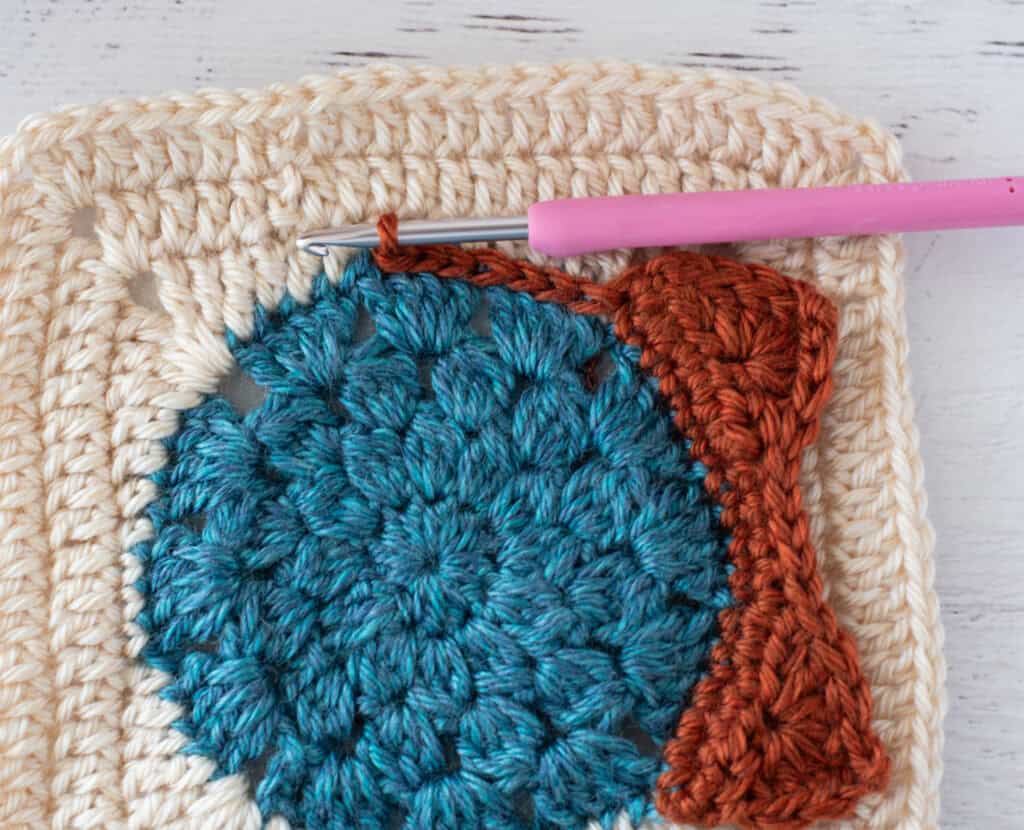
Owl Ears
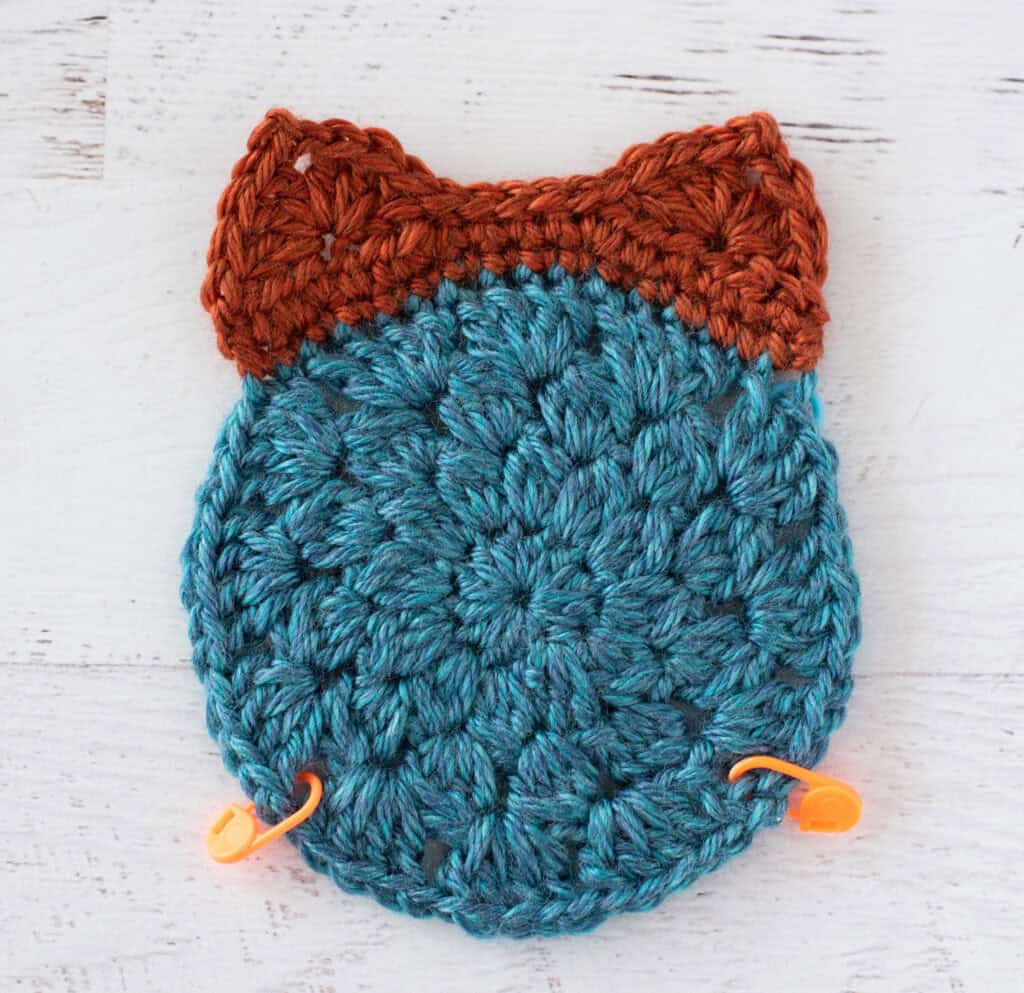
R1: Join ear color to the marked stitch (1 stitch to the right of a corner), sc in the same stitch, sc in the ch st, *sc in the next 4 st, skip the next ch, repeat from * once, sc in the next 4 st, sc in the next ch, sc in the next st. Turn. (16 st)
Note: Work all stitches in the FRONT LOOP ONLY of ALL stitches in this round.
R2: Working in both loops, ch 1 and sc in the same st, hdc in next 4 st, (hdc, sc) in next st, sc in next 3 st, (sc, hdc) in next st, hdc in next 4 st, sc in next st, sl st to last st. Turn. (18 st)
Note: Remainder of ears are worked in both loops and the work is turned after each round.
R3: Do not chain, sl st in next st, skip 2 st, in next stitch work all of the following [3 dc, ch 2, sl st to 2 nd chain from hook (picot made), 3 dc], skip 2 st, sl st in next st (1st ear made), sl st in next 5 st, skip 2 st, in next stitch work all of the following [3 dc, ch 2, sl st to 2 nd chain from hook (picot made), 3 dc], skip 2 st, sl st in next st. Fasten off yarn and weave in ends.
Complete Owl Square
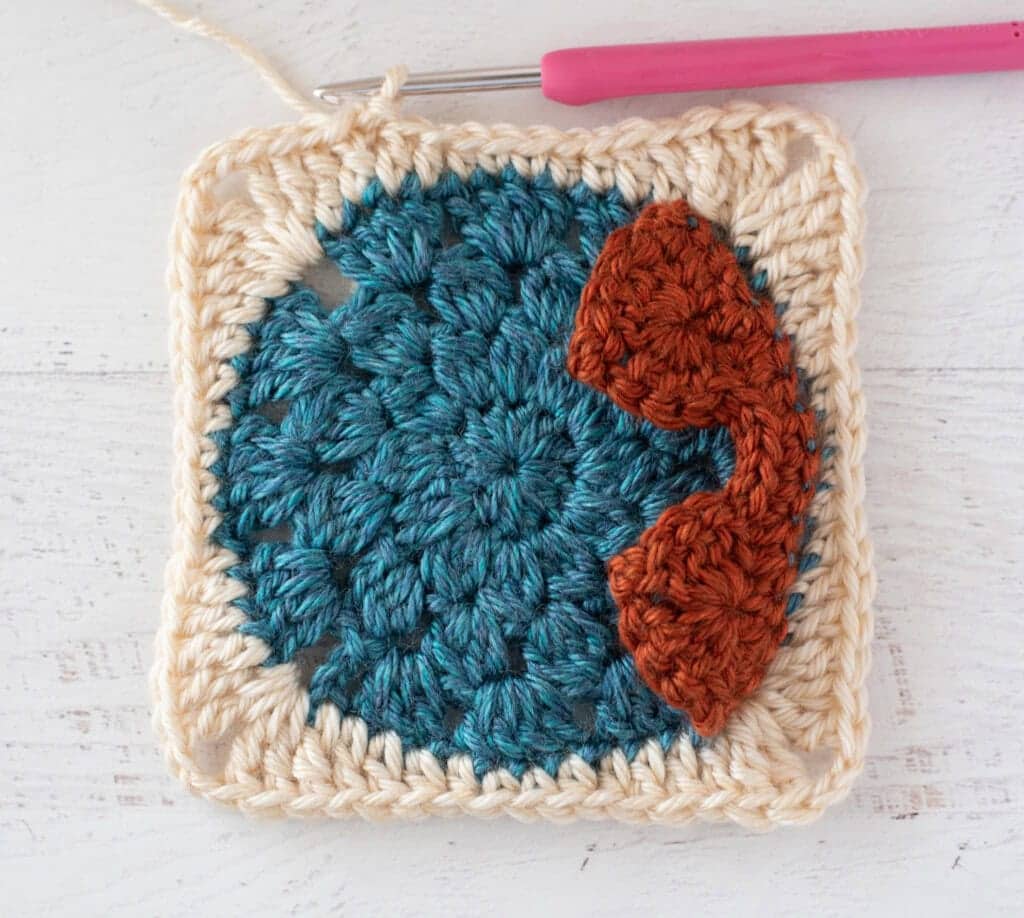
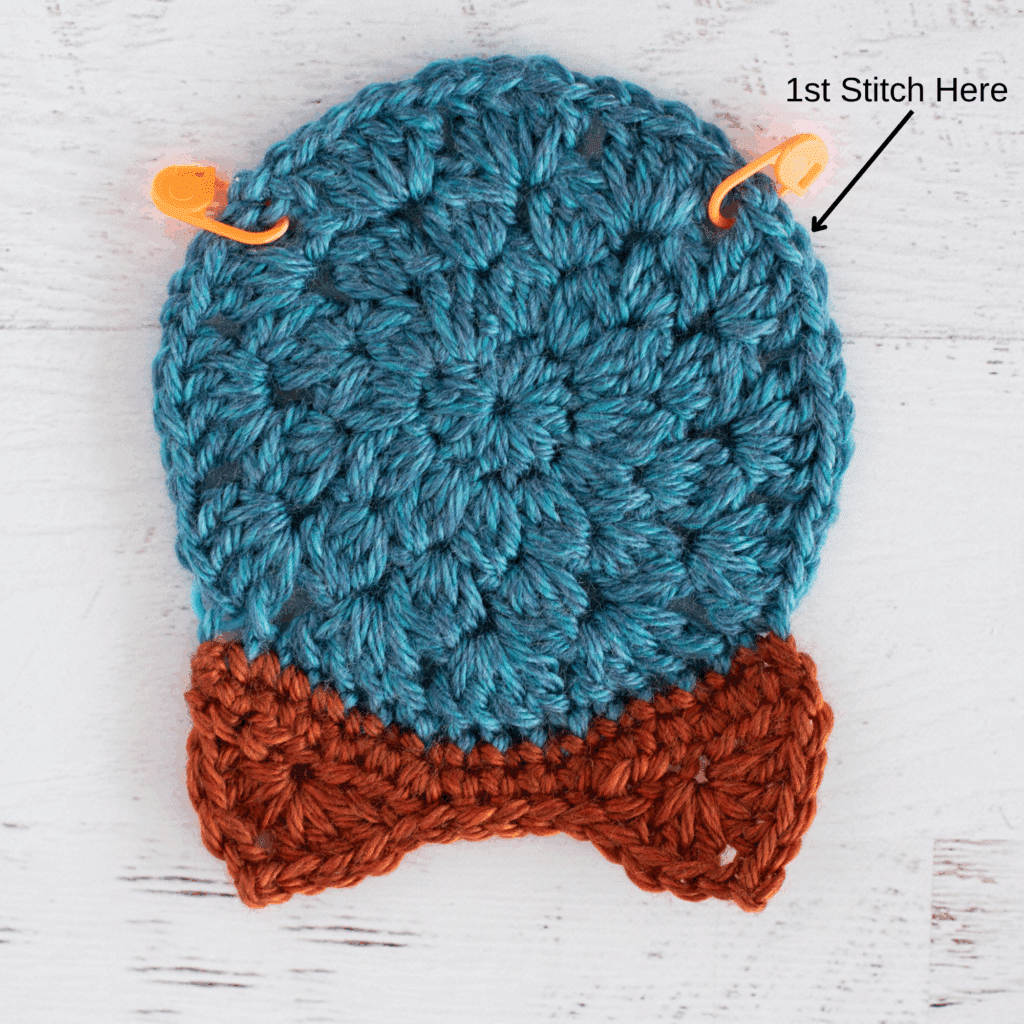
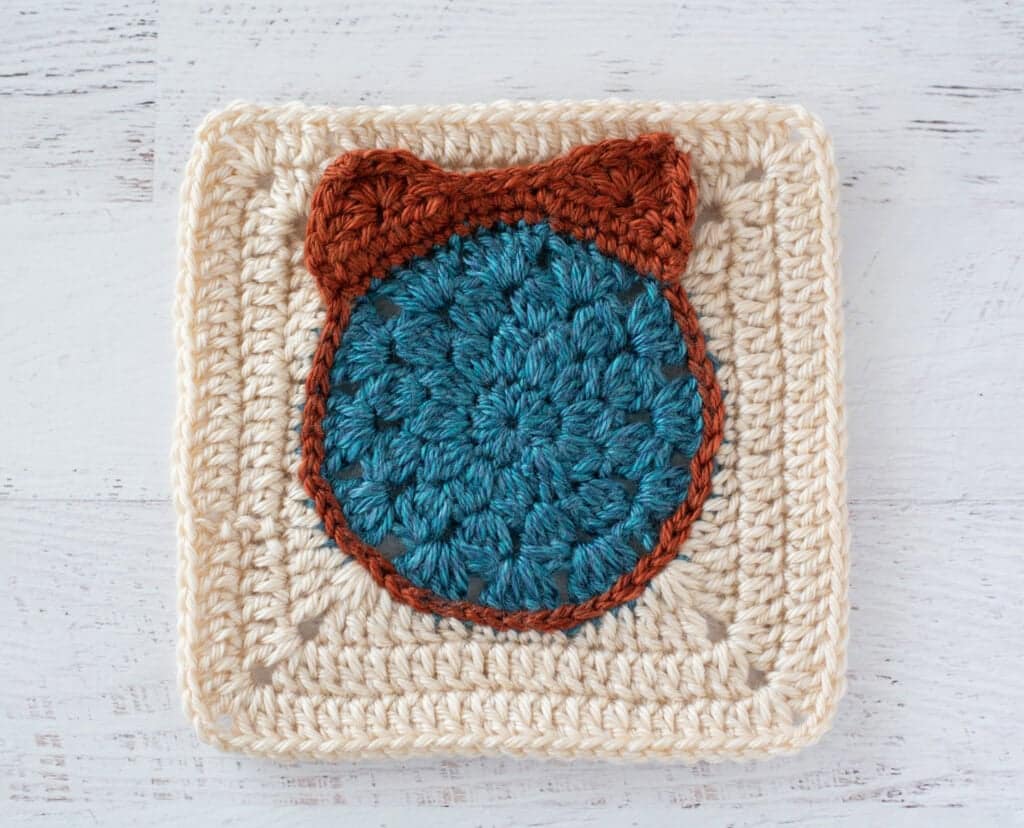
The next 2 rounds are worked around the original circle motif, similar to rounds 5 and 6 of the non-owl motif. For consistency’s sake, I will label these rounds similarly (as if we are continuing the circle motif and ignoring the row numbers for the ears).
R5: The starting stitch of this round is 2 stitches to the right of a corner (see indicated stitch in the photo). With ivory color, work a standing dc in the starting stitch, *tr in next dc, (2 tr, ch 2, 2 tr) in corner space, tr in next st, dc in next 2 st, hdc in next st, skip the next ch-sp, hdc in next st, sc in next 2 st, hdc in next st, skip next ch-sp, hdc in next st, dc in next 2 st. Repeat from * around. (Note in last repeat, omit final dc) and join with a sl st to top of starting dc.
NOTE: Remember to work in the BLO when you come to the ears. (Each side has a total of 16 st.)
R6: Ch3, work a dc in each stitch from the prior round. In each corner work (2 dc, ch 2, 2 dc). At end of round, join to top of starting chain. (Each side has a total of 20 st.)
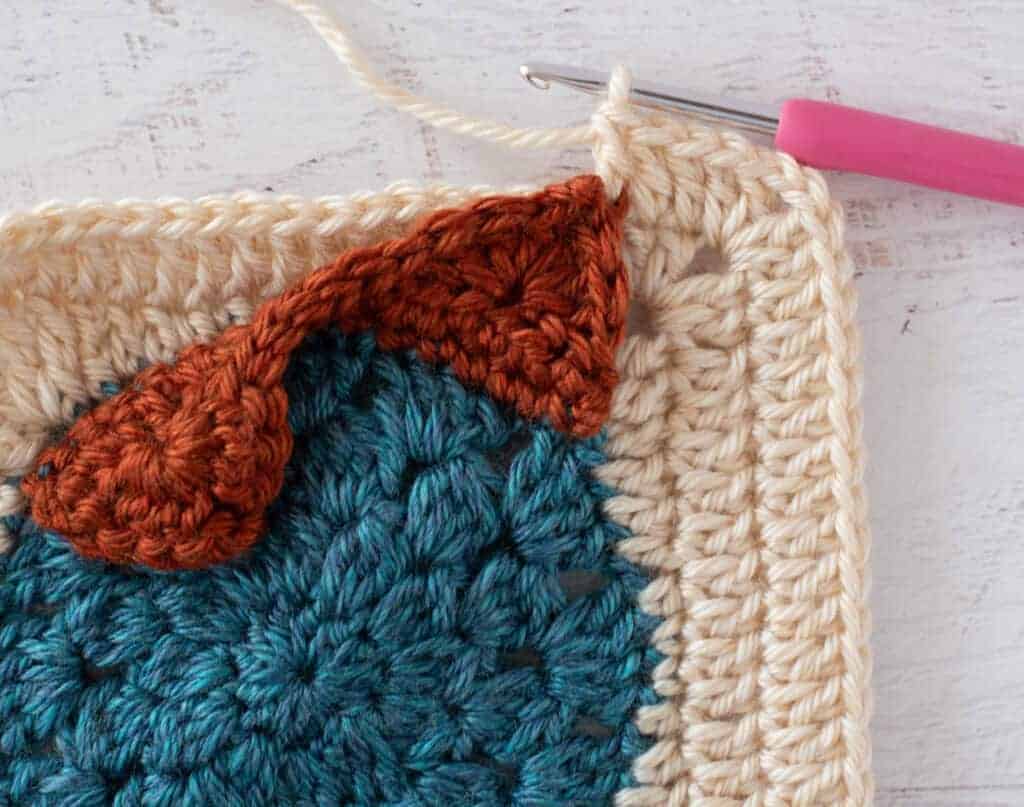
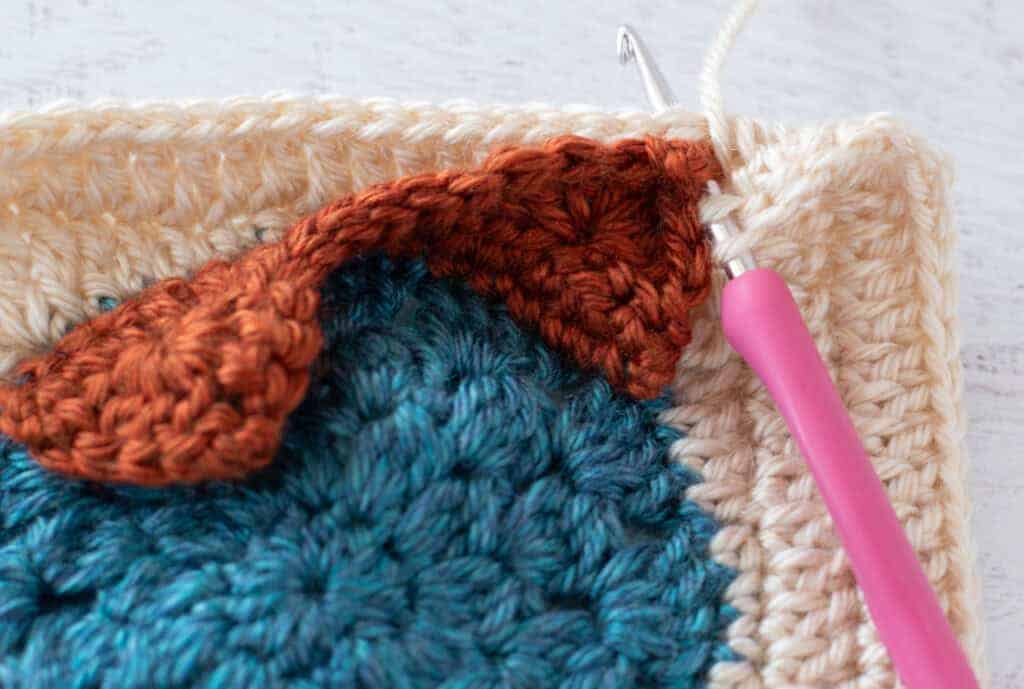
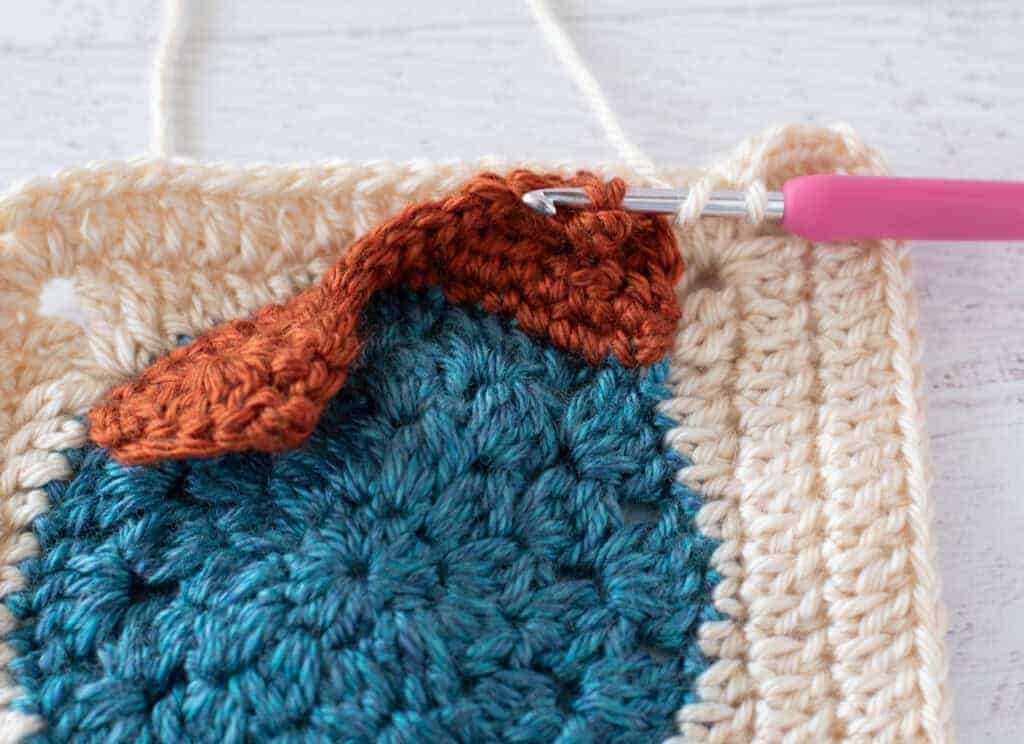
SPECIAL INSTRUCTIONS FOR ATTACHING THE EAR TIPS IN R7: Before working R7, you’ll need to understand how to attach the tips of the ears as you are working the round. Here are the steps:
- Step 1: The tips of the ears line up with the 3rd dc from the corner of the previous round. Work the 2 double crochet stitches after the corner. Yarn over as if to make a normal double crochet into the 3rd stitch. Grab 2 strands of yarn from the back of the tip of the ear on either side of the picot.
- Step 2: Then insert your hook into the 3rd stitch on the block.
- Step 3: Yarn over and pull through both the stitch and the 2 yarn strands. There are 3 loops on the hook. Complete the dc as normal (yarn over and pull through 2 loops, then yarn over again and pull through remaining loops).
R7: Ch 3, work a dc in each stitch from the prior round. In each corner work (2 dc, ch 2, 2 dc). Be sure to connect the ears as described in the special instructions. At end of round, join to top of starting chain. (Each side has a total of 24 st.)
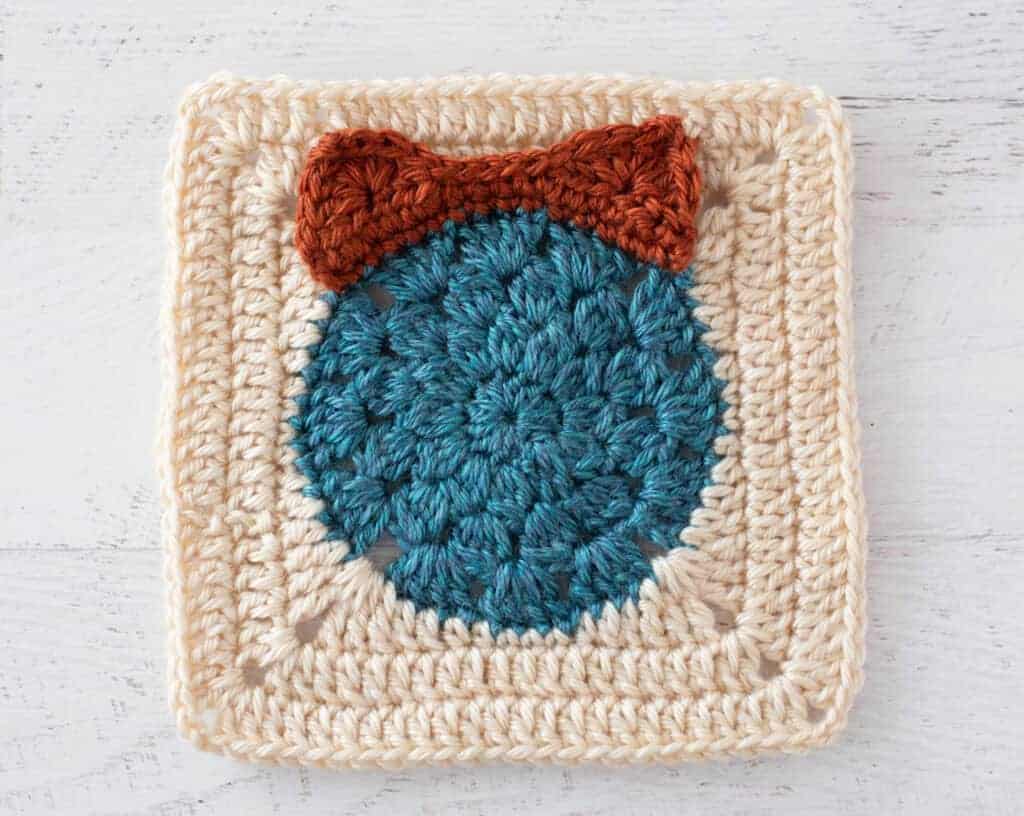
Using ear color, surface crochet around the color circle from ear to ear. Fasten off and weave in ends.
Regular (non-owl) Blocks (Make 8 per chart)
For the regular blocks, rounds 5-7 are worked in ivory and turned into squares, following the standard granny square progression without the ear attachments or surface crochet.
Eyes (Make 16)
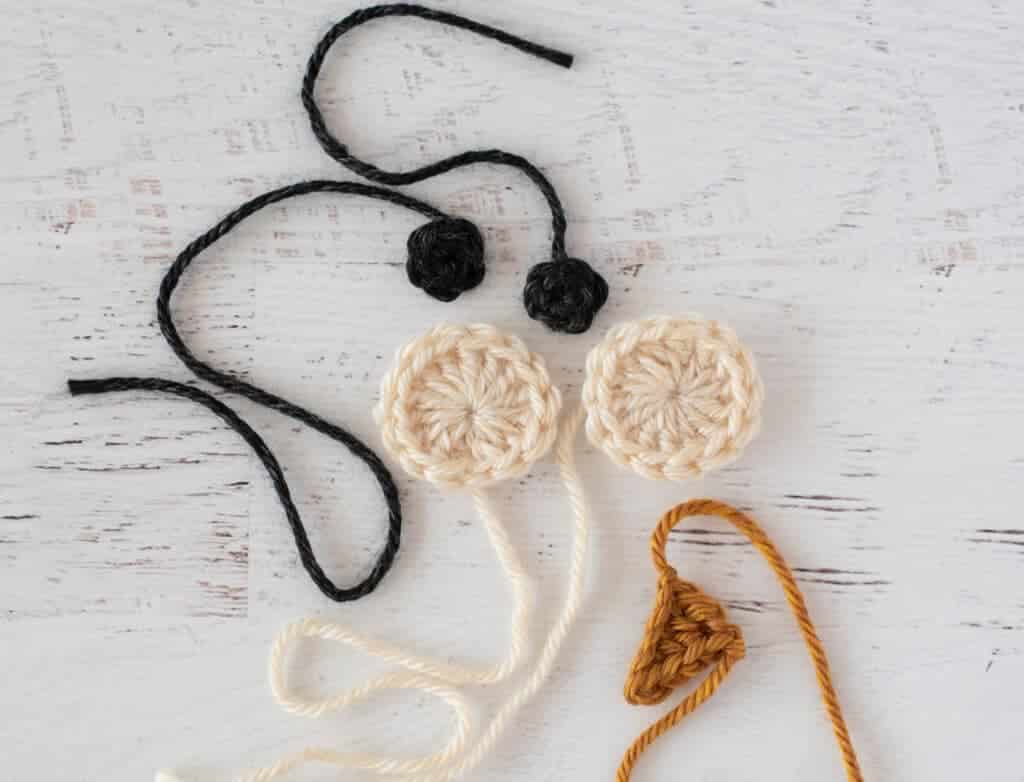
Using black yarn, make a Magic Ring. Ch1, then work 6 sc into magic ring. Join with an invisible join, leaving a long strand for joining. (6 st)
Pupils (Make 16)
Using yellow yarn, ch 5, sl st in 2nd ch from hook, sc in next ch, hdc in next ch, dc in last ch. Fasten off, leaving long strand for joining.
Beak (Make 8)
Using gold yarn, create a small beak shape using basic stitches, fastening off with a long strand for sewing.
Assembly
Sew pupils to lower part of eye. Position eyes and beak on owl and sew down. Note that the eyes overlap the top of the beak. I also positioned eyes so that the owls were looking at different owls in the afghan. This requires laying out the afghan squares and deciding which way to position the eyes on each owl before sewing them down.
I blocked my afghan after I completed it. If you prefer, you can block each square prior to sewing together (or opt out of blocking altogether).
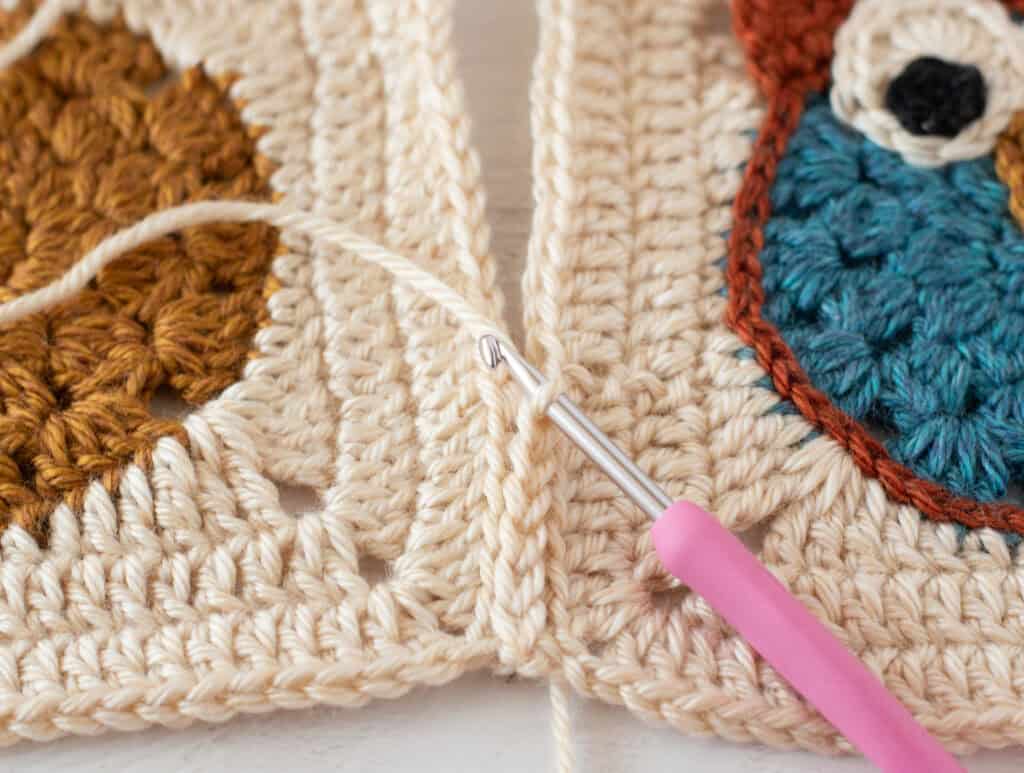
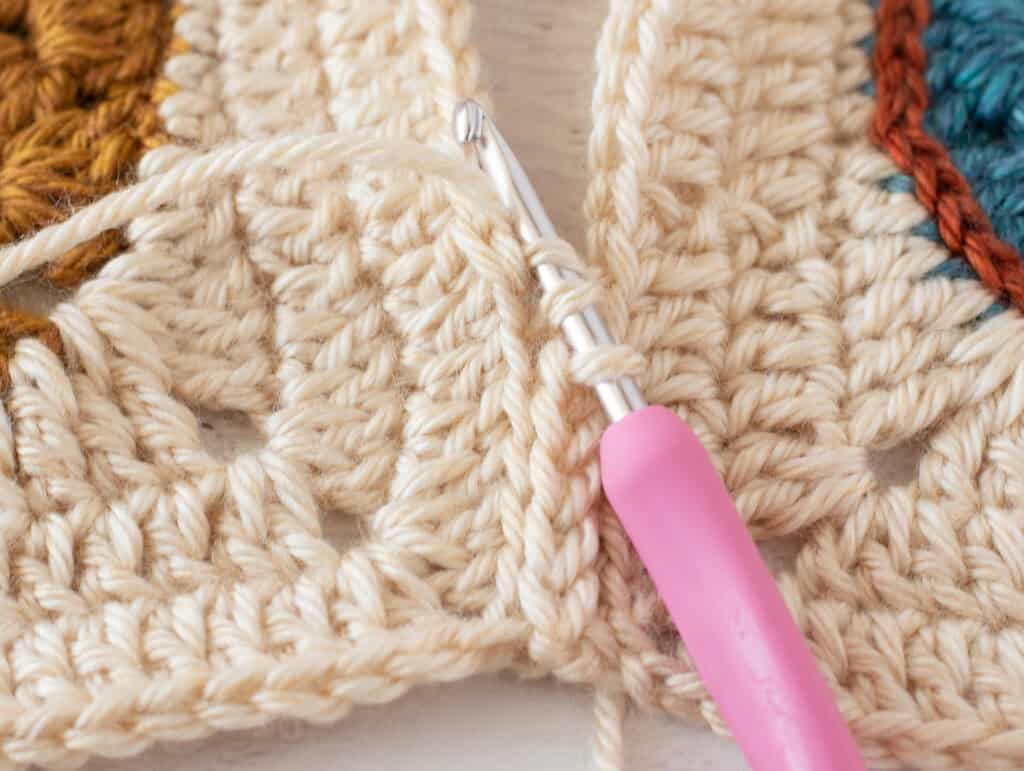
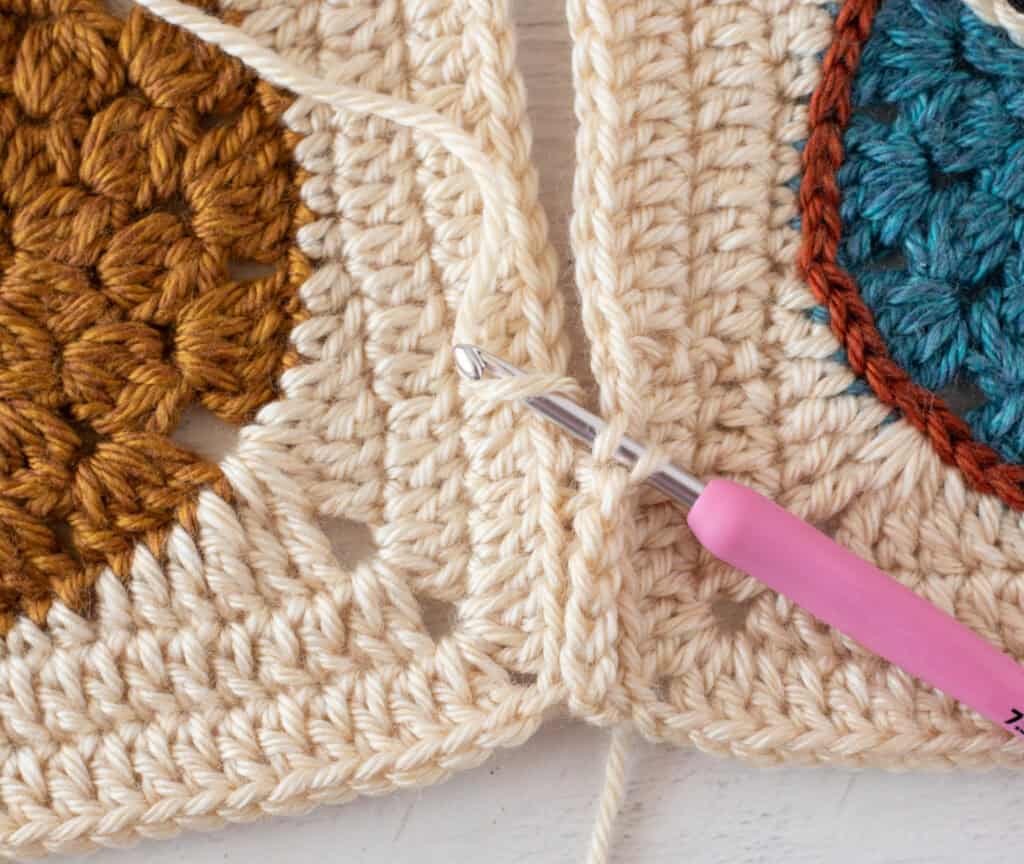
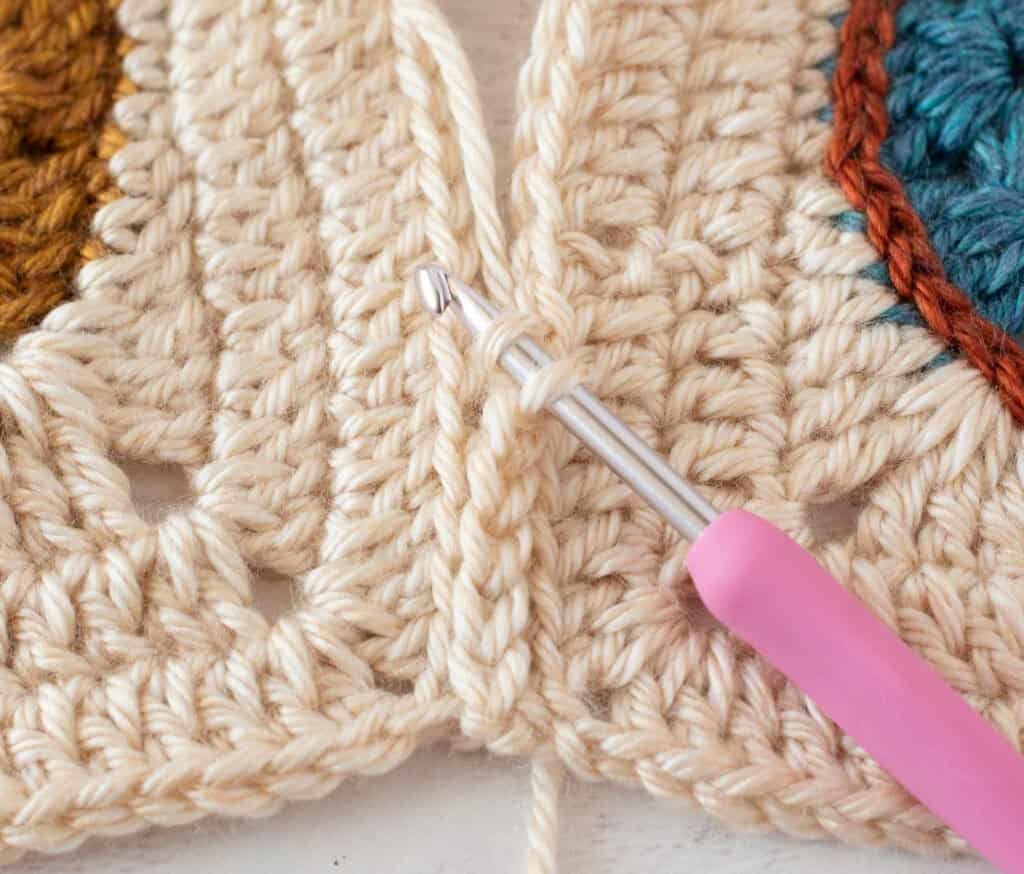
Join the afghan squares with your preferred joining method. I used a modified slip stitch join (see below). First, I attached 4 blocks to form a row. Then I joined the 4 rows.
Modified Slip Stitch Join:
- Start with a slip stitch on the hook or attach yarn to back loop only of the corner of first square from front to back.
- Step 1: Insert hook from front to back in back loop of first stitch on one square.
- Step 2: Yarn over and pull through stitch only. This will leave 2 loops on hook.
- Step 3: Insert hook into the BLO from front to back of corresponding stitch on 2nd square.
- Step 4: Yarn over and pull through all loops on hook at once.
The finished join lays flat between the two squares with the unworked front loops of each square visible on either side.
Tips
- Enlarging the Little Hoot Owl Afghan is very easy. Simply make more squares and buy additional ivory for the background and green yarn for the border. You’ll have plenty of the other colors leftover to make many more owls.
- You’ll want to play around with color placements so your owls look pleasing next to each other. And be sure to ‘audition’ the pupil placement so that your owls can look at one another. Of course, you can certainly just place all your pupils straight ahead if you’d prefer.
- This is such a fun pattern to make truly your own!
FAQs
Can I use a different yarn weight?
While the pattern is designed for worsted weight (size 4) yarn like Lion Brand Heartland, you can substitute other worsted weight yarns. However, be aware that the finished size and gauge may change, so check your gauge before starting.
How do I make the pom pom border?
The pom poms are worked as a continuous border connected by chains. They are not stuffed; instead, they are created by crocheting two halves that join back up to form a ball-like appearance. A specific tutorial for this technique is recommended to ensure the border lays flat.
What if I don’t want the owls to look at each other?
You can certainly place all your pupils straight ahead if you prefer. The “looking at each other” effect is a design choice that requires laying out the squares and positioning the pupils accordingly before sewing them down.
How do I fix dye lot variations?
It is crucial to buy all the ivory and green yarn you need at the start of your project and ensure your dye lots match. If you must buy additional skeins later, try to purchase them from the same batch or consider using a different color for the background if the match is too obvious.
Is this pattern suitable for beginners?
This pattern uses basic stitches, but because of the few special elements like cluster stitches and surface crochet, it is suggested for crocheters with some experience or a spirit of adventure. If you are new to crochet, you may want to practice the special stitches first.
For more inspiration on handmade gifts, you might also enjoy exploring Easy Father’s Day Crochet Gifts or checking out other Cozy Crochet Blanket Patterns for your home.
Pin This Crochet Pattern!