There is a quiet magic in a small batch of yarn and a well-lit workspace. It is the kind of ritual that invites you to slow down, count stitches, and find comfort in the rhythmic repeat of your hands. Whether you are preparing for a wearable project or simply practicing your craft, the way you begin a piece sets the tone for the entire journey. Learning to cast on is not just about mechanics; it is about establishing a sturdy, even foundation that allows your creativity to flow with confidence.
Small Details That Make It Better
While the source material focuses on knitting techniques, the principles of a strong cast-on are universal for any fiber artist. The choice of yarn plays a significant role in how easy it is to learn these foundational skills. Starting with a bulky acrylic yarn, as recommended in the guide, offers excellent visibility of your stitches and a forgiving texture that makes practicing much more approachable. This material choice reduces frustration and allows you to focus on the flow of the movement rather than fighting with tight or slippery fibers. Additionally, the tactile experience of draping yarn over your thumb and guiding the needle creates a mindful connection to the craft, turning a technical step into a meditative practice. These small adjustments in material and mindset can transform a daunting first step into a relaxing part of your creative routine.
Project Overview
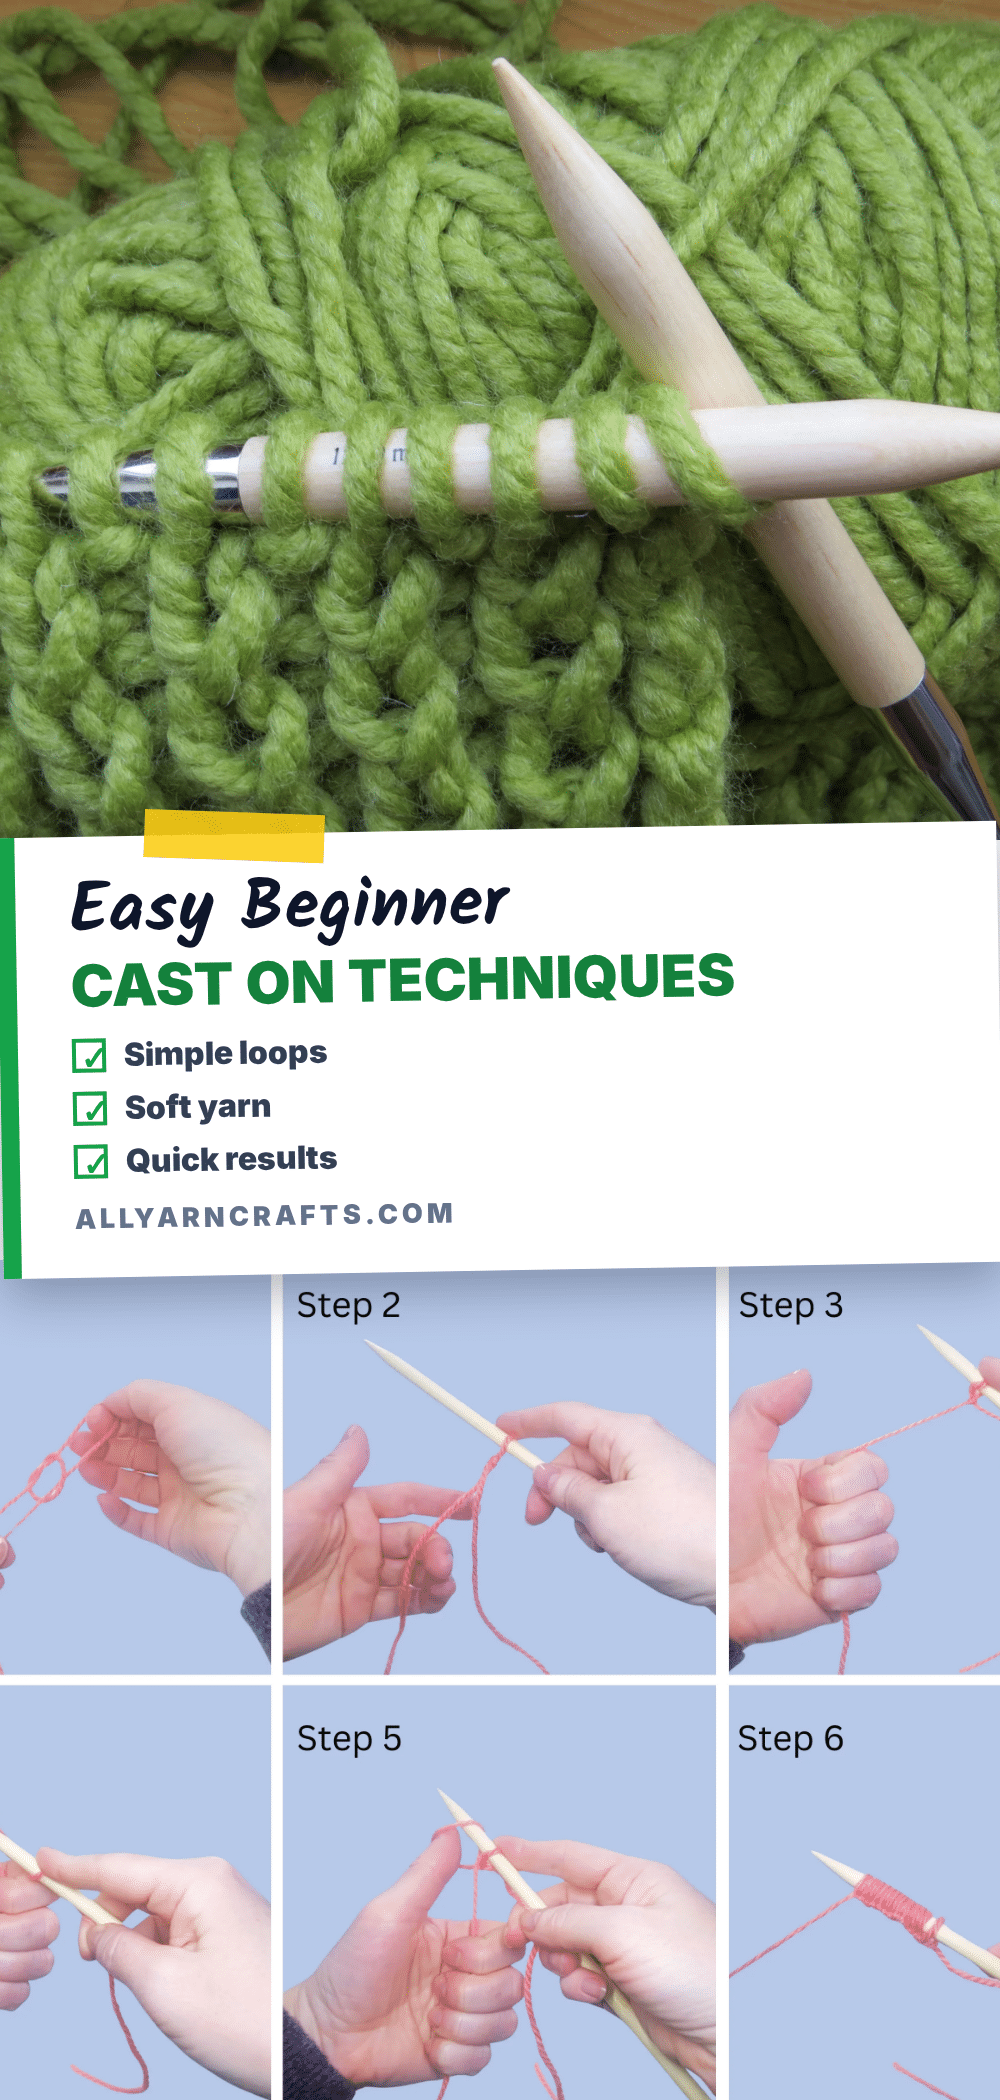
This guide serves as a comprehensive introduction to the essential first step of knitting: casting on. Casting on forms the bedrock of your knitting project, creating the crucial first row of stitches that set a base for your item. It is the foundation for your knitting journey, allowing you to start knitting with confidence. A well-executed cast-on ensures a sturdy and even foundation, laying the groundwork for a successful wearable or accessory. We will explore two primary methods: the Long Tail Cast On and the Single Cast On, ensuring you are well-equipped to tackle any project.
Materials Needed
Before delving into casting on, ensure you have the following materials at hand:
- Yarn: A ball of yarn is essential. For beginners, acrylic yarn is highly recommended for its versatility, durability, and price efficiency.
- Needles: Knitting needles appropriately sized for your yarn. The label on your yarn ball will contain specific size recommendations.
- Workspace: A comfortable and well-lit workspace to ensure you can see your stitches clearly.
Gauge and Finished Size
As this is a foundational technique guide rather than a specific pattern, there are no fixed gauge or finished size requirements. The goal is to achieve an even tension across your cast-on row that matches the rest of your project.
Abbreviations
No specific abbreviations are used in these instructions. All steps are written out in full for clarity.
Pattern Notes
Knitting is an easy and fun hobby that can be practiced anywhere, from a waiting room to a bus or train. The repeatable movements and focus help lower stress and increase productivity. To start your knitting journey, you must learn how to cast on to make the first row of stitches. While there are many methods, the Long Tail Cast On is the most common, while the Single Cast On is considered the simplest for beginners.
How to Cast On Using Long Tail Cast On Method
There is more than one method of Long Tail Casting on. The method using your thumb is the easiest to explain and understand for beginners.
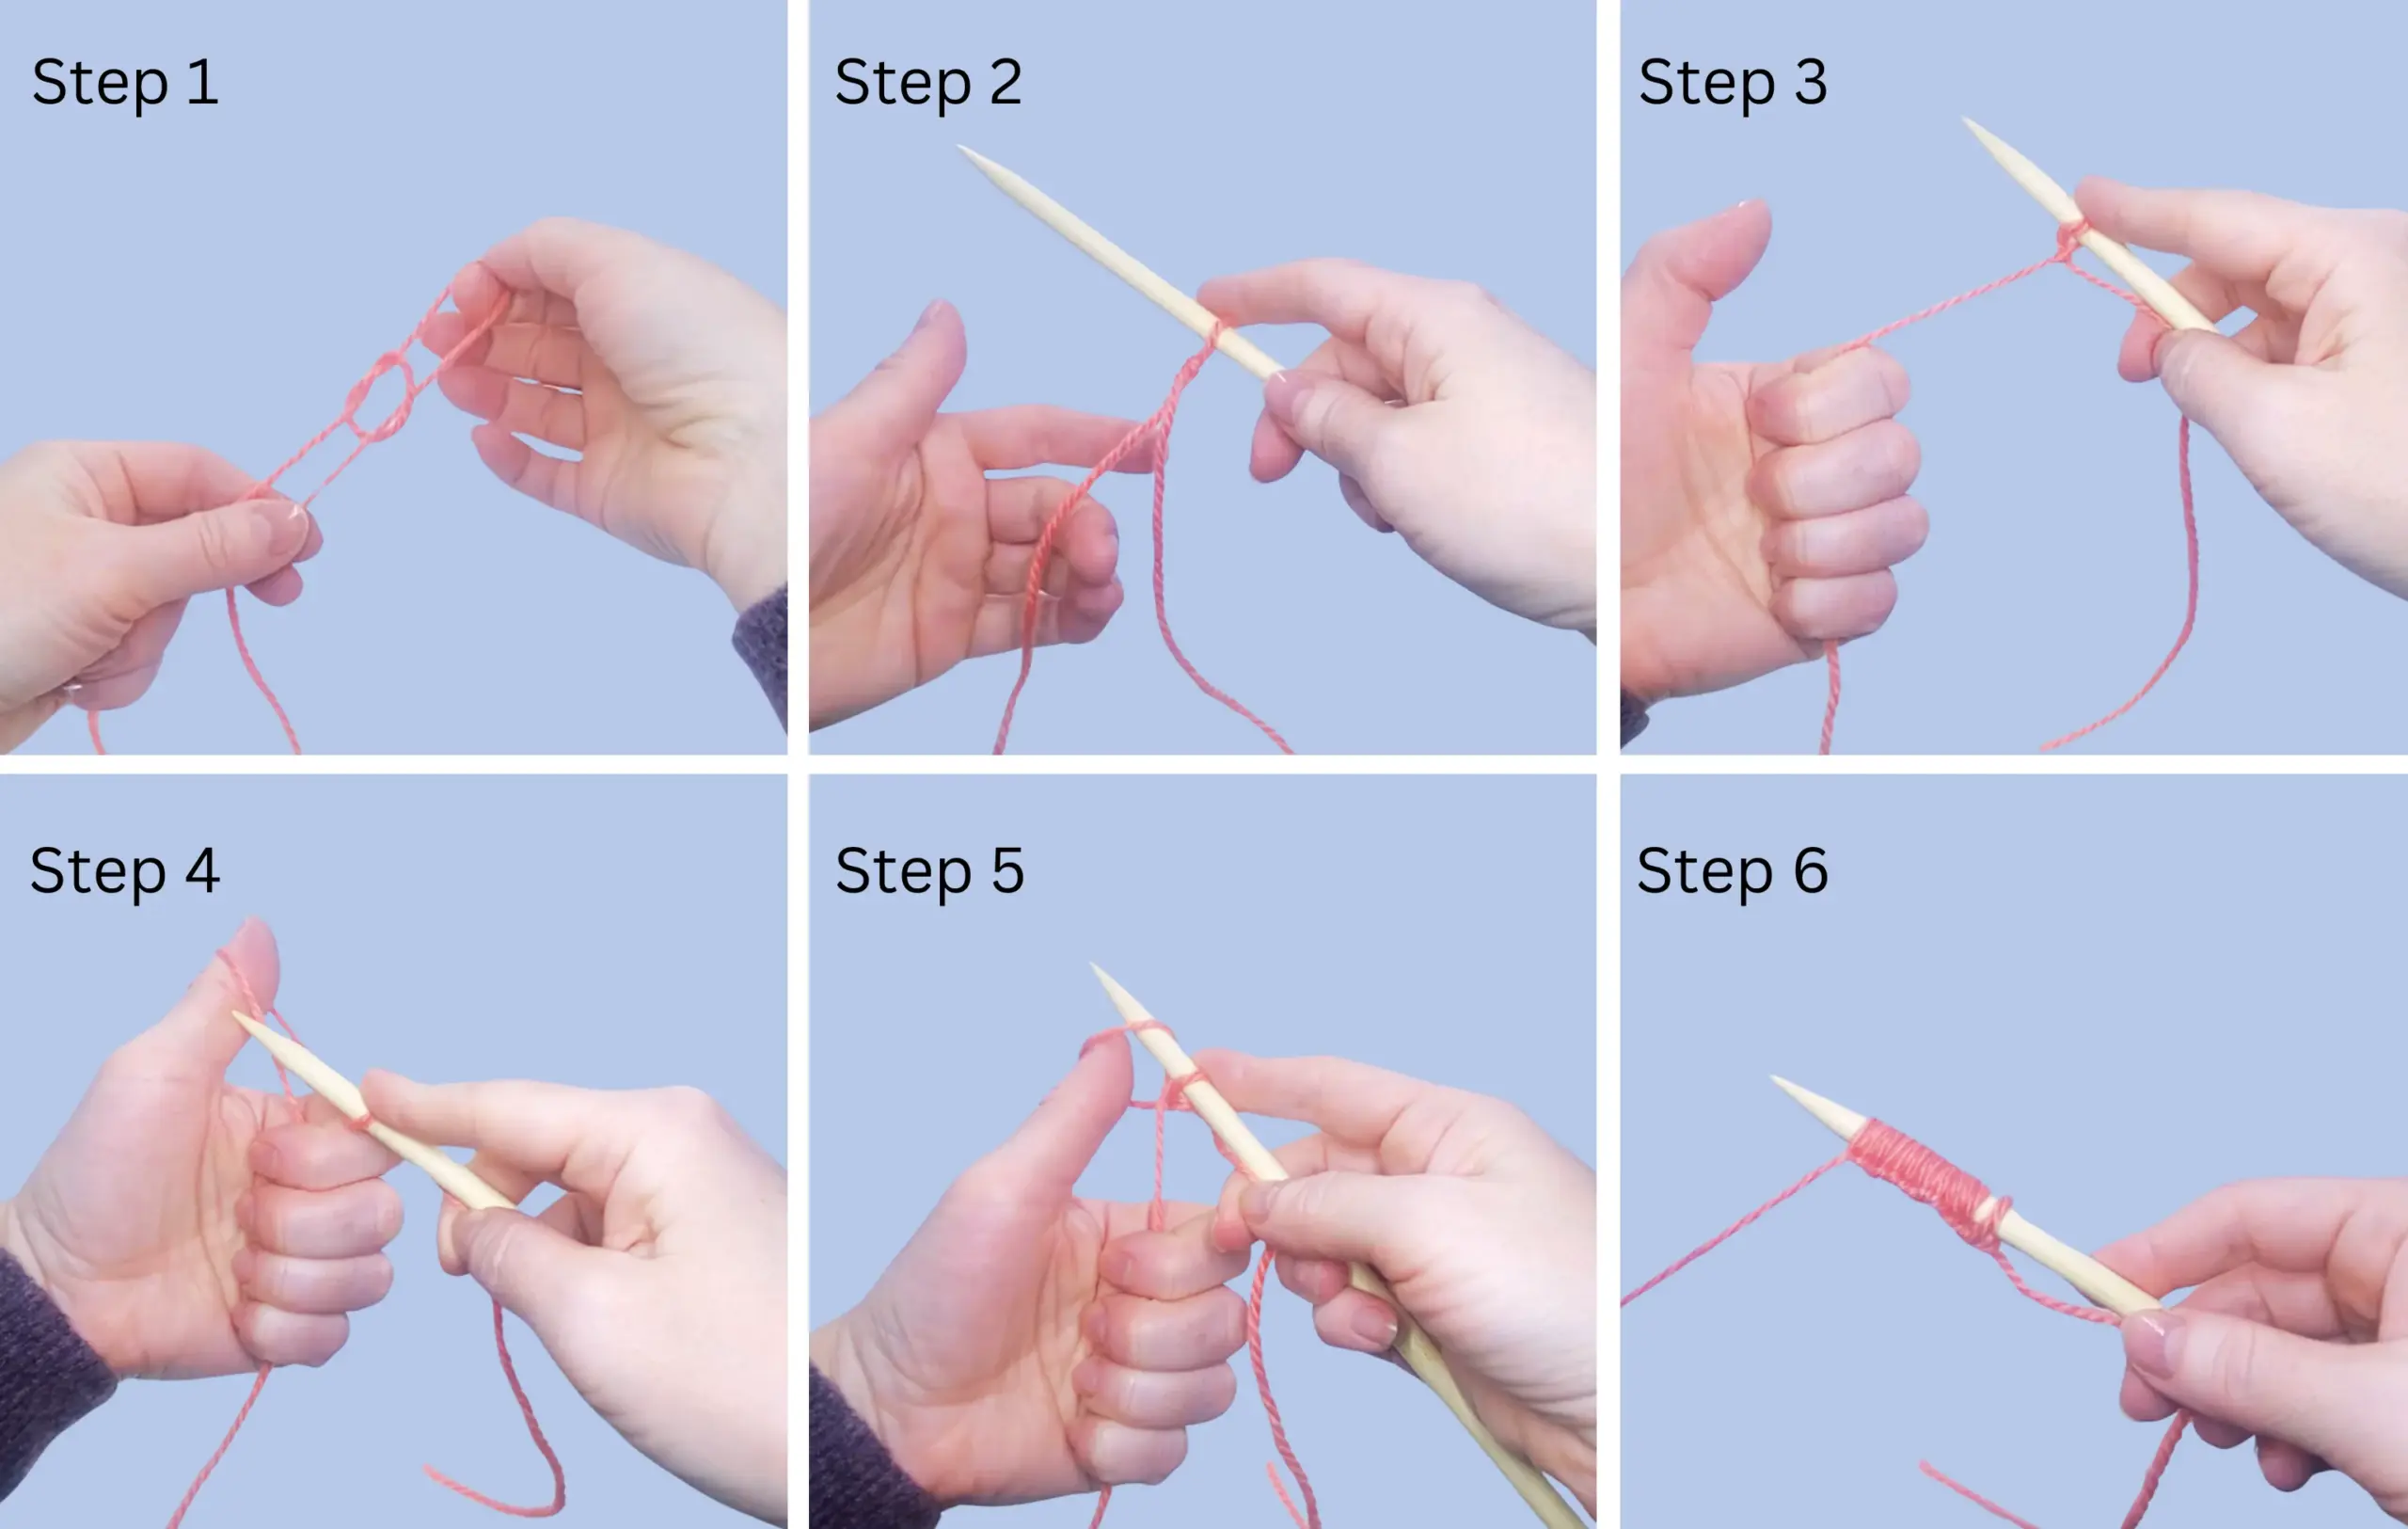
Step 1: Make a Slip Knot
Leave enough yarn from the tail to make the desired number of stitches. This is usually 3 times more than the width of your project. If you are just practicing, leave about 2 feet. At the measured length, create a slip knot by creating a loop with the yarn and threading the working end through the loop. Tighten the loop around the needle to form a slip knot.
Step 2: Hold Your Needle
Hold the needle with the slip knot in your dominant hand.
Step 3: Grab a Long Tail of Yarn
Grab the tail with 4 fingers of your non-dominant hand. Drape the tail yarn around your thumb from front to the back.
Step 4: Begin Creating the Stitch
Point the needle at your thumb. Bring the needle under the yarn moving up along with your thumb.
Step 5: Create the Stitch
Wrap the working yarn (from the ball end) around the point of your needle from down to the top. Bring the needle back up, catching the loop.
Step 6: Complete the Cast On
Drop the loop off your thumb onto the needle, creating a new stitch on the needle. Pull the yarn to tighten the loop.
Step 7: Repeat
Continue steps 3-5 until you have the desired number of stitches casted on.
How to Cast On Using Single Cast On Method
The Single Cast On is a straightforward method, ideal for beginners seeking simplicity.
Step 1: Make a Slip Knot
Begin with a slip knot by creating a loop with the yarn and threading the working end through the loop. Tighten it onto your needle.
Step 2: Hold Your Needle and Insert the Slip Knot
Hold one needle in your dominant hand, with the slip knot on the needle. Insert the needle through the slip knot from front to back.
Step 3: Position the Yarn
Grab the working yarn end with 4 fingers of your non-dominant hand. Drape the tail over your thumb from front to the back.
Step 4: Create the Stitch
Point the needle at your thumb. Bring the needle under the yarn moving up along with your thumb. Wrap the yarn tail around the point of your needle from down to the top. Bring the needle back up, catching the loop.
Step 5: Complete the Cast On
Drop the loop off your thumb onto the needle, creating a new stitch on the needle. Pull the yarn to tighten the loop.
Step 6: Repeat
Continue steps 3-5 until you have the desired number of stitches casted on.
Tips for Success
- Choose the Right Yarn: It is recommended to start with a bulky yarn. This makes the stitches larger and easier to see and manipulate.
- Select Proper Needles: For bulky yarn, the most frequent corresponding knitting needle size will be 6mm (US/10).
- Practice Tension: When completing the cast-on, ensure you pull the yarn to tighten the loop gently. Consistent tension is key to an even edge.
FAQs
What is the easiest cast-on method for beginners?
The Single Cast On is considered the simplest method for beginners due to its straightforward steps. However, the Long Tail Cast On is the most common method used in knitting projects and is highly versatile.
How much yarn do I need to leave for the tail?
For a Long Tail Cast On, leave enough yarn from the tail to make the desired number of stitches, which is usually 3 times the width of your project. If you are just practicing, leaving about 2 feet is sufficient.
What type of yarn should I use to learn?
Acrylic yarn is highly recommended for beginners because of its versatility, affordability, and ease of use. Bulky weight acrylic yarn is particularly helpful as it makes stitches easier to see.
Do I need special tools to cast on?
No, you only need a ball of yarn and knitting needles appropriate for that yarn. A comfortable, well-lit workspace also helps significantly in seeing your work clearly.
Why is casting on important?
Casting on creates the crucial first row of stitches that serves as the foundation for your entire project. A well-executed cast-on ensures a sturdy and even base, which is essential for the structure of your finished item.
Pin This Crochet Pattern!